How Do You Carve A Flower Into Clay?
Gather Your Materials
Before starting any clay carving project, you’ll need to gather the proper supplies. The most important items for carving flowers include:
- Clay – Polymer clay or pottery clay both work well. Choose a clay that matches your skill level and intended use for the finished piece.
- Clay tools – An assortment of loops, ribs, cutters, and sculpting tools suited for detail carving.
- Reference images – Print or digital photos of the type of flower you want to carve. Study the shapes and small details.
Other helpful supplies include a work surface like a canvas or wood board, baby wipes or paper towels for cleaning up, an acrylic roller or pasta machine for conditioning clay, and a ruler or clay shapers for smoothing surfaces.
Once you have gathered quality clay, specialized carving tools, and floral reference images, you’ll be fully equipped to start sculpting your flower design.
Prepare the Clay
Before you begin carving your flower, it’s crucial to properly prepare the clay so it has the right consistency for sculpting intricate details. The preparation involves wedging and kneading the clay to achieve an even moisture level throughout.
Start by cutting off a chunk of clay from your block. Then slam this chunk down on your work surface several times to release air bubbles. Next, fold the clay over itself again and again, pressing down firmly each time to wed the layers together. This wedging action mixes the moisture evenly in the clay.
After wedging, knead the clay thoroughly with your fingers. Work it like dough, pressing into the clay to soften it up. Keep kneading until the clay is smooth, pliable, and free of cracks. Avoid overworking it though, as too much kneading can make the clay tough and difficult to carve.
Getting the moisture level right is key. If the clay is too wet, it will be sticky and lose detail. If it’s too dry, it will crack. Test the consistency periodically as you knead – the clay should be soft but not soggy, and you should be able to make an impression with a fingernail that slowly fills back in without cracking.
Once your clay is properly wedged and kneaded, it’s ready for sculpting your floral design!
Sketch the Basic Shape
The first step in sculpting your flower is to sketch the simple, basic shape. Consider what type of flower you want to create – a rose will be a different shape than a daisy or orchid. Keep the overall form simple at this stage. For example, sketch a round shape for the center of the flower and five oval petals radiating outward.
As you sketch, visualize the flower in 3D. How will it look from all angles once formed in clay? Sketch lightly in pencil so you can refine and erase as needed. The simple sketch will be your guide as you sculpt, so make sure the proportions and shape capture your vision for the finished flower.
Refine the Shape
Once you have the basic flower shape carved out, it’s time to add more detail and dimension. Carefully refine the edges of each petal using clay sculpting tools. For a realistic effect, vary the thickness and thinness of the petal edges. Add gentle curves and contours to soften the petals.
Sculpt each petal individually, paying close attention to the subtle variations in shape and size between petals. Roses, for example, often have petals that spiral outward from the center. Lilies may have petals that curve backward. Capture the natural characteristics of your chosen flower type.
Add vein lines and other surface details on the petals using a dull knife or toothpick. Work gently to avoid tearing the clay. Bring out the depth and dimensionality of the flower by accentuating the shadows between petals. Your refined sculpting work will bring your clay flower to life.
Add Surface Texture
Adding texture to the surface of the clay flower can bring it to life with realistic details. The clay is very malleable at this stage, so you can use different techniques to achieve unique effects.
For flower petals, vein lines are essential. Use a dull tool like a chopstick to gently press along the petals, radiating out from the center. Create thin lines and grooves to mimic the delicate veining in real flower petals. Go lightly to keep the clay from distorting.
For thin petal edges, roll or pinch the clay gently to taper it into a thinner “sheet.” Use your fingers or a smooth tool to ruffle and frill the edges. This makes the petals look light and lifelike.
Consider pressing small stamps into the petals and leaves to add patterns. Leaves can take the imprint of a real leaf skeleton for added realism. Geometric patterns can create interesting effects on petals.
Rough textures like sandpaper or mesh can also imprint the clay. Press lightly and evenly to rough up certain areas. Avoid over-texturing, as you still want the main form to shine through.
Finally, smooth over any unwanted texture marks by gently rubbing with your finger or a soft cloth. This blends everything together into a cohesive overall texture.
Create the Center
The center of the flower is where you will form the pistil and stamens. The pistil is the female reproductive part of the flower, so shape it to resemble a vase or slender tube in the middle. Make sure it is rounded and smooth.
Next, add the stamens which are the male reproductive parts. These surround the pistil in the center. Roll small balls of clay for each stamen and attach them around the pistil, pointing them upwards.
For simplicity, you may want to only create a few stamens instead of trying to reproduce the full amount a real flower would have. Just be sure to space them evenly around the pistil.
Once you finish shaping the pistil and stamens, they will form the full center of your carved clay flower.
Make Finishing Touches
The finishing touches will bring your carved clay flower to life with finer details and personalized accents. At this stage, focus on enhancing the natural look and realism through subtle additions.
Refine the petals and leaves by gently pressing in the edges with your finger or a sculpting tool to add more definition. Create delicate veins on leaves and subtle variations in petal sizes and shapes to achieve an organic, naturalistic look. Consider lightly scoring petal tips and edges to suggest realistic texture.
You can also etch in tiny details like pistils in the flower’s center using a toothpick or needle tool. Add any final embellishments, such as thin vines trailing down the stem or tiny leaves sprouting from the main stem.
Work slowly and carefully as you make these finishing touches to preserve the overall form. Make minor adjustments to shape and proportions for ideal symmetry and flow. Step back occasionally to examine your carved clay flower from all angles, fixing any areas that need tweaking.
When you are satisfied with the details, your carved clay flower is ready for the finishing process. The finishing touches require precision but will elevate your creation to a lifelike, artistic flower sculpture.
Let It Dry
Proper drying is a crucial step when working with clay. Air drying clay sculptures slowly at room temperature allows moisture to evaporate evenly throughout the piece, preventing cracking and breakage.
The drying time will vary based on factors like the size and thickness of your clay flower, as well as the humidity in your environment. Very small, thin pieces may only take 1-2 days to fully dry. Larger, thicker sculpted flowers may require 1-2 weeks or longer.
As a general guideline, allow at least 24 hours of drying time per 1/4 inch thickness of clay. Gently rotate the flower occasionally as it dries to prevent flat resting surfaces from trapping moisture.
Keep the sculpted flower away from direct sunlight and heat during the drying process, as this can cause uneven drying. Air circulation around the piece is good, but avoid using fans directly on the clay.
Check for dryness by feeling the surface. When the clay maintains shape without imprinting under gentle pressure, it is ready for baking. Baking before fully dried risks cracking or exploding from trapped moisture turning to steam.
Bake the Clay
Baking brings your clay sculpture to life by hardening and strengthening it. Follow the baking instructions on the clay packaging carefully. Clay products differ in their recommended baking temperature, time, and any special considerations.
Test the baking process on smaller clay pieces before doing your final sculpture. Find the right baking temperature and time for your specific clay type and sculpture size. Start with the minimum time and check frequently to avoid over-baking.
Typically, bake clay sculptures at temperatures from 130°F to 275°F. Bake for 10-15 minutes per 1⁄4 inch of thickness. The thicker the clay, the more time is needed. Let the clay cool completely before handling.
While baking, avoid opening the oven door frequently, which can cause cracking. And don’t bake clay on an old baking sheet, as accumulated clay residue can burn and smoke.
Once baked, the sculpture will be hard and durable. The baking process evaporates any moisture, resulting in some shrinkage depending on the clay type. Your sculpture is now ready for sanding, glazing, or application of your choice of finish.
Apply Glaze or Finish
Once your carved clay flower has completely dried, you have a few options for adding color and finish:
Glazing
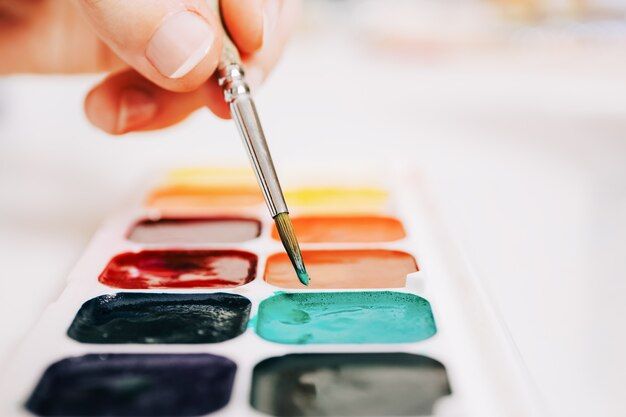
Glazes come in endless colors and finishes like glossy, matte, metallic, speckled, etc. Brush or dip glaze over the entire flower or just parts of it. Glazes penetrate and color the clay. Follow manufacturer’s instructions on firing temperature and times.
Acrylic Paint
Acrylic paint can be brushed directly onto dried polymer clay. No firing or baking is required. Acrylics allow you to add fine details like veins on petals. Seal painted clay with varnish or polyurethane for a glossy look.
Chalk Pastel
For soft effects, rub chalk pastels over the flower. Spray with sealant when finished. Pastels work best on raw polymer clay.
Polyurethane
A clear coat of polyurethane or other sealant will give your carved clay flower a smooth, finished look. Multiple coats can create a glossy effect. Allow each coat to fully dry before adding another.


