How Do You Center Clay Easily?
Centering clay on the pottery wheel is one of the most important skills in pottery making. It involves shaping a lump of clay into a symmetrical, centered cylinder on the wheel head as it spins. Properly centered clay is essential for throwing successful pots, bowls, vases and other round pieces.
When clay is centered, it spins evenly without wobbling and has uniform thickness in the walls. This provides a stable, balanced foundation on which to build the rest of the piece. Centering also removes air bubbles from the clay and consolidates the mass. Learning to center clay takes practice but is crucial for mastering the potter’s wheel.
Gather Materials
The main items you will need to center clay are:
- Pottery wheel – This provides the rotating surface to shape the clay on. An electric wheel offers consistent spinning speed.
- Clay – Use an appropriate clay that has been properly wedged to remove air pockets. A stoneware or porcelain works well. Soft clay like earthenware can be more difficult to center.
- Water – Have a bowl of water nearby to wet your hands and keep the clay from drying out.
- Bat or canvas – Place your clay on a bat (pottery wheel accessory) or canvas before attaching to the wheel. This provides a surface to lift your finished piece off the wheel.
Make sure you have gathered all these materials before beginning the centering process. Having the right equipment and prepared clay will make centering much easier.
Prepare the Clay
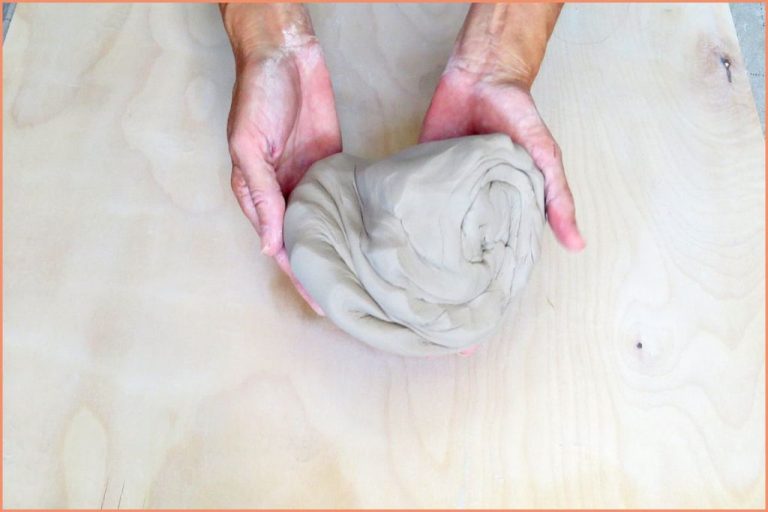
Before centering clay on the wheel, it is crucial to properly prepare the clay by wedging and kneading it. This removes air bubbles and creates an even, uniform consistency throughout the clay. To wedge, cut the clay block in half and smash the two halves together. Then pull one half away, forming a cone shape, and smack the two pieces back together. Repeat this process, rotating the clay to wedge it thoroughly.1
After wedging, knead the clay by gathering it into a ball and pushing into it with the palms of your hands. Roll and squeeze the clay. Work slowly and methodically until the clay feels soft, smooth, and free of lumps or air pockets. Well-prepared clay is essential for successful centering. Take the time to properly wedge and knead your clay before attempting to center it on the pottery wheel.
Center Yourself
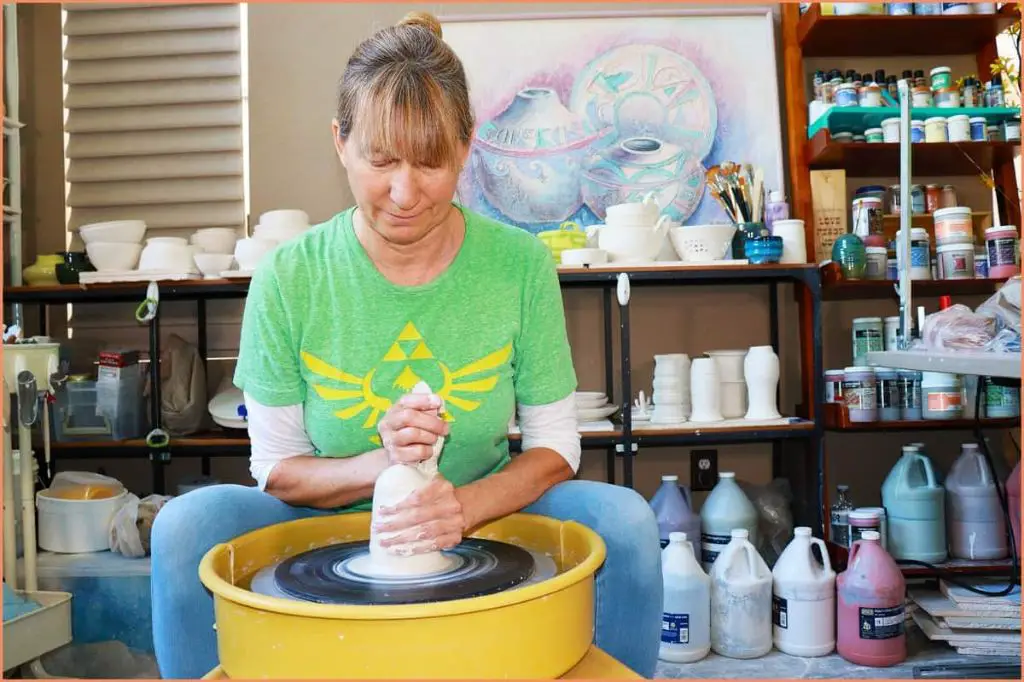
Relaxing your body and mind is crucial when centering clay on the pottery wheel. Proper posture helps you gain control over the clay. Sit upright with a straight spine. Scoot close to the wheel so your thighs press against the splash pan. Keep your elbows tucked in to your sides and hover your hands over the clay. Take a deep breath to release tension before you begin. Focus your gaze on the mound of clay in front of you.(source)

Centering requires coordination between your hands, feet, eyes, and mind. Eliminate distractions in your environment so you can concentrate fully on the clay. Tune in to the sensations in your fingertips as you connect to the clay. Let all other thoughts drift away. Enter a meditative state where centering clay becomes the singular purpose of the moment. With an open yet focused mindset, you gain the control needed to center the clay with precision.(source)
Shape the Clay
Once you have centered yourself at the wheel, it’s time to begin shaping the clay. Start by forming the clay into a ball shape. Make sure there are no cracks or air pockets in the clay. Then, with steady pressure, form the clay into a cone shape on the wheel head. Press down on the clay with your palms to compress the clay and push out any air bubbles. As you press down, allow the clay to spread outwards under your palms. Be patient during this process – any air trapped in the clay can cause issues later when throwing your piece. Take your time to ensure you completely compress the clay into a smooth, centered cone https://creativeartsstudios.com/how-to-center-clay-a-step-by-step-guide/.
Start Spinning
Once the clay is centered on the wheel, it’s time to start the spinning process. Begin slowly, usually around 100-150 rpm. Going too fast at the start can cause the clay to fly off the wheel. Gently cup both hands around the sides of the clay ball, but don’t apply any pressure yet. Let the wheel’s momentum move the clay at this stage. The centrifugal force generated will help center the clay and form it into a basic cylindrical shape.
As the clay spins, you can gently nudge it into shape if needed. But be patient during this step. Rushing the process or forcing the clay too early may distort the cylinder shape. Allow the wheel to evenly distribute the clay into a balanced form. Once it takes shape and all sides spin smoothly, you’re ready for the next step – applying pressure.
Apply Pressure
Once the clay is spinning evenly, you can begin applying pressure to shape the walls. Place both palms on the clay, fingers together and heels of hands tilted slightly outward. Push down and into the clay firmly but gently, supporting the walls as they rise up. The pressure should come from your body weight transferred through your arms to your palms. Too little pressure will result in an uneven shape, while too much can collapse the walls. Find the right amount of force to evenly raise the clay walls. Keep centered over the wheel with shoulders relaxed. Your posture impacts the consistency of pressure, so stay balanced.
As the walls gain height, you’ll need to support them by placing one hand inside and one outside the form. The outside hand continues applying downward and inward pressure, while the inside hand braces the rising walls. Work slowly, allowing the clay to move under your palms. Rushing can cause the walls to warp or collapse. Patience leads to perfectly centered symmetrical walls. Monitor thickness and gently compress any thicker areas by smoothing with a sponge. The walls should maintain an even width all the way to the top edge.
Shape the Walls
Once you have centered your clay and formed the basic shape, the next step is to shape the walls of your piece. This involves evening out the walls and compressing any air pockets that may have formed.
As you shape the walls, apply even pressure with your hands and tools. Move up and down the walls smoothly to achieve an even thickness. Pay attention to any bulges or overly thick areas and compress them gently. According to an article on the Ceramic Arts Daily website, “Used properly, the rib can compress clay and reduce the wall thickness while smoothing the exterior” [1].
It’s also important to compress any air pockets that may be trapped in the walls. Air pockets can cause cracks or explosions once the piece is fired. Run your tool around the walls and push inward firmly to close up any gaps. Small holes can be patched later if needed, but try to eliminate large pockets as you shape.
Shaping the walls evenly while eliminating air pockets will set you up for success in refining the final form of your piece. Take your time to compress thick areas and smooth bulges. Your patience will pay off with smooth, consistent clay walls.
Refine the Base
Once you’ve shaped the basic walls of your piece, it’s time to refine the base. This is a crucial step to ensure your piece will be properly balanced and stable when completed. The base should be smoothly concave and of even thickness throughout.
First, place one hand inside the piece and support the base from within as you smooth it with a rib held in your other hand. Use firm, consistent pressure with the rib to gently scrape and compress the clay. Work in circles from the center outward to blend any irregularities or bulges (source).
Check thickness regularly by gently pressing into the base with a stick tool. Even out any thicker areas by refining with the rib. The base should have an evenly concave shape up to the walls, with no abrupt changes in thickness. Aim for approximately 1⁄4 inch thickness throughout.
Take care not to overwork the clay as this can cause cracks. Once the base feels smooth, even, and properly concave, your piece is ready for final touches.
Final Touches
Once you have the basic shape formed, it’s time to refine the clay and make sure it is properly centered and shaped before moving on to decorating. As you spin the wheel, hold one hand on the outside and one hand on the inside of the clay. Use the outside hand to gently smooth any lumps or uneven spots on the walls, being careful not to distort the shape. According to the article “How to centre clay – The one sided method. Beginners Guide” on thelittlepotcompany.co.uk, you want the walls to have an even thickness all the way around.
Pay special attention to smoothing the base and getting it as flat and level as possible. An uneven base can cause the piece to wobble. Use a rib tool or your fingers to gently smooth the base into a flat surface. According to the experts, patience here is key – resist the urge to rush through this step. Taking the time to properly refine the shape will pay off in the end with a beautifully centered piece.


