How Do You Dry Clay For A Slip?
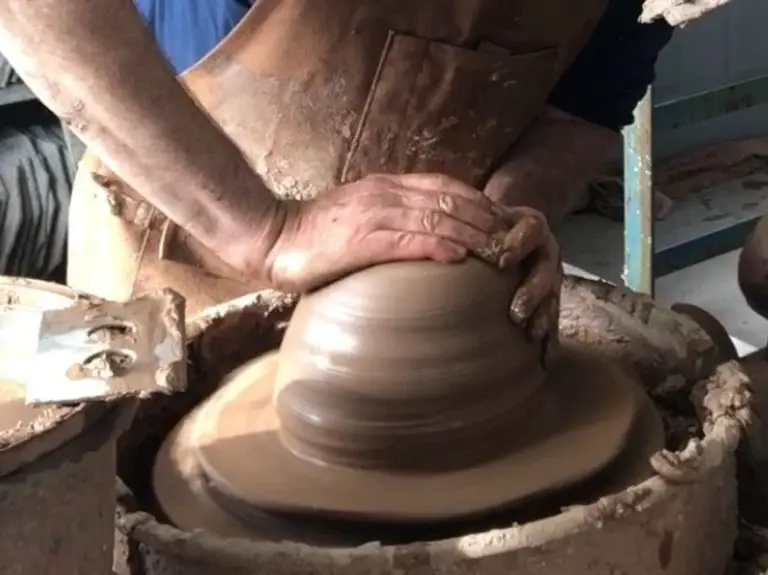
A clay slip is a liquid mixture of clay and water used for various ceramic decorating and joining techniques. Some common uses for slip are attaching handles and spouts, painting decorations, adding texture, joining pieces of unfired clay, and as a glue between layers of clay in handbuilding. Proper drying is crucial for working with slip, as overly wet or moist slip can lead to cracking, weak bonds, flaws in the final product, and other issues. This guide covers key steps for effectively drying slip for use in pottery and ceramics.
Get the Right Consistency
When preparing a clay slip, getting the right consistency is crucial for proper drying. The ideal thickness for a slip is similar to heavy cream. It should coat a brush evenly without running off. Test the consistency by dipping a brush into the slip and painting a stroke onto a piece of cardboard. The slip should leave a smooth, even coating without dripping off the brush.
If the slip is too thin and watery, it will become difficult to control when painting and could run off the ware during drying. Excessively thick slips can also cause issues. They may not fully coat the piece and can leave an uneven, bumpy surface after drying. Adjust the slip thickness by adding small amounts of water or clay powder as needed until reaching the perfect creamy texture.
Remove Excess Moisture
Before drying your clay slip, it’s important to remove any excess surface moisture. This will help the drying process go more smoothly and prevent cracking or peeling.
One easy way to remove excess moisture is to gently blot the surface of the slip with a clean rag or paper towels. Gently press the rag against the surface to soak up moisture. Be careful not to rub too hard, as this could mess up the consistency of the slip. Change rags as needed until the surface no longer transfers moisture.
You can also let the slip sit for a bit before using it. Allowing it to rest gives time for some of the moisture to evaporate naturally. Let it sit for 10-15 minutes, then come back and blot again if needed. The surface should feel cool and damp but not wet.
Getting rid of excess moisture now will pay off later when it’s time to dry the slip fully. It will help the clay harden evenly without cracking or becoming too brittle. Taking this simple step helps ensure your dried slip has an ideal consistency for glazing and other ceramic work.
Air Dry Thoroughly
The most important step in drying slip is allowing it to air dry completely. The drying time will vary greatly based on the climate and humidity where you live. In a hot, dry climate, slip may be ready in 1-2 days. In a cool, humid environment, drying could take 4-5 days or longer.
There are a few signs to check that indicate your slip is dry enough for storing long-term or using right away:
- The slip feels dry on the surface, with no cold or tackiness.
- Pressing into the slip does not leave an indentation or fingerprint.
- There are no visible signs of moisture.
- Clumping is minimal when rubbed between fingers.
- A piece of the dried slip does not change shape when bent or folded.
Allow your slip to dry until it passes these tests before moving to the next steps. Rushing the drying risks trapped moisture that could ruin a batch.
Avoid Cracks
When drying clay for slip, it’s important to take steps to avoid cracking. Cracks can form in the clay as it loses moisture and shrinks. Here are some tips for preventing cracks:
Dry the clay completely flat. Lay it out in a slab no more than 1/4″ thick. You can use drywall, plaster batts, or sheets of plastic. Avoid drying clay freehand or draping over forms, as this can cause uneven drying. Drying flat minimizes stresses that lead to cracks.
Wrap clay in plastic as it firms up. When the slab has dried enough to be handled without distortion, carefully wrap it in plastic. This allows drying to continue slowly while minimizing cracking. Leave it wrapped for 12-24 hours, then unwrap and allow to finish drying.
Mist spray. If cracks start to form, misting the clay with water and tightly re-wrapping in plastic can help. This rehydrates the surface and allows interior moisture to equalize.
Avoid rapid drying. Dry clay at room temperature away from direct sun, heating vents, or fans. The slower the drying process, the less likely cracks are to form.
Accelerate Drying
If you need to speed up the drying process, there are a couple techniques you can use:
Use a fan to blow air over the clay pieces. Position the fan several feet away and aim it so there is a gentle breeze flowing over the clay. The moving air will help carry away moisture faster. Just be sure not to aim the fan directly at the clay or have it so close that it blows the pieces over.
Dry the clay in sunlight. The heat from the sun will help evaporate moisture from the clay quickly. Place the clay pieces in a spot that gets direct sunlight for much of the day. An outdoor location works best if the weather is warm, dry and not too humid. You can also dry clay near a sunny window indoors. Rotate the pieces periodically so all sides get evenly dried.
Store Properly
After your clay slip has completely dried, it’s important to store it properly to prevent moisture from being reintroduced. Here are some tips for storing dry slip:
Seal the dry slip in an airtight container or plastic bag. Any exposure to air can allow moisture to be reabsorbed by the clay. Make sure the container or bag is completely sealed shut.
Consider storing the slip in the refrigerator. The cool, dry environment of a refrigerator can help prevent moisture buildup. Store the sealed slip towards the back of the fridge if possible.
When reusing the slip, let it come fully to room temperature before opening to avoid condensation. Then reseal promptly after taking out what you need.
With proper sealing and storage, dried slip can be stored this way for several months while maintaining its properties and integrity.
Reconstituting Dry Slip
If your dried slip gets too stiff or dry to use, don’t worry, you can bring it back to the ideal consistency. The key is to add small amounts of water and remix thoroughly.
Start by placing the dry slip in a container. Using a spray bottle, mist the slip with water while mixing. Add just enough moisture to rehydrate the clay. Go slowly and be patient. Too much water at once can flood the mixture.
Use your hands, a spoon, or a paddle to incorporate the water fully. Keep mixing until the slip regains a creamy, fluid texture. Test the consistency on a piece of ware periodically. Stop adding water when the slip reaches the desired viscosity.
Let the reconstituted slip sit for a while after mixing, so the moisture equalizes. Then give it one final stir before using on your pottery. With care, you can revive dry slip and restore it to a usable state.
Tips for Specific Slips
Different types of clay slips have their own unique properties and drying requirements. Here are some tips for working with specific slips:
Terra Sigillata
– This refined clay slip results in a smooth, glossy surface but can be prone to cracking. Thin multiple coats with a small soft brush and allow 12-24 hours of drying time between coats.
– Mist coats with water to slow drying and prevent cracking or “crawling”.
– Once fully dry, burnish by rubbing with a soft cloth to compress the microscopic clay particles and bring out the sheen.
Casting Slip
– Casting slips are formulated to not shrink much during the drying process. Still go slow to avoid cracking.
– Pour slip into a plaster mold in thin layers and allow to dry overnight before adding the next layer.
– Once cast piece is fully dried, reopen mold carefully and remove slowly to prevent distortion.
Underglaze
– Underglaze slips are intended for brushing on bisqueware or greenware before firing. Make sure surfaces are bone dry before firing to prevent pinholes.
– Multiple thin coats are better than one thick coat for even results and to prevent running.
– Keep stirring underglaze as you work to prevent heavier pigments from settling.
Conclusion
Drying slip properly requires patience and care. The key steps are to achieve the right consistency, remove excess moisture, air dry thoroughly, avoid cracks through even drying, and store properly once fully dried. Rushing the process can lead to problems, so it’s important not to skip steps and allow enough time for the slip to dry completely before use. Proper drying results in smooth, crack-free slip that reconstitutes well for glazing and decorating. With the right technique, you can successfully dry any clay slip for future crafting and ceramic work.