How Do You Glaze Pottery After Firing It?
Glazing pottery after it has been fired is a common technique used to create a protective coating and decorative effects on ceramic ware. The glaze is applied to the bisque (once-fired) clay and then fired again at high temperatures to melt and fuse the glaze to the clay body. Glazing serves both aesthetic and functional purposes – it makes the clay watertight and adds colorful and glossy surfaces. After the initial firing, the porous clay body readily absorbs liquids, so glazing creates a vitreous glass-like coating that seals the surface. Glazes come in many colors and textures, allowing artists to creatively enhance their pottery. This process requires careful preparation, application, and firing to achieve the desired results.
Source: [How To Glaze Pottery: Guide To Ceramics Glazing](https://www.thecrucible.org/guides/ceramics/how-to-glaze/)
Reasons to Glaze After Firing
Glazing after the initial bisque firing is standard practice for most pottery. There are several key reasons why glazing after firing is preferred:
Makes pottery non-porous and waterproof: The bisque firing preps the clay by hardening it and making it slightly porous. Glazing creates a glassy coating that seals the pores of the bisque clay. This makes the pottery non-porous, waterproof, and food safe. According to Pottery Crafters, glazing before bisque firing can lead to cracking or crazing issues.
Allows control over glaze effects: Glazing on raw clay can cause unpredictable results as the glaze interacts with the drying and firing process. Glazing after bisque firing allows precise control over the glaze surface and effects.
Prevents glaze ingredients from burning out: Some glaze ingredients can burn out or decompose if fired too long. Glazing after bisque firing prevents this.
Provides better glaze adhesion: Bisqueware has a slightly porous, toothy surface that allows glazes to securely adhere to the clay body. Glazes bind better to bisque than raw clay.
Types of Glazes
There are two main categories of glazes used in pottery – underglazes and overglazes.1 Underglazes are applied directly to bisqueware clay before firing. They are made of a mixture of metal oxides, frit, and a medium like gum arabic. Common types of underglazes include colored underglazes for decoration and clear glazes. Underglazes enhance the appearance of the clay surface and create backgrounds for overglaze decoration.
Overglazes are applied on top of an already-fired glazed piece. They adhere to the glossy glazed surface and can create brilliant colors and effects. Common overglazes include colored glazes, metallic lusters like gold and silver, and special textures. Overglazes are often used for accenting or adding detail on top of an underglaze. The combination of underglaze and overglaze allows potters to create layered, multidimensional finishes.
Choosing the right combination of underglazes and overglazes allows potters to achieve diverse visual styles ranging from solid colors to intricate designs. Properly applying and firing each glaze layer is key to creating a beautiful final product.
Glaze Ingredients
Glazes are made up of several main ingredients that serve different purposes in the glaze. The three most common ingredients are silica, alumina, and fluxes.
Silica, often in the form of quartz, silica sand, or flint, is the main glass former in glazes. It provides the glaze with a glassy texture when fired and helps the glaze mature at the right temperature. A good source explains that silica makes up around 60% of most glaze recipes (source).
Alumina, usually from kaolin or ball clay, is a glass stabilizer that helps increase the glaze’s resilience and prevent leaching and crazing. It comprises around 20-30% of a typical glaze according to experts (source).
Fluxes like feldspar, lithium, and borax lower the melting temperature of the glaze so it vitrifies at the right kiln temperature. They make up 10-20% of most recipes (source). The percentages can be adjusted to achieve certain effects.
Glaze Recipes
There are many recipes for creating different glaze effects. Here are some sample recipes for clear, matte, and glossy glazes:
For a clear glaze, try this simple 3-ingredient recipe: 40% Gerstley Borate, 35% Silica, 25% Frit 3124. This will result in a beautiful transparent glaze perfect for highlighting the natural color and texture of the clay body underneath.
To achieve a matte look, this cone 6 recipe yields a smooth, silky surface: 20% Wollastonite, 15% Silica, 10% Dolomite, 55% Frit 3195. The dolomite gives it a flat, non-reflective finish.
For an ultra glossy glaze, a 50:50 mix of Gerstley Borate and Frit 3195 works beautifully. Add zirconium silicate or tin oxide for even more shine. This flows nicely and leaves a mirror-like surface after firing. Some metallic oxides can be added for speckles of color.
You can find thousands of recipes and adjust amounts or combine them to achieve your desired aesthetic. Keep detailed notes on each test batch until you perfect your favorite glaze combinations.
Glaze Application Methods
There are several techniques for applying glaze to pottery pieces after firing. Some of the most common methods include:

Dipping
Dipping the pottery piece into a container of liquid glaze is a simple and effective application technique. The piece should be dipped evenly and then any excess glaze should be wiped off the bottom [1]. Dipping allows the glaze to cover the piece evenly and fully saturate the clay body.
Pouring
Pouring glaze directly onto the piece is another option. The glaze can be poured evenly over the entire surface or directed into specific areas as desired. Pouring gives the artist more control over glaze placement than dipping [2]. The thickness of the glaze layer can also be controlled by regulating the amount poured.
Brushing
Using a paint brush to apply glaze allows for precise placement and thin layers of glaze. Brushing works especially well for detailed areas and glaze techniques like trailing. The brush size can be varied to control the glaze pattern.
Spraying
Spraying glaze through an airbrush tool or spray bottle mists a fine layer evenly across the surface. This is useful for larger pieces or achieving a uniform coat. Spraying requires some equipment but creates consistent, professional results.
Glaze Firing
Firing glazed pottery requires higher temperatures than regular clay firing. For clay alone, firing temperatures are typically in the < 2124°F range. However, firing glazes requires higher heat since the glaze contains glass-forming ingredients that melt and fuse with the clay at high temperatures. Most mid-range glaze firings happen between 2124°F-2264°F. For stoneware glazes with higher levels of flux, firings can go up to 2345°F. Always refer to the glaze manufacturer’s specific firing recommendations since factors like clay body, glaze ingredients, and kiln type impact the ideal firing temperature.
In addition to higher temperatures, glaze firings require a carefully controlled cooling cycle. Fast cooling can stress the glaze and lead to crazing. Slow cooling ensures the glaze has time to properly anneal and adhere to the clay body. A typical glaze firing may involve a 2-3 hour cooling time down to 1000°F before the kiln is turned off and opened.
It’s critical to keep track of temperatures and firing times when glaze firing. Use a kiln sitter or pyrometer to monitor the temperature inside the kiln. Refer to a kiln firing chart and your glaze recommendations when determining your target peak temperature and optimal hold times.
Achieving Different Effects
There are many interesting visual effects that can be created with glazes after firing pottery. Some effects occur naturally from the glazing process, while others require special techniques. Common glaze effects include:
Crazing
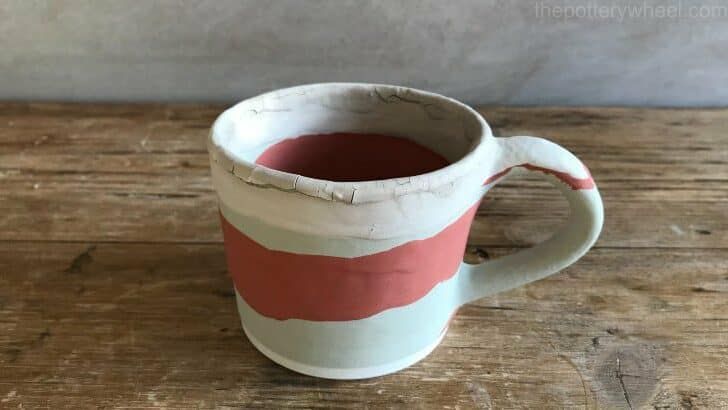
Crazing occurs when the glaze and clay body shrink at different rates, causing fine cracks in the surface. It results from problems like glaze and clay thermal expansion mismatch. Crazing can be an undesirable defect, or it can be encouraged for artistic purposes. Controlled crazing lends an aged, antique look.
Bleeding
Bleeding happens when pigments spread unpredictably, creating blurry color edges. It is caused by the pigments remaining mobile during firing. Bleeding can be avoided by using stable pigments, lower firing temperatures, and shorter firing times.
Peeling
Glaze peeling or flaking off the clay surface is usually due to poor adhesion. The glaze and clay may be incompatible chemically. Using a liner glaze between the clay and final glaze can help. Peeling can also result from firing too quickly or uneven glaze thickness.
Crawling
Crawling occurs when the glaze pulls away from areas of the clay surface, leaving bare patches. It is often caused by surface contaminants like grease preventing glaze adhesion. Crawling can be minimized by thorough clay cleaning prior to glazing.
Pinholing
Small pits or craters in the glaze surface, known as pinholes, generally come from trapped air bubbles. Using glaze recipes and applications methods that minimize air bubbles can help reduce pinholing.
Troubleshooting Issues
Some common issues that can arise when glazing pottery include bubbling, pinholing, crawling, crazing, and shivering. Here are some potential causes and solutions for the most common problems:
Bubbling is caused when small pockets of air or gas get trapped in the glaze during firing. This can happen if the glaze is applied too thickly or if the kiln temperature rises too quickly during firing. To prevent bubbling, apply glaze in thin, even layers and watch the kiln temperature carefully during firing. Slow down any rapid temperature climbs. If bubbling occurs, try thinner applications and slower firing.[1]
Pinholing happens when small holes form in the glaze surface. This is often caused by impurities in the glaze ingredients or clay body, such as oils, sulfur, carbon, or organics burning out during firing. To avoid pinholes, use high quality ingredients and bisque ware longer before glazing. Make sure glazes and clay are free of contaminants. Fire glazes completely to allow burnout.[2]
Crawling occurs when the glaze pulls back and exposes bare clay. This happens when the glaze and clay have different thermal expansion rates. To prevent crawling, make sure the glaze and clay are compatible in expansion. Test compatibility before glazing a whole piece. Adjust the glaze recipe or switch clay bodies if needed.[1]
Caring for Glazed Pieces
Properly caring for glazed pottery after firing is important to keep your finished pieces looking their best. Here are some tips for washing, storing, and handling glazed ware:
Washing: Use a soft sponge or cloth to gently wash glazed surfaces with warm, soapy water. Avoid abrasive scouring powders or scrubbing that could scratch the glaze. Rinse thoroughly. You can also use a diluted vinegar solution to remove hard water deposits.
Storing: Allow glazed pieces to thoroughly dry after washing. Store pottery on padded surfaces, not directly on hard shelves or surfaces that could chip the glaze. Avoid stacking glazed ware directly on top of other pieces to prevent scratches and rubs.
Handling: Be gentle when moving or lifting glazed pottery. The glaze can chip or crack if handled roughly. Carefully grip undersides or unglazed surfaces. Use two hands when lifting larger pieces. Avoid direct shocks from banging or sharp impacts.
With proper care, the beautiful colors and surface of your glazed pottery will stay vibrant for many years of use and enjoyment.


