How Do You Make A Ball And Socket Joint Out Of Clay?
A ball and socket joint is a type of movable joint that allows smooth movement in many directions. In sculpture, it enables connecting two pieces together while preserving a wide range of motion. Ball and socket joints involve a rounded end fitting into a cuplike socket, similar to how a ball fits into a glove. This guide will cover the materials needed and step-by-step instructions for sculpting a basic ball and socket joint out of polymer or air-dry clay.
To create a movable ball and socket joint sculpture from clay, you will need the following supplies:
- Polymer clay or air-dry clay
- Clay sculpting tools
- Acrylic roller or pasta machine (optional)
- Baking paper
- Oven or air-drying setup
The key steps will involve shaping the ball, sculpting the socket cup, securing the pieces together, refining the shapes, adding surface details, and properly curing the finished joint.
Gather Materials
The main material you’ll need for making a ball and socket joint sculpture out of clay is the clay itself. Polymer clay or natural clays like pottery clay both work well. Choose a clay that is pliable and strong enough to hold the shape of the joint pieces without crumbling or cracking when handled. You’ll also need some basic clay sculpting tools like a knife, small loop tools, and a roller. These will help shape the rounded forms and smooth the clay surfaces. Have a container of water on hand too – you can dip your fingers or tools in the water to prevent the clay from sticking as you sculpt. The key materials to start with are:
- Clay (polymer or natural)
- Clay sculpting tools
- Container of water
Shape the Ball
The ball portion of the ball and socket joint begins by shaping clay into a sphere. Start with a lump of clay and roll it between your palms to form it into a rounded ball shape. Apply even pressure as you roll to make the ball as close to a perfect sphere as possible.
Next, smooth the surface of the clay ball. Use your fingers and palms to gently massage the surface, blending any uneven areas or creases. You can also use a clay tool or potato peeler to further refine the shape. Smoothing will create a polished, seamless surface for the ball portion of the joint.
Take care not to flatten the ball or deform it from a spherical shape during this smoothing process. Check it from multiple angles to ensure it remains properly rounded on all sides. The smooth, spherical clay ball will help the joint rotate freely when connected to the socket.
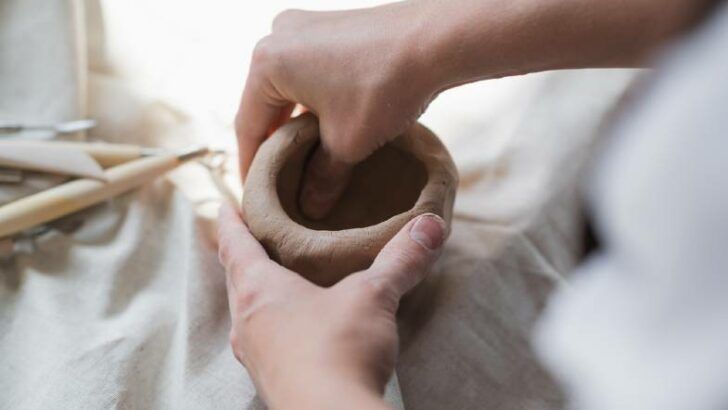
Create the Socket
After shaping the ball portion of the joint, the next step is to create the socket that the ball will fit into. Start by taking a flattened oval shape of clay and laying it on your work surface. This flattened clay pancake will form the base of the socket.
Take a straw, pipe cleaner, or other cylindrical object and press it into the center of the clay pancake to cut out a circular hole. Twist the straw or press down firmly to hollow out the socket shape you need. Remove the straw and you’ll be left with a flattened clay circle containing a cylindrical socket in the middle.
The socket should be slightly smaller in diameter than the ball you created earlier. Test that the ball can press into the socket but still move smoothly. Widen the socket if needed so there is some space around the ball. The socket must be deep enough to contain the ball shape by at least half.
Attach the Pieces
After shaping the ball and socket separately, it’s time to attach them together to form the joint. First, use a sharp tool to score the surfaces on the ball and in the socket that will be joined. This helps the clay adhere. Next, dip your finger in water and moisten the scored areas. Water acts as an adhesive with clay. Finally, gently press the ball into the socket, wiggling it slightly to work it into place. Apply even pressure to ensure a good connection. Check that no air bubbles formed between the pieces.
Refine the Joint
Once the ball and socket pieces are initially joined together, some refinement will be needed to perfect the joint. Carefully shape the seam between the ball and socket, blending the clay together for a smooth transition. Work gently to avoid tearing the clay. Use sculpting tools or your fingers to gently smooth away any cracks or gaps in the joint. The ball should be able to rotate freely within the socket if the pieces are well-blended. Be patient and take time on this step to achieve a seamless joint line. The goal is a strong connection between the pieces that allows the joint to articulate.
Add Details
Once the ball and socket pieces are joined and the basic shape is formed, you can use clay tools to add decorative details. This helps make the joint more realistic and interesting to look at. Use metal or wooden modeling tools to press grooves or ridges into the clay along the seams and edges of the ball and socket. You can also use loop tools to carve circular or curved patterns. Clay ribbon tools are useful for making line designs. Add some crosshatch marks or other textures with serrated sculpting tools. Emboss designs by pressing objects like buttons, coins or seashells into the clay. Get creative with the patterns and textures you add – this personalizes your sculpture and makes it truly unique.
When detailing the ball, focus on the upper hemisphere that will be visible. The lower half that inserts into the socket can remain smooth. For the socket, add some ridges and grooves within the cylindrical cavity to represent the cup shape. Make sure any etched designs are shallow enough that the ball portion can still fit snugly into the socket. Adding fine details brings realism and visual interest to the joint, while still allowing the mechanism to move freely.
Bake or Air Dry
Once your ball and socket joint sculpture is fully assembled and detailed, it needs to be hardened through either baking or air drying. Follow the instructions on your particular clay package for proper baking times and temperatures. Air dry clays will take longer, usually 24-48 hours, to fully harden. Be patient and allow the clay to properly cure all the way through before handling too much or painting.
When baking, place the sculpture on a cookie sheet or ceramic tile and bake at the temperature recommended for the clay type. Check at minimum time intervals so it does not overbake. Air drying sculptures should be placed in a warm, dry area with good airflow all around the piece.
Proper hardening is essential for the structural integrity of the movable joint. Underbaking or inadequate drying can result in pieces that are fragile and prone to breakage when handled and posed. Take the time needed to fully cure the clay and your ball and socket joint will turn out strong and lasting.
Finish the Surface
After the ball and socket joint sculpture has baked or air dried, it’s time to finish the surface. Sand any rough areas that may have formed during the baking or drying process with a fine grit sandpaper. Be gentle and take your time to avoid taking off too much clay. The goal is to smooth out any bumps or irregularities, not reshape the sculpture.
Once sanded, the sculpture is ready for decorative finishing. If desired, paint the ball and socket joint with acrylic paints or use glazes formulated for the type of clay you used. Multiple thin coats of paint or glaze will give the best results. Allow ample drying time between coats. The finishing touches will bring out the details and give your sculpture an attractive, professional look.
Display the Sculpture
Once your clay ball and socket joint sculpture is complete, you’ll want to display it properly to keep it safe and looking its best. Here are some tips for effectively showcasing your artwork:
Mount the sculpture on a sturdy base or stand to keep it upright and prevent falls. Clay is sturdy but can still crack if dropped. Choose a neutral colored base like white, black or natural wood so as not to distract from the sculpture itself. Secure the ball and socket joint tightly in place on the base with clay or strong putty.
If you designed a movable joint, take extra care to protect the sculpture from falls and damage when handling. Avoid frequent handling and movement which could lead to cracks. When moving a joint, grasp the main body of the sculpture carefully and move slowly.
Display your clay sculpture somewhere safe from drops, bumps and direct sunlight which can cause fading. Shelves, tabletops or display cases work well. Consider using museum gel to securely adhere the base to the surface. Position your sculpture at eye level so guests can admire your artwork with ease.
With the proper display and care, your homemade clay ball and socket joint creation will be an impressive decorative accent and conversation piece for years to come. The creative possibilities with clay are endless!