How Do You Make A Block Of Clay Into A Sphere?
Sculpting a clay sphere is a fun and rewarding way to get creative with an accessible art material. With just a block of clay and some simple tools, you can shape a perfectly smooth 3D ball that makes an appealing sculpture on its own or can be used as the basis of more complex ceramic projects. Learning how to form spheres consistently takes some practice, but the techniques are straightforward enough for both kids and adults to master. Homemade clay spheres have many uses as decorative objects, toys, or supplies for more advanced pottery and sculpture. This guide will walk through the full process of sculpting a basic clay sphere, from preparing the clay to polishing the finished piece.
Gather Materials
To make a clay sphere, you will need the following materials:
-
Clay – Polymer clay or air-dry clay work best. You’ll need around 1 pound of clay.
-
Sculpting tools – Wooden sculpting tools like loop tools help shape the clay without sticking. Plastic sculpting tools can also work.
-
Water – Use water to smooth and blend the clay as needed.
-
Workspace – Cover your workspace with wax paper, canvas, or a dedicated clay working surface.
Make sure you have enough clay and tools before beginning the sculpting process. Acrylic clay rollers, ceramic sculpting ribs, and a sculpting stand can also help when sculpting the sphere.
Prepare the Clay
Clay must be properly prepared before shaping to ensure it is soft, pliable, and free of air pockets. Start by kneading the clay vigorously with your hands on a clean, flat surface. Knead it like you would bread dough, pressing into the clay firmly and folding it over itself repeatedly. This softens the clay by warming it with friction and your body heat. It also evenly distributes moisture and binds the clay particles together.
As you knead, you’ll feel hard spots or air bubbles trapped in the clay. Keep working the clay, focusing extra effort on these areas, until it has an even, smooth, elastic consistency free of lumps or pockets. Well-kneaded clay should be very soft, not sticky, and able to hold an imprint when pressed. Proper kneading ensures the clay will be cooperative and easy to shape into a sphere without cracking or distorting.
Form a Ball
Once you have your clay prepared, it’s time to form it into a ball shape. Start by gathering the clay into a loose ball. Cup it in your hands and roll it back and forth, applying even pressure with your palms and fingers. Rotate the ball as you smooth to maintain its roundness. Avoid squeezing too tightly or the clay may get misshapen. If the clay sticks to your hands, lightly dust them with flour. Keep rolling until the rough edges disappear and you have a smooth, symmetrical sphere.
Check the ball periodically from all angles to ensure it is uniformly round with no flat spots or bulges. Gently pinch and push any imperfections to reform the surface. Be patient and take your time smoothing the clay. Rushing can lead to unevenness. Your goal is a ball with a perfectly curved, polished exterior, free of cracks or crevices.
Once smoothed, the clay ball should rest comfortably in your curved palm. The surface should have a soft, even sheen. Avoid handling the ball too much at this stage or you may flatten it. Now your basic sphere shape is ready for refining and detailing.
Refine the Shape
Once you have formed a basic ball shape out of the clay, it’s time to refine the roundness and smooth out the surface. This process removes any lumps, bumps, or irregularities in the sphere. Start by gently rolling the clay ball on a flat surface while applying light pressure with your palms. This will help even out the shape.
Next, use sculpting tools to further refine the roundness and create a smooth surface. Looping tools like ribbon tools and ceramic loop tools are perfect for this task. Gently run the loops over the surface of the clay, working in different directions. The looping action will smooth and blend the clay. You can also use metal ribs or kidney tools to gently scrape and compress areas that need more refinement. Just be careful not to overwork any one spot, which can cause unevenness.
As you refine, turn the clay sphere over frequently and check for flat spots from all angles. Continue smoothing until you have an even, spherical shape with no visible bumps or divots. The surface should have a continuous smooth finish.
Add Details
Once you have formed a smooth spherical shape, you can add finer details and textures to make your clay sphere more interesting. Here are some techniques you can use:
-
Use loop or rib tools to carve lines, circles, swirls or other patterns into the surface of the sphere. Press lightly and drag the tool across the clay in the design you want.
-
Use a rolling pin with texture on it to roll across the surface of the sphere. This will imprint the design into the clay.
-
Use silicone molds or stamps to press shapes and patterns into the clay. Dip the mold in water or massage oil first so it releases easily.
-
Attach additional small pieces of shaped clay using slip. This allows you to add shapes like animals, flowers, etc.
-
Use a knife or skewer to scratch irregular patterns like scales or feathers into the surface.
-
Roll pieces of clay into coils, balls or teardrops. Use slip to attach them to the sphere for added texture.
-
Use sponges, crumpled paper or other items to press interesting textures into the clay.
Get creative with the tools you have on hand to add as much or as little detail as you desire. Intricate patterns and textures will give your finished clay sphere more visual interest.
Let Dry
After shaping and adding details to the clay sphere, it’s important to let it dry partially before doing any additional work. Allow the sphere to sit undisturbed for at least a few hours. The clay needs time to firm up so the details don’t get squished or lose their shape when handled again.
How long you let the clay dry depends on factors like the size and thickness of the sphere, the clay type, and environmental conditions. Thinner or smaller pieces may only need an hour or two. Larger, thicker, or dense clay pieces may require 12 hours or overnight drying. Observe the clay – when it lightens in color and becomes cooler, firmer, and less sticky to the touch, it has dried enough for the next steps.
While waiting for the clay to dry, make sure it is in a safe location where it won’t get knocked over or disturbed. Letting it dry on a flat surface is best to prevent sagging or distortion. Maintaining the same ambient temperature and avoiding drafts will allow the sphere to dry evenly. With some partial drying, the clay will be ready for firing, finishing, or further detailing.
Fire the Clay
Once you’ve refined the shape and allowed your clay sphere to dry completely, it’s time to permanently harden it through a process called firing. Firing uses extremely high temperatures to cause chemical and physical changes that transform your fragile clay into a strong, finished ceramic piece.
There are a few different options for firing your clay sphere:
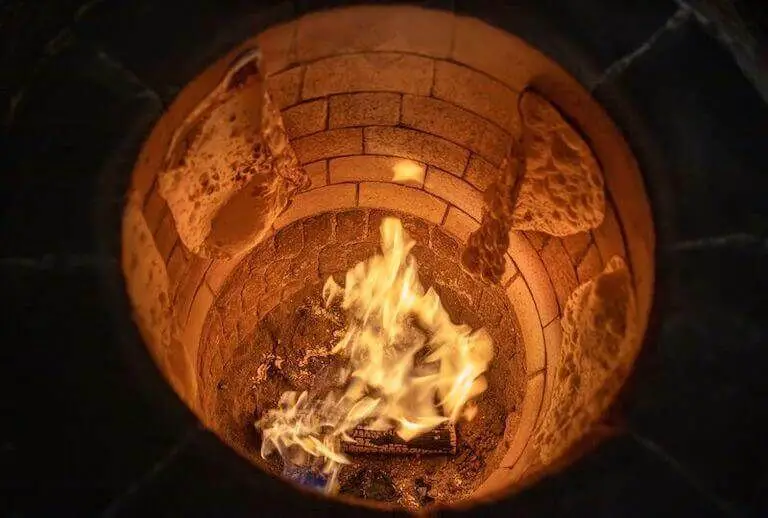
- Use a kiln – The best way to fire clay is with a kiln, which allows you to precisely control the temperature and heat distribution. Kilns can reach over 2000°F, which is sufficient to fully fuse and harden the clay. Place your dried sphere on a kiln shelf and fire according to the clay manufacturer’s specifications.
- Use a fire pit or grill – If you don’t have access to a kiln, you can fire your clay sphere in a very hot firepit or grill, using hardwood charcoal or wood. This is trickier and less reliable, but can work. Build a large hot fire and place your sphere on a grate, turning it frequently with metal tongs. Keep the fire blazing for at least an hour.
- Use a blowtorch – For very small pieces, you can use a blowtorch to carefully heat the surface to fuse it. This will not fully fire the clay but can add some strength. Constantly move the torch to avoid cracking from concentrated heat.
No matter which firing method you use, make sure to bring the clay slowly up to temperature, hold it there for sufficient time, then allow it to cool down completely before handling. Firing transforms your clay sphere into a strong, permanent ceramic art piece ready for finish application and display.
Apply Finish
After firing the clay sphere in a kiln, you may want to apply some finishing touches for decoration and protection. Popular options include:
Sanding – Lightly sanding the sphere can smooth out any rough patches and prepare the surface for other finishes. Start with 120 grit sandpaper and work in a circular motion. Wipe away any dust with a cloth when done.
Paint – Acrylic and oil-based paints work well on ceramic bisque. Thin layers of paint can add color while allowing the clay texture to show through. Let paint fully dry before applying a topcoat.
Glaze – Ceramic glazes come in various colors and textures like glossy, matte, or crackled. Brush on a thin coat according to manufacturer directions and refire the piece in a kiln to set the glaze. Multiple layers can be applied for a richer effect.
Wax – Applying beeswax or a ceramic wax blend seals the clay and adds a soft sheen. Use a cloth to rub the wax liberally over the entire surface. Buff with a clean cloth until smooth.
Sealant – For functional clay pieces like mugs, use a food-safe ceramic sealant on the inside before use to prevent stains and odors. Apply per label instructions and let it cure fully.
With colorful paints, glazes, waxes and more available, get creative with finishing techniques to make your clay sphere truly unique. The final touches will enhance your handcrafted art piece.
Display the Sphere
Once your clay sphere has been fired, glazed, and cooled, you will want to proudly display it. Here are some options for showcasing your homemade clay sphere:
Mount it on a base – For a clean, simple look, mount the sphere on a wooden cube or rectangular prism. This will elevate the sphere and make it the clear focal point. Place felt pads on the bottom of the base to protect any surfaces.
Place on a shelf – Clear some space on a shelf, mantel, or tabletop to highlight your clay creation. The sphere’s smooth curves will stand out when solo. For extra flair, add lighting above or around the sphere to accentuate the shape and glaze.
Give as a gift – Your homemade clay sphere makes a wonderful gift for any occasion. Consider nestling it in a gift box or wrap with tissue paper to build anticipation before the recipient unveils their new keepsake. Include a note sharing the meaning behind the uniquely handcrafted present.


