How Do You Make A Clay Teapot On The Wheel?
The teapot is one of the most iconic ceramic art forms. Teapot making on the wheel emerged in China during the Song Dynasty (960-1279 AD), revolutionizing ceramic production with the potter’s wheel. Teapots were originally made from porcelain, but stoneware clays high in iron and sand are now more commonly used.
Making a teapot on the wheel takes practice and skill. The general process involves centering the clay on the wheel, shaping the pot’s base, then pulling the walls up to form the body. The spout and handle are shaped separately then attached. Refining the shape, smoothing surfaces, and adding decorations come next. The teapot must then slowly dry and be fired in a high-temperature kiln to harden it.
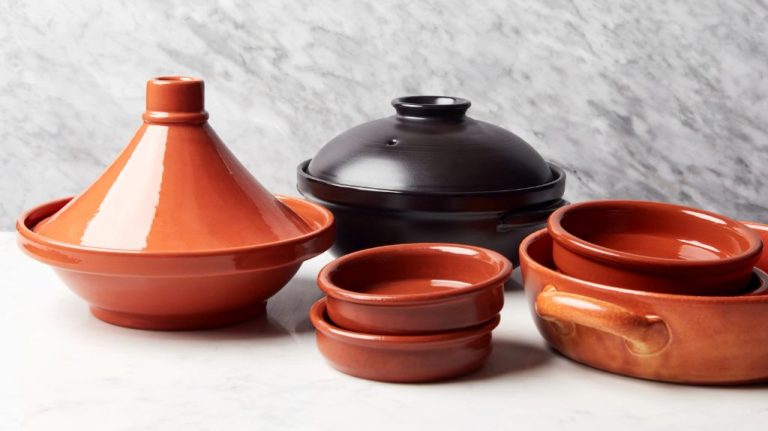
The best clays for throwing teapots are stoneware and porcelain. Stoneware has high plasticity and durability for throwing thinner walls. Porcelain has low plasticity but becomes translucent and rock-hard after firing, creating a delicate, high-quality finish.
Gather Materials
To begin making a clay teapot, you’ll need to gather the proper supplies:
Clay
The type of clay you choose will impact the finished look and durability of your teapot. Pottery or stoneware clays are good options as they can withstand repeated use and exposure to heat. Choose a clay free of impurities to avoid cracking and breakage during firing. The clay should also have good plasticity so it’s workable on the wheel.
Pottery Wheel
You’ll need access to a pottery wheel, which rotates at various speeds to shape and center the clay. Most wheels have a rotating wheel head powered by an electric motor and a solid metal band around the circumference you can brace your hands against while throwing.
Tool Kit
Having the right pottery tools on hand will make throwing and sculpting easier. Useful tools include:
- Pottery rib – for smoothing clay surfaces
- Trimming tools – loop tools and ribs for refinement
- Sponge – for cleaning and smoothing
- Cutting wire – for cutting excess clay
Prepare the Clay
Before you begin shaping the clay on the wheel, you’ll want to properly prepare it by wedging or kneading it. This serves several purposes – it removes air bubbles from the clay, aligns the clay particles, and makes the clay more plastic and workable. Start with a chunk of clay and cut it into several smaller pieces. Then slam and squeeze each piece against your work surface to compress it. Fold the clay over itself and continue kneading and slamming until the clay is smooth, soft, and has a uniform consistency.
Once your clay is wedged, form it into a rounded ball shape. Try to center the ball and compress it so there are no cracks or lines. The clay should be smooth, symmetrical, and have no air pockets. This centered clay ball is now ready to be placed on your pottery wheel and shaped into a teapot form.
Center the Clay
Centering the clay on the wheel is one of the most important steps in throwing a teapot or any vessel on the wheel. The goal is to center the clay into a uniform cylinder or cone shape with even thickness throughout. This ensures the walls of the teapot will be evenly formed as you shape it.
Start with a lump of clay secured to the wheel head. Apply downward pressure with both hands while slowly kicking the wheel into motion. Use the heels of your hands to press the clay into the center as it spins. Do not press too forcefully or you may displace the clay entirely. Work patiently, applying pressure and allowing the centripetal force to pull the clay towards the wheel head.
Stop the wheel periodically to check the progress. The clay should gradually form into a cone shape with the thick end out and the pointed end secured to the wheel. Use a rib tool to carefully trim any uneven sections, then begin spinning the wheel again. Repeat this process until the clay forms a symmetrical cone with even thickness and no lumps or cracks.
Common issues that can occur when centering clay include the following:
- Off-center clay – Adjust by gently pressing the thicker areas into the center as the wheel spins.
- Uneven thickness – Use a rib tool to trim any excess clay from thicker areas.
- Slumping or collapsing clay – The clay may be too wet. Allow it to firm up slightly before centering.
- Cracks – The clay may be too dry. Mist the clay with water before centering.
Be patient and make gradual adjustments as needed. Well-centered clay is essential for pulling the walls of the teapot up evenly in the next steps.
Shape the Base
After centering the clay on the wheel, you can begin shaping the base. Start by gently pressing down on the center of the clay to form a rounded bottom. Apply even, firm pressure with your thumbs while supporting the clay with your fingers. As you press down, the clay will begin rising up the sides of the wheel head, forming the base.
As the walls start to pull up, use your thumbs on the inside and fingers on the outside to compress the clay and thin the walls. Try to maintain an even thickness throughout the base by smoothing the walls with your fingers. Avoid making the walls too thick or too thin. Aim for around 1/4 inch thickness.
Continue to shape and smooth the base until you have a rounded, uniform foundation for your teapot. Remove any cracks or wrinkles by compressing the clay. The smoother the base, the easier it will be to pull up the body without flaws.
Form the Body
After shaping the base, it’s time to form the body of the teapot. Start by centering the clay again and placing both hands inside the opening you created for the base. Then, begin steadily pulling the clay upwards and outwards to form the walls of the teapot body. Be patient and work slowly as you pull up the walls, evenly distributing the clay as you shape it.
As you pull up the walls, contour the body into the desired shape, round or angular. Visualize the final form in your mind. Leave enough room at the top for the spout and handle which will be attached later. The body should have a wider base tapering up towards the rim. Shape the body carefully, keeping the walls an even thickness throughout. Avoid making the walls too thick or too thin. Aim for around 1/4″ thickness.
Stay centered as you shape the body, compressing the clay while maintaining an open form. Use your fingers to gently smooth ripples on the inside and outside surfaces. Make sure no cracks appear in the clay body walls. If the clay becomes too wet, let it firm up slightly before continuing to shape the body. Form a rounded, aesthetically pleasing teapot body with enough room for adding the spout and handle.
Shape the Spout
To shape the spout, first press your fingers into the clay to create an opening for attaching it. Carefully attach a coil of clay to form the spout, blending it smoothly into the body of the teapot. Use your fingers and some water to gently blend the seam where the spout meets the body.
Next, use your fingers and some tools to shape the spout into the desired curve and thickness, making sure the inside passage stays open. Pinch the end of the spout to create an appropriate pouring spout shape and size. Smooth any ridges or bumps in the spout using your fingers, a moist sponge, or a rubber kidney tool. Check the thickness of the spout walls and refine as needed. Allow the spout to firm up slightly before final smoothing.
As you shape the spout, pay close attention to the angle and position in relation to the body and handle. The spout should pour comfortably without dripping down the sides when the teapot is tilted. Refine the spout shape and angle as needed to achieve the appropriate form and function.
Create the Handle
The handle is an important part of designing your teapot. Proper attachment and shaping of the handle will ensure functionality and enhance the overall look of the piece.
When creating the handle, first allow the body of the teapot to stiffen slightly before attaching. Using your fingers, gently pull and blend a lump of clay from the body to create the handle shape. Flatten the bottom of the handle so it adheres fully to the body. Using a scoring tool or loop tool, score crossing lines on the handle attachment area to help it stay secured.
Once attached, use your fingers and small wooden tools to refine the handle’s shape. Create an open form that allows four fingers to pass through. Carefully smooth and blend the attachment points into the teapot body so they are imperceptible. Let the handle firm up slightly before final shaping.
Consider the handle’s thickness, arch and overall form. A well-made handle should look balanced according to the size and shape of your teapot. Use wooden ribs and loop tools to refine the shape. Blend the edges for a smooth, comfortable grip. Your handle can be elegant, playful or modern, but should uphold functionality while complementing the overall design.
Refine and Smooth
Once the basic shape of the teapot is formed, it’s time to refine the shape and smooth the surface. This is an important step for creating a beautifully finished teapot.
First, carefully look over the teapot shape and form. Make sure the walls are an even thickness, the spout and handle are attached securely and shaped properly, and the lid fits well. Use your fingers and metal loop tools to lightly compress and smooth any irregularities or bumps in the clay walls and surface.
Pay close attention to smoothing the inside walls and rim of the teapot as this is where tea will flow. Use a rounded silicone tool or your finger dipped in water to smooth these areas. Avoid overworking the clay as too much handling can weaken the structure.
Gently smooth the spout, handle and any decorative elements to remove any remaining bumps or ridges. Blend attachments points smoothly into the teapot body. Make sure edges are refined and smooth.
As you refine the shape, step back periodically and evaluate the overall form, proportions and balance of the teapot. Make any necessary adjustments to achieve your desired shape and aesthetic.
Once the teapot surface feels smooth to the touch without any bumps, ridges or irregularities, it’s ready for the drying and firing stages.
Dry and Fire
After the teapot is shaped to your satisfaction, allow it to air dry completely before firing. Make sure the teapot is dried evenly to prevent cracking or exploding in the kiln. As a general rule, allow 1 week of air drying time for each 1⁄4 inch of thickness of the clay body. The thicker the clay, the more slowly it dries.
Once completely dry, the teapot must be fired in a kiln to harden the clay through a process called sintering, where clay particles bond together permanently. There are several popular firing methods, such as bisque firing and glaze firing. Bisque firing brings the clay to a hard, porous state that is ready to receive a glaze. Typical bisque firing temperatures are around cone 04-06. After the bisque firing, the teapot can be glazed and fired again at a higher temperature around cone 4-6 to melt the glaze and create a glass-like coating.
Common glazing techniques include dipping, pouring, brushing, and spraying. Consider complementary colors that enhance the form. Clear glazes allow the natural texture and color of the clay body to show through. Glazes rich in iron, copper, or cobalt can produce vibrant blues, greens, and reds. Multiple glaze layers and combinations result in even more possibilities.