How Do You Make A Harappan Seal Out Of Clay?
Harappan seals were small, carved objects used in the ancient Indus Valley Civilization sites of Harappa and Mohenjo Daro dating back to roughly 3000-1500 BCE. They were created and used by the urban civilization that once flourished in the Indus River Valley in modern day Pakistan and northwestern India. The seals were typically square or rectangular in shape and featured intricately carved inscriptions and animal motifs.
The purpose of Harappan seals was to mark ownership or authority. The seals were pressed into soft clay or wax to leave an impression and mark documents, storage containers, or other objects. They served as a form of signature or identification marker. The seals contained writing in the undeciphered Indus script, which may have functioned as a form of identification. The seals also frequently depicted animals like elephants, tigers, unicorns, and bulls. The animal motifs likely had religious, cultural, or political significance.
The Harappan seals provide insight into the sophisticated culture, artistic abilities, writing system, administrative practices, and religious beliefs of the Indus Valley Civilization. Thousands of seals have been uncovered at Harappan sites, though their specific function and meaning remains a mystery. Nonetheless, the seals demonstrate the accomplishments of one of the world’s earliest urban civilizations.
Materials Needed
To make an authentic Harappan seal, you’ll need the following materials:
Type of clay
Harappan seals were typically made from fine alluvial clay, siltstone, steatite, or faience. To recreate this, aim for an air-drying clay that fires to a light terracotta color. Some good options are white earthenware clay or red clay.
Carving tools
You’ll need an assortment of carving tools like loop tools, gouges, and blades. These will allow you to carve fine details into the clay. Opt for metal tools with a variety of tip shapes and sizes.
Baking tools
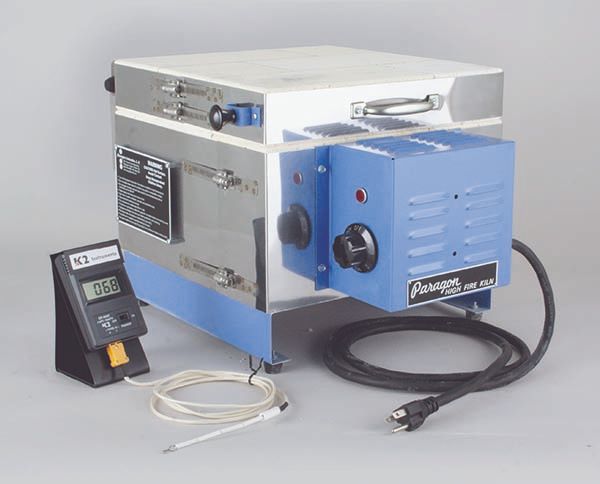
To fire your finished seal, you’ll need a small kiln that reaches over 800°C. A mini-kiln designed for ceramics or jewelry making is ideal. You’ll also need firing bricks or a ceramic flowerpot to support your seal.
Paints/glazes
Harappan seals were often decorated with pigments like red ochre or black manganese. Look for ceramic paints and glazes in earthy tones like terracotta, brown, or green. You can apply these before or after firing.
Preparing the Clay
Properly preparing the clay is an essential first step in creating a Harappan seal. The clay must be kneaded and wedged to remove any air bubbles and evenly distribute moisture throughout. This helps prevent cracking and breakage when carving and drying the finished seal.
Start by kneading the clay vigorously with your hands. Fold, press, and push the clay against itself on a flat surface. This softens the clay and works the moisture in evenly. Continue kneading for 5-10 minutes until the clay is smooth, pliable, and has a uniform consistency.
Next, cut the kneaded clay in half and form each half into a ball. Take one ball and press it into a thick, round pancake. Stand facing the pancake and throw it repeatedly against the work surface. This technique is called wedging and further removes air pockets. Rotate the clay 90 degrees and repeat wedging in the new direction.
Once your clay is fully wedged, use a rolling pin to roll it into a slab about 1/4 inch thick. Try to achieve an even thickness. You may need to turn the clay and roll in different directions. Your clay is now ready for the stamping design.
Creating the Design
When creating your design, it’s important to research common motifs and images used in Harappan seals. Some classic examples include animals like bulls or elephants, figures in ritual poses, and geometric patterns. Look at photos of authentic artifacts and museum collections to get inspired. Once you’ve decided on an overall theme or composition, sketch out some initial design ideas on paper. This allows you to visualize how the elements will be arranged before carving into the clay. Try out a few different options to see what works best. Focus the design on the central area that will be used for stamping, but also incorporate decorative borders if desired. Refine the sketch until you have a cohesive, balanced design you’re excited to carve.
Carving the Design
Once the design is imprinted into the clay, it’s time to carve it out. For this intricate process, you’ll need some specialized carving tools. The main tools used are:
- Loop tools – These have a variety of shaped wire or wooden tips used for scraping out fine details and textures.
- Ribbon tools – Flat, flexible metal tools used to carve out lines.
- Fettling knives – Small, short blades for trimming and sharpening edges.
- Needle tools – Sharp, pointed metal tools for incising fine lines and details.
Always carve towards yourself and brace your hands or wrists for stability. Use light, scraping motions to slowly carve out the design. Take care not to cut too deeply or apply too much pressure, which can distort the soft clay. Work methodically from large shapes to small details. Frequently rinse your tools in water to keep the clay from sticking.
Pay close attention to recreating the original carved lines and textures of Harappan seals. The signature Indus writing system was carved using nested V-shapes and stacked rectangles. Reproduce these by making crisp, neat cuts and avoiding over-scraping. Work slowly and patiently to capture every nuance of the intricate script.
Once the main design is carved, use the ribbon and needle tools to incise any fine border patterns, decorative shapes, or textures seen on ancient seals. These small details allow you to emulate the craftsmanship of Harappan artisans.
Drying the Clay
After carving your design, it is crucial to let the clay dry fully before baking. If there is any moisture left in the clay, it can cause cracks or breakage during baking. Allow at least 1-2 days for thorough drying time, though 3-4 days is ideal.
The clay should be dried in a warm, dry area out of direct sunlight. Drafty areas or rapidly changing temperatures can dry the clay unevenly, so aim for a stable environment between 70-80°F. Place the carved clay on a rack or shelf so air can circulate underneath.
Check the clay each day. It is ready for baking when it is no longer cool to the touch, turns a shade lighter, and feels lighter in weight. The clay should be bone-dry without any sticky or moist areas. Test by scratching the surface with a fingernail to ensure it is completely hardened.
Rushing the drying risks cracking or exploding in the kiln. Patience ensures your carved design remains intact through baking. The extra time leads to a stronger, higher quality finished seal ready for stamping and glazing.
Baking the Seal
Once the seal has been carved and allowed to dry fully, the next step is to bake it in a kiln to harden and set the clay. Proper baking is essential for creating a usable and durable seal. The ideal temperature range for baking Harappan style seals is usually between 800-1000°C. Firing the clay at higher temperatures results in more complete vitrification and a harder, more stone-like final product.
Kilns allow for controlled heating of the clay. Simple kilns can be made from brick and clay, or more modern electric or gas-fired kilns may be used. Place the carved seal in the center of the kiln, allowing adequate space for air circulation. Heat the kiln gradually, increasing the temperature at a rate of around 80-100°C per hour. Avoid rapid heating or cooling which could cause cracks.
The length of firing time can vary based on factors like clay composition, kiln type, and desired hardness. Typically, 1-8 hours at maximum temperature is sufficient. Use pyrometric cones to evaluate when the target temperature has been reached and the bake is complete. Allow the seal to cool down slowly inside the kiln before removal. The clay should have vitrified into a hard, ceramic material ready for finishing and use.
Applying Glazes
Optional colored glazes can add vibrancy and visual interest to your Harappan seal. Glazes come in a variety of colors like blue, green, yellow, red, and more. When choosing a glaze color, consider complementing the clay color rather than covering it up completely.
There are a few techniques for applying glazes:
- Dipping – Submerge the entire seal into the glaze liquid. This will cover the entire piece evenly.
- Brushing – Use a small brush to manually apply glaze. This allows more control over glaze placement.
- Spraying – Use an airbrush tool or spray bottle to mist glaze onto the seal. This gives a smooth, even application.
Apply glaze in thin, multiple coats. Allow each coat to dry before adding another layer. Too much glaze can cause cracking or running during the firing process. Blend and fade glaze colors by overlapping brushed edges.
Clear glazes can also be used to give an attractive glossy finish and help protect the clay surface without affecting the color.
Polishing and Finishing
Once the seal has been fully dried, the final step is to polish and finish it to create a smooth, professional look. Start by gently sanding the seal with increasingly finer grit sandpaper, starting with a coarse grit and moving up to a super fine grit. This will smooth out any rough edges or surface imperfections. Be sure to sand evenly across the entire surface.
Next, you can polish the seal by rubbing it with a soft cloth. For an extra shine, use a polishing compound or sealant specifically made for clay. Apply a thin coat and buff the seal until it develops a glossy finish. This will help protect the clay and make the carved design stand out.
At this point, you can add any final detailing with small clay sculpting tools. Use a sharp tool to refine lines or add texture. Be careful not to apply too much pressure or you may damage the design. Work slowly and gently.
Once satisfied with the polish and details, do a final inspection of the seal. Make sure there are no overlooked spots needing smoothing or issues needing correction. Your Harappan seal is now ready for inking and pressing into clay or wax to make an impression.
Using the Seal
Once your Harappan seal is complete, you’ll want to start using it to make impressions. The two main methods for doing this are inking the seal and pressing it into clay, or pressing the seal into warm wax.
For clay impressions, start by rolling out softened clay into a slab about 1/4 inch thick. Ink the seal by pressing it into an ink pad or applying ink directly to the seal surface using a brayer or paintbrush. Apply firm, even pressure to press the seal into the clay slab at a 90 degree angle. Lift straight up to reveal the impression. Allow the clay to dry fully before handling.
To make wax impressions, start with a block of carving wax and warm it slightly with a heat gun or by placing it in warm water briefly. This will soften the wax enough to take an impression. Press the seal firmly into the soft wax at a 90 degree angle, then lift straight up. The wax will harden again within a few minutes, locking in the impression. Wax impressions can be used to create molds for casting or to affix to documents.
Experiment with inking and pressing your handmade Harappan seal to create historically accurate impressions. Take care not to damage the carved design of the seal in the process. Enjoy putting your seal to use just like the artisans of the ancient Indus Valley civilization.


