How Do You Make A Perfect Round Ball Out Of Clay?
Making a perfectly round clay ball takes some practice, but it is an essential skill for any potter or clay sculpture artist. Round balls of clay have many uses – they can be molded into bowls, cups, vases, pots, and sculptures. Mastering how to make uniform, smooth clay spheres allows you to easily create circular shapes for any clay project.
This guide will walk through the entire process of sculpting a flawless round clay ball, from choosing the right clay and preparing it, to shaping and smoothing the ball, drying and firing it properly. With some patience and the techniques outlined here, you’ll be able to craft round clay forms with ease.
The end result will be a clay ball that is perfectly symmetrical and smooth, ready to be transformed into elegant pottery or decorative sculptures. So whether you’re just starting out in clay crafting or looking to refine your skills, read on to learn how to make a gorgeous round clay ball!
Gather Materials
To make a perfect round clay ball, you’ll need to gather the appropriate materials:
Type of Clay – The best type of clay to use is an air-drying earthenware clay. This provides enough workability to shape smoothly, while still being sturdy when dried. Avoid clays that are very porous or flaky when carving.
Clay Tools – Have on hand a variety of loop and ribbon modeling tools to refine the shape, as well as a scoring tool, carving tools, and a measuring tool like calipers. Metal rib tools will give the smoothest surface.
Rolling Surface – Use a dedicated smooth ceramic or marble slab at least 12×12 inches in size as a work surface. The slab needs to be totally smooth and level to shape a uniform ball.
Prepare the Clay
Before beginning to sculpt the perfect round ball, it is important to properly prepare the clay. Preparing the clay involves removing any air pockets, achieving an even consistency and forming it into a ball shape. Any air pockets left in the clay can cause the sculpture to crack or explode when fired in a kiln.
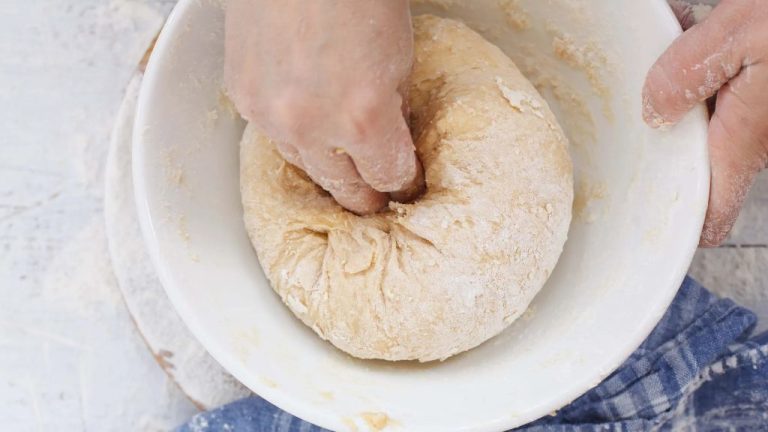
To remove air pockets, firmly press the clay against your work surface while kneading it. Roll and fold the clay over itself, gradually working it until the texture is completely smooth. Continue kneading for several minutes until no air pockets remain.
As you knead, the clay will become more pliable as the moisture evenly distributes. Once the surface is smooth, roll the clay into a ball shape. Try to avoid leaving any cracks or seams in the surface. The clay is now ready for sculpting into a perfectly smooth sphere.
Shape the Ball
Shaping the ball is one of the most important steps for achieving a perfect sphere. Start by gently rolling the clay between your palms to form it into a rough ball shape. Apply even pressure as you roll to compress the clay into a solid mass.
Once you have a basic ball shape, you can further refine it using some simple modeling tools. A metal rib or knife tool works well to smooth away any irregularities. Gently scrape or cut away any bumps or ridges until the surface looks uniform.
As you work, routinely stop to examine your clay ball from all sides. Turn it around in your hands looking for flat spots or uneven areas. Check that the shape is as close to a perfect sphere as possible, with an even roundness on all sides.
Take your time at this shaping stage, since it’s easier to fix imperfections now rather than later. The goal is to achieve a smooth, symmetrical sphere before moving on to the next steps of drying and firing your clay.
Refine the Surface
Once the basic shape of the spherical ball is formed, it’s time to refine the surface for a smooth, professional finish. This step is important to remove any imperfections and create a perfectly round shape.
Start by wetting your clay tools to prevent sticking. Dip your metal sculpting tools, wooden ribs, and sponges in water. Wet tools will glide across the clay surface without dragging or tearing the clay.
Gently smooth the entire surface of the sphere. Use your wet metal tool to carefully scrape any rough areas. Work slowly and methodically around the ball, applying even pressure. This will level any bumps or grooves in the clay.
Use a wet sponge to softly buff and blend the surface. Wipe in circular motions to polish and unify the texture. The sponge will catch any fine ridges and fill small gaps without distorting the shape.
Check for any fingerprints, smudges, or indentations. Carefully press out any marks with your fingers or tools. Fingerprints can leave visible spots after firing, so it’s important to remove them during this step for a flawless finish.
Work slowly and gently during this stage. Rushing may cause cracks or damage to the refined shape. Frequent smoothing and light pressure is key for a perfectly smooth clay ball.Continue refining and checking until the entire surface has a consistent, polished appearance.
Check Diameter
After shaping the clay into a rough sphere, it’s important to check the diameter to ensure the ball is perfectly round. The most accurate way to do this is by using calipers to precisely measure the diameter at multiple points around the sphere.
Start by taking a measurement from the top to bottom poles of the sphere. Then take measurements at four evenly spaced points around the equator. Compare all the measurements, and if there is more than 1-2 mm of variation, additional adjustments will need to be made.
Carefully pinch and smooth any bulging or indented sections until the diameter measurements are equalized. Take additional measurements after each adjustment. The ball may need to be slightly elongated to compress bulging sections before tapering the ends back into a sphere. With patience and precision, the clay can be worked into a perfect sphere with equal diameter throughout.
Achieving a uniform diameter is crucial for creating a flawless spherical shape. So take the time to repeatedly measure and finely tune the entire surface until all measurements align. Once the diameter is consistent within 1 mm all the way around, the ball’s shape will be beautifully spherical and ready for finishing.
Let Dry
After shaping and smoothing the clay ball, it is important to let the clay dry partially before firing or applying any finish. However, you don’t want the clay to dry completely at this stage.
Allow the ball to air dry for at least a few hours, or preferably overnight. As the clay dries, moisture evaporates from the surface. This firms up the clay and makes the texture more resilient to handling.
Check the clay periodically. When it lightens slightly in color and feels cool and leather-hard to the touch, it has dried enough for the next steps. The surface should not feel tacky. There should be no fingerprints left if you gently press the clay.
Too little drying can cause cracking or warping later when firing or glazing. However, you don’t want the clay to become completely bone-dry, as it will be more prone to cracking and less malleable.
Proper partial drying is key for further refining or embellishing the surface, and preparing for firing and finishing.
Fire the Clay
Firing the clay is a crucial step to harden and finish your clay ball. It’s important to follow the kiln’s instructions closely regarding firing time, temperature, and ramp speeds. Clays generally fire between 1800-2200°F, but verify the specific range for your clay type. Slow ramp speeds, like 200°F per hour, help prevent cracks and explosions from trapped moisture and gases. The clay must reach its maturation point to fully harden while avoiding over-firing that can cause bubbling or distortion.
Set the kiln to an appropriate peak temperature based on your clay type, typically around 2000°F or cone 6. Maintain that maximum temperature for 1-2 hours before cooling. The longer the clay can soak at peak temperature, the harder and more durable it will become. Insufficient temperature or time in the kiln will result in a fragile, brittle final piece. Carefully monitor the kiln throughout the entire firing process to ensure proper results. With adequate firing time and temperatures, your sculpted clay ball will emerge hardened, strong, and ready to finish.
Inspect Final Piece
Once the clay ball has been fired in the kiln, it’s time to inspect the final piece. This step is critical for confirming that the ball retained its ideal shape throughout the firing process. Carefully examine the ball from all angles, feeling for any irregularities or flat spots that may have developed. A perfectly spherical ball should feel smooth and even across the entire surface.
Next, inspect the surface smoothness. Running your fingers over the surface, it should feel completely smooth without any cracks or rough patches. Small scratches can be lightly sanded out, but deep cracks may require reforming the shape and re-firing the piece.
Finally, check that the clay ball fired to the expected color. Different clay bodies will fire to various colors from a very light buff to deep red and brown. Ensure the final color aligns with the specific clay type used. Dramatic shifts in color can indicate an issue with the firing temperature or duration.
With the shape, smoothness, and color verified, the clay ball is ready for any final finishing steps and can be put to use.
Apply Finish
After the ball has been fired, you have a few options for finishing it to bring out an attractive look. You can leave it natural with an unglazed terra cotta appearance. Or add color and shine with paints and glazes.
Acrylic craft paints are an easy way to add color. Make sure to use ones formulated for ceramics that can withstand high temperatures. Apply in thin coats using a small brush. Let dry fully between coats.
For a glossy look, use ceramic glazes formulated for the clay body and firing method used. Apply with a brush, sponge, or pouring to create unique effects. Fire again according to glaze directions to melt and permanently fuse the glassy coating.
Consider combinations like adding black acrylic paint accents over a blue poured glaze. Or mixing glazes for layered multicolor finishes. The options are endless for creative and artistic looks.
Finishing the ceramic ball brings the whole sculpting process full circle. While optional, applying color, shine, or design takes the final piece to the next level for displaying.


