How Do You Make A Pottery Yarn Bowl?
A pottery yarn bowl is a ceramic bowl specially designed to hold skeins of yarn for knitting or crocheting projects. The smooth, curved sides of the bowl allow the yarn to pull easily without tangling or knotting up. Yarn bowls make crafting more convenient by keeping the yarn ball contained in one place instead of rolling around.
Using a yarn bowl offers several benefits:
- Prevents yarn tangling and knotting
- Allows yarn to flow smoothly as you knit or crochet
- Keeps yarn clean since it stays contained in the bowl
- Portable to take your knitting projects anywhere
- Wide variety of styles and designs to match your décor
Creating your own pottery yarn bowl involves shaping the basic bowl form, adding decorative details, letting it dry properly, applying glaze or paint, attaching a base, and finally firing the clay in a kiln. With some creativity and patience, you can make a custom yarn bowl that fits your needs and style.
Materials Needed
The main material you’ll need is air dry clay or polymer clay. Air dry clay is an easy clay for beginners to work with as it doesn’t require baking to set and harden. Polymer clay is more durable but does need to be baked after sculpting to cure it. Pick whichever clay suits your project best.
You’ll also need some clay sculpting tools like a rolling pin, carving tools, and clay shaping tools. These will help you sculpt the basic bowl form and add decorative details.
Acrylic paints and brushes are optional if you’d like to paint your finished clay bowl. And you’ll need some kind of clear glaze or finish to seal and protect the bowl once complete.
Make the Basic Bowl Shape
The key to making the basic bowl shape is first creating a flat clay base, and then building up the sides using the coiling technique. Here are the steps:
Roll out and cut clay base
Start by rolling your clay out into a 1/4 inch thick slab using an acrylic roller or rolling pin. Make sure the clay is softened and conditioned so it rolls out smoothly without cracking. Roll out a circular piece roughly 1-2 inches wider in diameter than you want the finished bowl to be.
Then, use a knife or template to cut a perfect circle from the slab. This will be the base of your bowl. Try to get it as even and smooth as possible.
Create bowl sides with coiling method
To build up the sides, you’ll use the clay coiling technique. Roll out “snakes” of clay into long coils, approximately 1/4 inch thick. Apply slip (liquid clay) to the top outer edge of the base circle.
Begin laying your clay coils on top, slowly building up and overlapping the coils while gently blending and smoothing where they meet. Work progressively higher until the bowl sides are the desired height.
Smooth seams and shape
Once you’ve reached your desired height, smooth the inner and outer seams between coils by gently rubbing with your fingers, a metal scraper, or rubber rib. Create a nice smooth finish.
You can refine the shape by sculpting with your hands, curving the sides gently outward into a bowl form. Don’t make the walls too thin. Let the clay firm up slightly before final shaping.
Add Decorative Details
Once the basic bowl shape is made, you can add decorative details to make your pottery yarn bowl unique. Here are some ideas for embellishing your bowl:
Make ridges, scallops, etc. on rim
Use your fingers or small sculpting tools to add ridges, scallops, zigzags, or other patterns to the rim of the bowl. This can create an interesting border effect as well as add visual interest.
Add handles or feet if desired
Attach coil “handles” to the sides of the bowl if you want to add function and design flair. You can also sculpt small feet or a base out of additional clay. Let these dry as long as possible before attaching to the bottom of the bowl.
Texture outside of bowl
Use different household items to imprint textures on the outside of the dried clay bowl. Try pressing in lace, burlap, leaves, seashells, or other interesting objects. You can also use clay sculpting tools to carve patterns and textures.
Let Clay Dry
Properly drying your clay is one of the most important steps when making a pottery yarn bowl. Rushing the drying process can lead to cracks or exploding clay. Here are some tips for safely drying your bowl:
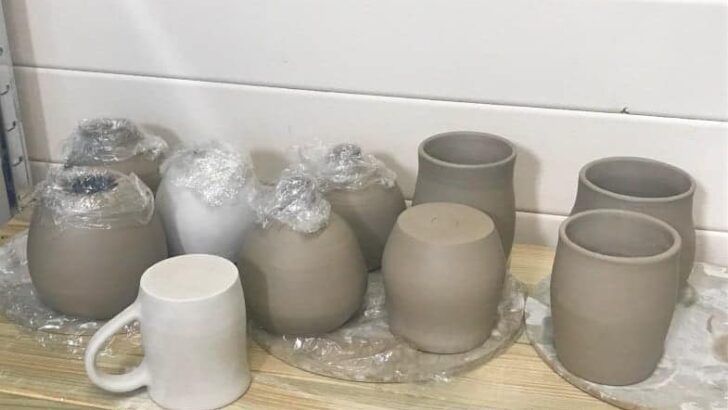
Allow your clay bowl to air dry completely before firing or applying any finish. The drying time will vary based on factors like clay thickness, humidity and air circulation. Expect the drying process to take at least a few days. Keep the clay away from direct sunlight and heat during this time.
For faster drying, you can use a food dehydrator or oven on the lowest heat setting with the door propped open. Just be sure to closely monitor the clay so it does not overheat. Rotate the bowl periodically for even drying. The clay should be dry to the touch with no cool, damp areas before moving to the next step.
Proper drying prevents cracking and exploding that can ruin all your hard sculpting work. Be patient and allow adequate drying time before decorating, firing or using your homemade pottery yarn bowl.
Apply Color and Finish
Once the pottery yarn bowl has dried completely, you can add color and finish to make it look more decorative. Acrylic paints work well for adding color accents to the bowl. Use a small paintbrush to paint designs or patterns onto the bowl surface. Let the acrylic paint dry fully before continuing.
Next, apply a clear glaze or finish to the entire bowl using a soft paintbrush. This will seal and protect the bowl, while also adding sheen. Use long, even brushstrokes to coat the entire bowl, including the underside. Make sure you don’t miss any spots. Let the glaze or finish cure fully as per the manufacturer instructions, usually at least 24 hours.
Applying color and a protective finish brings out the natural beauty of the clay and makes the pottery yarn bowl ready for use and display. Take your time with this finishing step to end up with a bowl you’ll be proud of.
Make a Base
To finish your pottery yarn bowl, you’ll need to add some kind of non-slip base. This will ensure your bowl sits firmly on a table or shelf without sliding around. There are a few different options for making a base:
Attach Felt Pads
Self-adhesive felt furniture pads make a quick and easy non-slip base. Cut the pads to fit the bottom of your bowl, peel off the backing paper, and press them firmly onto the underside of the clay. Felt pads come in various sizes and can be stacked for extra grip.
Add Cork
Gluing on a layer of cork tile or sheet cork is another way to create a non-slip base. Use craft glue or epoxy to affix the cork to the bottom of the dried clay. Cork provides a protective barrier and helps prevent scratches if placing your bowl on a hard surface.
Make a Wooden Base
For a more finished look, attach a custom wooden base. Cut a round or square piece of unfinished wood slightly larger than the bottom of your bowl. Drill pilot holes and use wood screws to securely attach the wood base to the underside of the clay. Finish the wood with stain, paint or polyurethane.
Use and Care
Caring for your pottery yarn bowl will help it last for many crochet and knitting projects to come. Here are some tips for proper use and care:
Store yarn inside the bowl while working on projects. The bowl helps contain the yarn, keeping it clean and tangle-free. When not in use, remove the yarn and store the bowl in a safe place.
Handwash the bowl gently with mild soap and water. Avoid submerging in water or using abrasive cleansers. Gently wipe with a soft cloth to clean. Allow to fully dry before using again or storing.
With proper use and care, your handmade pottery yarn bowl will be a cherished crafting companion for years of cozy projects.
Troubleshooting
When making pottery yarn bowls, you may run into some common issues like cracks forming as the clay dries, paint rubbing off, or yarn snagging on rough areas. Here are some tips for troubleshooting these problems:
If cracks start to form in the clay as it dries, there are a couple things you can try. First, make sure the clay is drying slowly and evenly. Dramatic temperature changes can cause cracks. Also, consider wedging your clay again before using it to remove any air pockets. Finally, you can fill small cracks with watered-down clay slip.
If your acrylic paint rubs off the finished piece, you likely didn’t apply enough layers. Try to use 3-5 thin layers of paint, letting each dry fully. You can also apply a sealant when finished painting to help protect the paint. Make sure to use paint specifically formulated for clay and ceramics.
If yarn is getting caught on rough areas of your bowl, you’ll need to smooth it out. Use a damp sponge or fine grain sandpaper to gently smooth any rough patches before painting. Avoid handling the bowl too much before it’s fired, as the clay can get abrasions. Use a soft paintbrush to apply glaze rather than dipping to prevent new rough areas.
Final Thoughts
Making your own pottery yarn bowl is a fun and creative project you can be proud of. We walked through the full process – choosing the right clay and tools, shaping the basic bowl, adding decorative details like texture and cutouts, letting it dry properly, applying color, attaching a base, and finally curing. While it takes some time and patience, it’s very rewarding to make something beautiful and functional with your own two hands.
Feel free to get creative and make your yarn bowl truly unique. Try different shapes beyond the basic round bowl, add handles or feet, incise more patterns, or play with different glazing effects. The possibilities are endless. And remember, if your first attempt doesn’t turn out perfectly, that’s okay. Making pottery is a learning process, so just keep practicing.
The best part is that once your bowl is complete, you’ll be able to enjoy using it for years to come. As you knit or crochet, having your yarn contained in a lovely handmade vessel will make your hobby even more relaxing and inspiring. Your bowl will become a meaningful keepsake that reminds you of the joy of creating.


