How Do You Make A Soap Pump Work?
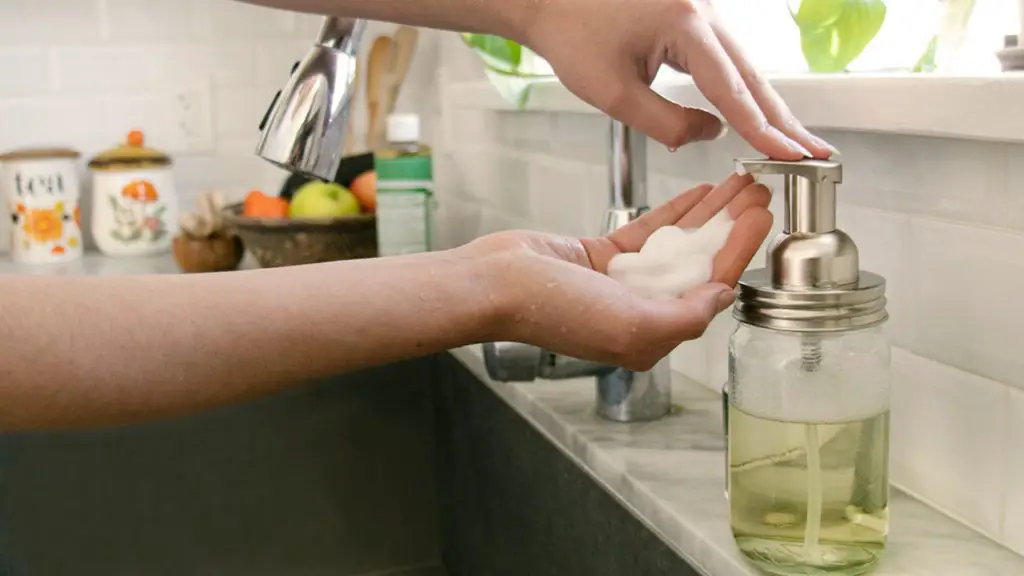
A soap pump is a device that dispenses liquid soap or hand sanitizer when activated. It allows users to easily dispense soap without having to handle the bulk container directly. Soap pumps make hand washing more sanitary and convenient in public restrooms, kitchens, and other settings where multiple people share soap access.
Soap pumps work by using a pump mechanism to draw soap up from the bulk container and dispense a measured amount when pushed or pulled. This provides hands-free, no-touch soap access. Soap pumps allow bulk soap containers to be refilled less frequently since only a small amount is dispensed at a time. They help reduce contamination and make hand hygiene easy.
Parts of a Soap Pump
A soap pump consists of the following main components:
- Pump mechanism – This is the internal mechanism that draws soap from the reservoir and dispenses it when the actuator is pressed. It contains valves, pistons, springs, and seals.
- Spout – The nozzle through which soap is dispensed. It is often removable for cleaning.
- Reservoir – The internal container that holds the soap. It is usually made of plastic.
- Actuator – The part pressed by the user to activate the pump. Often a lever or button on top of the spout.
- Closure – Attaches the pump to the reservoir opening. Usually screws or snaps into place.
- Check valve – Allows soap to flow in one direction and prevents backflow.
Additional parts can include a pump housing which encloses the inner workings, a lockable cover to prevent tampering, and mounting hardware for attaching it to a wall or sink.
The main components work together to draw soap from the reservoir and dispense it through the spout when the actuator is engaged. The type and quality of the parts affect the pump’s durability, dosage, and performance.
Sources:
https://www.allpartitions.com/soapdispensers.html
How the Pump Mechanism Works
The pump mechanism in a soap dispenser relies on a one-way valve and the principles of pressure and suction to draw soap up through the pump and out of the nozzle when dispensed. The main components involved are the pump head, the dip tube, and the bottle itself.
The dip tube extends from the pump head down into the bottle, with the lower opening submerged in the soap. When the pump head is pressed down, it creates pressure inside the dip tube, forcing the one-way valve at the top to close. This pressure forces the soap at the bottom of the dip tube to travel upwards through the tube.
When the pump head is released, it creates suction inside the dip tube. This opens the one-way valve at the top and draws more soap from the bottle up into the pump head, while the valve at the bottom prevents the soap from flowing back down. Repeated presses of the pump head continues drawing soap up through the valve and out the nozzle.https://blog.bottlestore.com/how-do-soap-dispenser-pumps-work/
Choosing the Right Pump
When selecting a pump for your soap dispenser, you’ll need to consider the viscosity of the soap you plan to use. Thinner, watery soaps require a different pump than thicker, lotion-like soaps. The pump needs to be able to push the soap through without too much effort.
Look for pumps specifically designed for liquid hand soap or foaming hand soap. These tend to work well for thinner soap consistencies. For thicker soap or lotion, look for a pump made for lotions or creams. The opening and mechanisms will be sized appropriately. You can find viscosity guidelines on pump packaging or product descriptions to match your soap.
Consider the desired output for the pump. Do you want a small squirt or a larger dollop? Select a pump nozzle with the right sized opening and flow control to dispense the amount you prefer. Typically, wider openings and less flow restriction allow more soap output.
Make sure to select a durable pump designed for frequent use. For hand washing, it will be pumped multiple times per day. The pump should be made from quality materials like durable plastic, ceramic, or metal.
Lastly, the pump should fit properly onto your bottle or container opening. The threading needs to match up for a tight seal. Test different pump tops and caps until you find the right fit for your soap bottle.

Some good pumps to consider are from reputable brands like Bottiful, Aptar, and Silgan Dispensing.
Assembling the Components
Assembling the components of a soap pump requires attaching the spout, tubing, valves, pump mechanism, and other parts together properly. Here are the key steps:
First, insert the straw or suction tube into the opening of the pump mechanism, making sure it is fully seated. This tube will draw the soap up from the bottle or reservoir below. Next, attach the spout to the front of the pump mechanism using the provided hardware or threads. Ensure a tight seal so leaking does not occur.
Then, attach one end of the discharge tube to the outlet on the underside of the pump mechanism. This will feed the drawn soap to the spout. Attach the other end to the inlet fitting on the spout or dispenser head. Use hose clamps or other hardware to secure the tubing connections.
If your pump includes a check valve, install this on the discharge tube. The valve prevents backflow and dripping. Position the valve so that the flow moves in only one direction – from pump to spout.
Finally, install any filters, caps, or other accessories per the manufacturer’s instructions. Check all connections to confirm everything is tight and properly assembled before filling and priming the unit.
With the major components assembled securely, the pump should be ready for installation and use. Always refer to the specific guide for your model and setup during assembly.
Filling and Priming
Filling and priming the soap pump properly is an important step to ensure it functions as intended. Start by removing the pump mechanism so you can access the reservoir. Use a funnel if needed to carefully pour soap into the reservoir without spilling. Leave about 1/2 inch of space at the top for the pump mechanism. Avoid overfilling as this can cause leaking or make it hard to reattach the pump. Refer to the pump instructions for exact fill levels.
Once filled, prime the pump by covering the soap dispensing hole with your finger or thumb. Then repeatedly push the pump head down several times until you see a steady stream of soap come out when you remove your finger. This primes the pump and ensures the soap will flow properly when you use it. Some models may require 10-15 pumps to fully prime. Priming also eliminates any air pockets that could hinder performance. Consult the manufacturer’s guide for specific priming recommendations. Proper filling and priming is crucial for your soap pump to operate as designed.
Installing and Mounting
There are a few options for mounting your soap dispenser depending on your setup. The most common ways to mount are:
- Undermount – This involves installing the dispenser underneath your sink or counter. You’ll need access below to attach a mounting nut and tighten it properly. This keeps the dispenser hidden and out of the way when not in use.
- Deck mount – The dispenser installs directly through a hole in your sink or counter. Some models are designed specifically for deck mounting. This puts the dispenser right where you need it when washing up.
- Wall mount – For this you’ll need to locate a stud or use anchors to attach the dispenser directly to your wall near the sink. Make sure it’s positioned conveniently within reach.
Best practices for mounting include:
- Ensure the mounting location is solid and secure – on a stud or with anchors in drywall.
- Follow manufacturer instructions for proper installation.
- Check for clearance – make sure the dispenser doesn’t interfere with faucets or other items under or around the sink.
- Consider convenience of location based on your height and reach.
With some advanced planning and proper execution, you can mount your soap dispenser securely in a convenient spot. This will lead to smooth operation and hassle-free hand washing for years to come.
Use and Maintenance
It’s important to properly maintain your soap pump dispenser to ensure it continues working well. Here are some tips for refilling, cleaning, and troubleshooting common issues:
Refilling Soap
Most soap pumps need to be refilled about once a month depending on usage. Check the soap level regularly and refill before it runs out completely. To refill, remove the pump head and pour your preferred hand soap directly into the dispenser tank. Avoid overfilling as this can cause the pump to clog.
According to Moen’s instructions, only fill their soap dispensers 3/4 full to allow proper operation of the pump mechanism (Source: https://solutions.moen.com/Article_Library/Soap_Dispenser_Care_and_Cleaning).
Cleaning
For exterior cleaning of the soap dispenser, wipe with a damp cloth and mild dish soap, then rinse and dry. Avoid letting soap residue build up. For interior cleaning, pump warm soapy water through the dispenser periodically to remove any clogs or residue.
BLANCO recommends rinsing the exterior with water often to keep soap buildup at bay (Source: https://www.blanco.com/us-en/service/cleaning-and-care/soap-dispenser-care/).
Troubleshooting Issues
If the pump starts to dispense soap slowly, clean the interior and check for clogs. If the pump stops working, try cleaning it thoroughly. Make sure the dispenser is at least 1/3 full of soap – being too empty can prevent the pump from working properly. If issues persist, you may need to replace the pump mechanism.
Customization Options
One of the great benefits of soap pumps is the ability to customize them to match your style and decor. There are various ways to personalize your soap pump:
The housing around the pump mechanism itself often comes in different colors and materials like metal, plastic, or glass. For example, The Polished Jar offers fully customizable soap dispensers in glass or plastic where you can customize the font, color, and engravings.
You can also customize the scent of the soap itself. Many brands offer soap refills in a variety of scents like lavender, citrus, vanilla, and more. Or you can purchase plain unscented soap and add your own essential oils to create a signature scent.
Some pumps allow you to easily insert decorations inside the reservoir around the soap cartridge. This lets you add items like seashells, dried flowers, or decorative beads to complement your bathroom or kitchen decor.
For a coordinated look, purchase soap pumps that match other items like lotion dispensers, toothbrush holders, tumblers, and more. Sets often come with optional customization like monogramming.
With the range of customization options for materials, scents, engravings, and decorations, it’s easy to find or create soap pumps that align with your personal style.
Conclusion
A soap pump is a simple but handy device that makes it easy to dispense liquid soap or hand sanitizer. By understanding the basic parts and mechanism, you can choose the right pump, assemble it properly, fill and prime it, and install it for convenient use. With some maintenance and customization, a soap pump can provide years of hygienic hand cleaning.
In summary, the key components of a soap pump include the pump mechanism, tubing, nozzle, soap reservoir, brackets and fasteners. The pump creates suction to draw soap up through the tubing and out the nozzle when the lever is pressed. Filling the reservoir, priming the tubing, and sealing connections are important steps during assembly. Proper mounting and occasional cleaning will keep the pump working smoothly. While basic pumps are widely available, you can also customize them with different spout styles, materials, or dispensed liquids.
With this overview of how soap pumps operate, you should now have the knowledge to install one in your home, workplace, or other facility. They are an affordable way to promote hand hygiene. A functioning soap pump also demonstrates neat design – with simple physics enabling convenient access to cleaning solutions.


