How Do You Make Easy Clay For Kids?
Clay is a fun, creative material that allows kids to explore their imagination and artistic side. There are many different types of clay that are safe and easy for children to use, such as polymer clay, air-dry clay, and homemade clay made from household ingredients. Playing with clay offers a variety of benefits for children’s development. It helps improve fine motor skills, hand-eye coordination, and sensory stimulation. Clay is also an open-ended artistic material that allows kids to create anything they can dream up. Whether kids want to make simple clay creations or more elaborate sculptures, clay provides endless opportunities for creative play and learning.
Supplies Needed
To make this easy homemade clay, you’ll only need a few simple ingredients that you likely already have in your kitchen:
- 2 cups baking soda (Source)
- 1 cup cornstarch (Source)
- 1 cup water
- Food coloring (optional)
- Mixing bowl & spoon
That’s it! The beauty of this clay recipe is that it requires so few ingredients, making it easy and affordable to whip up anytime.
Step 1: Mix the Baking Soda and Cornstarch
The first step in making homemade clay is to combine the main ingredients – baking soda and cornstarch. As recommended by the recipe from the ARM & HAMMER website, add 2 cups of baking soda and 1 cup of cornstarch to a large mixing bowl (Source). Stir together with a spoon until the baking soda and cornstarch are well combined. Baking soda gives the clay elasticity and allows it to harden while the cornstarch provides structure.
By mixing 2 parts baking soda with 1 part cornstarch, you achieve the right consistency for molding and sculpting. Make sure there are no clumps of baking soda or cornstarch left before moving onto the next step.
Step 2: Add Water Slowly
The key when adding water to the baking soda and cornstarch mixture is to go slowly. Add the water 1 tablespoon at a time, mixing thoroughly after each addition. Pour the water into the saucepan and then use a spoon or spatula to mix it into the dry ingredients.
Keep mixing and adding water tablespoon by tablespoon until a doughy clay-like consistency forms. The total amount of water needed can vary between 1 to 1 1/4 cups based on the humidity of your environment. Add only enough water so the mixture sticks together when pressed without being too sticky.
Mixing slowly allows you to control the consistency and prevents the clay from getting too thin and watery. Take your time with this step for the best homemade clay results. The clay should form into a smooth, pliable dough that’s easy for kids to shape and mold.
Step 3: Knead the Clay
Kneading the clay is a crucial step to make sure the ingredients bind together and the clay becomes smooth and elastic. Turn the mixture out onto a flat surface dusted with cornstarch to prevent sticking. Using the palms of your hands, start kneading the clay by pressing down and forward. Fold the clay over and press down again repeatedly for 2-3 minutes until the clay becomes one uniform material that is smooth, elastic, and free of cracks [1]. Proper kneading allows the ingredients to fully incorporate, removes air bubbles, and develops the plasticity of the clay.
As you knead, be firm but don’t overwork the clay. If it starts to feel too dry, wet your hands slightly. The finished clay should hold its shape when molded and bounce back a bit when poked. Kneading well at this stage makes the clay easier to work with for kids’ projects.
[1] https://www.wikihow.com/Knead-Clay
Step 4: Add Food Coloring (Optional)
Adding food coloring to the clay is an easy way to create colored clay for kids’ projects. Here’s how to add color:
Separate the clay into a few sections. Depending on how much clay you made, separate it into 2-4 portions. Put each portion onto a sheet of wax paper or a plate.
Add drops of food coloring and knead to mix in the color. Start with just a couple drops of food coloring and knead it in well. Add more drops if you want a deeper color. Knead each portion well until the food coloring is fully mixed in and incorporated.
Food coloring works best on white clay. If your clay is naturally off-white, the colors may be muted. For more vibrant colors, use professional clay coloring compounds or acrylic paints (make sure they are non-toxic). See: Colour Mill Oil-Based Food Coloring.
Step 5: Let the Clay Dry
Once you’ve finished sculpting your clay creation, it’s time to let it dry and harden. Air dry clay dries through evaporation, as the water in the clay slowly evaporates over time. Here are some tips for letting your clay dry properly:
Store any unused clay in an airtight container in the fridge. This prevents the clay from drying out and going bad. According to this source, air dry clay can last for months in the fridge.
Air dry your clay creations for 1-3 days until they become hard. Place them in a well-ventilated area out of direct sunlight. Larger sculptures may take longer to fully dry. Allow even longer drying times if the climate is humid. Refer to this guide for more details on air dry clay drying times.
Avoid handling or moving delicate clay pieces until they have dried and hardened fully. Clay can easily break or become damaged when still soft.
Clay Recipe Variations
There are a few simple ways to modify the basic clay recipe to create different textures and effects:
Use a 2:1 ratio of baking soda to cornstarch. The standard recipe calls for a 1:1 ratio, but increasing the baking soda creates a smoother, less gritty clay texture. Just use 2 cups of baking soda and 1 cup of cornstarch.
Substitute all-purpose flour for the cornstarch. The texture will be slightly different, but still workable. You can experiment with using 100% flour or doing half flour, half cornstarch.
Add a few drops of essential oils like lemon, peppermint, or lavender to create scented clay. Let kids mix and match scents for a custom clay creation.
For more ideas on modifying the clay recipe, check out this article.
Clay Project Ideas
There are so many creative ways that kids can use the homemade clay for fun projects including sculptures, jewelry, magnets, ornaments and more. Here are some ideas to get you started:
Make sculptures and shapes like animals, cars, letters or anything you can imagine. Let the sculptures air dry or bake them to harden them.
Roll the clay flat and use cookie cutters or molds to imprint fun shapes and designs. Create holiday ornaments, magnets or refrigerator art by poking a hole before baking and adding ribbon or a magnet back.
Use tools like stamps, straws, forks or popsicle sticks to imprint textures and patterns into the clay. Get creative with different types of imprinting.
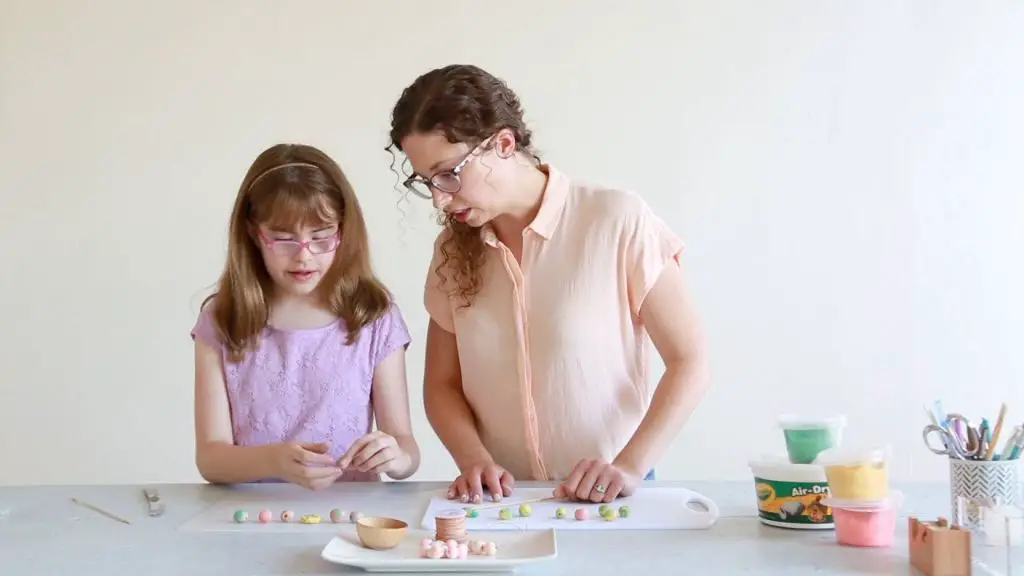
Make beads, pendants or earrings out of polymer clay by rolling small balls and poking a hole through before baking. String onto cord or wire to make jewelry.
Encourage kids to make pinch pots, clay bowls, vases or cups by gently pressing their thumbs into a ball of clay and evenly turning and stretching the sides upwards.
Let kids make their own specialty clay by mixing colors and textures like glitter. This adds variety to projects.
Conclusion
Making homemade clay with kids is an easy and fun activity. All you need are a few simple ingredients like baking soda, cornstarch, and water. Mix the ingredients together to form a dough, knead thoroughly, and let it dry. Adding food coloring allows kids to create clay in their favorite colors. Once dry, the clay holds its shape well for creative projects.
Playing with clay provides many benefits for children. It builds hand-eye coordination as they knead and mold the clay. Creating sculptures engages their imagination and self-expression. Different textures and tools can be used to imprint shapes and patterns. Clay play also has sensory elements, allowing kids to explore the feel and smell of the clay. Most importantly, it offers an open-ended artistic material for freeform creation.
Homemade clay lets kids create keepsake art, develop skills, and simply have fun. Encourage them to make their own unique clay creatures, jewelry, and more. With adult supervision and creativity, clay play can provide endless hours of learning and enjoyment for children.