How Do You Make Food Safe Pottery At Home?
Food safe pottery refers to ceramics that have been properly prepared and fired to create tableware that can safely come in contact with food and drink for serving, consumption, and storage. Making your own food safe pottery at home involves thoughtful choices in materials and careful firing techniques to produce durable, non-toxic pieces.
The process of making food safe pottery begins with selecting an appropriate clay body and preparing it properly. Next, you will shape the clay using methods like handbuilding, wheel throwing, or molds. The pottery must then slowly dry before going through one or more firings in a kiln. At the right high temperatures, the clay and any glazes applied will mature and become food safe. Testing your finished pieces will ensure no leaching of lead or other harmful substances. With care and caution, homemade pottery can become trusted kitchenware and tableware.
Choosing Clay
When making pottery at home, the type of clay you choose is very important. There are three main types of clay used in pottery:
Earthenware – This clay contains lower amounts of fluxes than stoneware and porcelain. It fires at lower temperatures, between 1000-1200°F. Earthenware absorbs water and is not as strong as stoneware or porcelain.
Stoneware – Stoneware clay contains larger amounts of fluxes and is fired between 2200-2400°F. It is dense, hard, and less porous than earthenware. Stoneware is water-resistant and strong.
Porcelain – Porcelain clay is highly refined and purified. It fires at very high temperatures, between 2200-2400°F. Porcelain is strong, durable, and impermeable to water.
For food-safe pottery, stoneware and porcelain clays are the best choices. They fire to a high enough temperature to vitrify the clay, making it non-porous. When choosing clay, look for the following properties:
- Plasticity – The clay holds its shape well when worked
- Strength – The fired ware will be durable
- Firing range – Match the temperature your kiln can reach
- Absorption – Low to non-absorbent after firing for food safety
- Color and texture – Consider the finished look you want
Test any new clay on a small scale before using it for finished pieces. This will ensure you get the results you expect from the clay you have chosen.
Preparing the Clay
Once you have chosen the appropriate clay for your project, you will need to prepare it before shaping. The two main steps in preparing clay are wedging and kneading to remove air bubbles.
Wedging involves cutting the clay into chunks and then pressing it back together. This process aligns the clay particles and removes air pockets. Start by cutting the clay into fist-sized pieces. Then slam the clay down onto your work surface and press it back together into a ball shape. Repeat this process, cutting and reforming the clay several times until it becomes one consistent material with no visible air bubbles.
You can also knead the clay by pressing down and folding it over itself repeatedly. Kneading works the clay to make it smooth and pliable. Form the clay into a ball shape and then use the palms of your hands to push down on the clay while turning it. Continue kneading for several minutes until the clay feels soft and uniform. Check for any remaining air pockets and work them out.
Properly wedging and kneading your clay ensures an even consistency that will be easier to shape. It also removes air bubbles that could expand and crack during firing.
Shaping Methods
There are several techniques that can be used to shape pottery at home without the need for expensive equipment. The most common handbuilding techniques are pinch, coil, and slab construction.
Pinch – This is one of the most basic and ancient methods of handbuilding. Start with a ball of clay and pinch it between your fingers to form the desired shape. Pinch pots allow you to make simple bowls, cups, and vases.
Coil – Roll out “snakes” or coils of clay, then stack and press the coils together to build up the piece. Add water or slip between layers to help bond the coils. Coiling enables you to make larger, taller pieces like jars and pitchers.
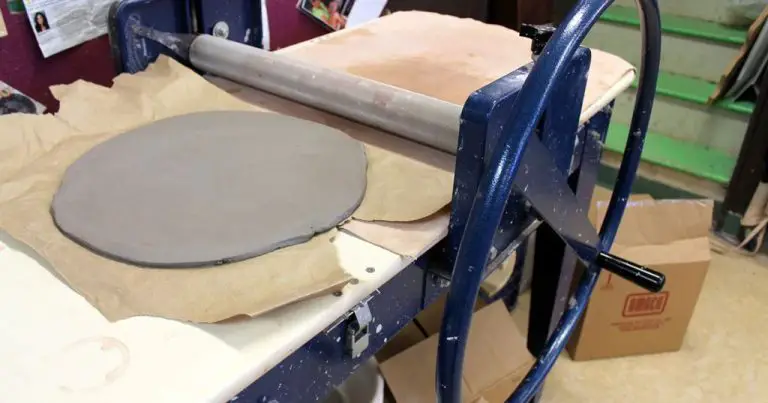
Slab – Roll out flat “slabs” of clay to a consistent thickness using guides like rolling pins or cut 2x4s. Cut and stack the slabs to form box-like shapes or drape over molds. Great for making trays, plates, and lidded containers.
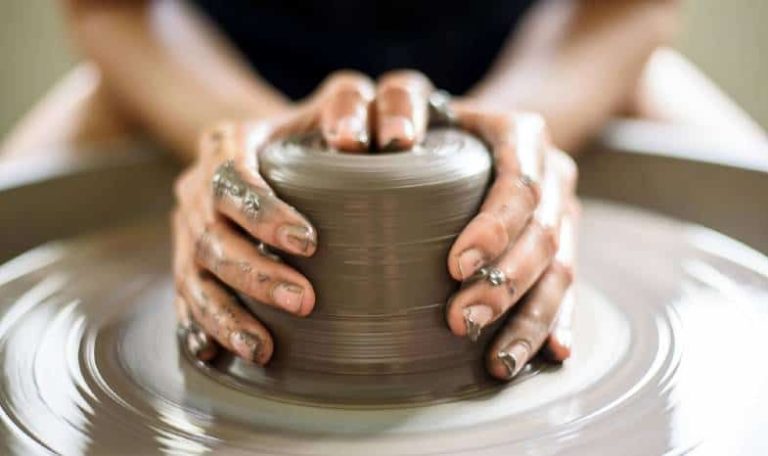
For more complex shapes, many hobbyists turn to wheel throwing using a pottery wheel. This takes practice to center the clay and requires an electric or kick wheel, but allows symmetrically shaped pots, vases, bowls, cups, and more. Start with soft clay and open forms before attempting enclosed shapes. YouTube tutorials can help you learn wheel throwing techniques.
Drying and Firing
After you have shaped your pottery pieces, they need time to dry thoroughly before firing. Air drying times depend on factors like humidity, air circulation, thickness of the clay pieces, and type of clay used. In general, allow 1-2 weeks for small pieces to air dry completely. For larger, thicker pieces, drying could take several weeks.
Make sure pieces are bone dry before firing. Any moisture left in the clay will cause cracking or even explosions in the kiln. To test for dryness, weigh a piece before and after leaving it in a warm oven for several hours. If the weight does not change, it is fully dried.
The first firing, known as bisque firing, converts the clay into a permanent ceramic material. Low fire clay bisque temperatures are usually around 1600-1800°F. Mid-range clays bisque between 1800-2100°F, while high fire clays need 2200-2300°F or hotter. Consult the packaging or manufacturer’s guidelines to determine the optimal bisque temperature for your clay. Slowly increase the kiln temperature, holding at intervals to allow heat to fully penetrate the clay. The bisque firing makes the pottery hard and porous, ready for applying glazes.
Applying Glazes
One of the most important steps in creating food safe pottery is applying the right glaze. There are specific glazes formulated to be non-toxic and safe for food use.
Look for glazes labeled as “food safe” or lead-free. Lead glazes can leach toxins when exposed to foods, especially acidic foods like tomatoes or citrus. Food safe glazes use substitutes like zinc or other minerals instead of lead.
When buying glazes, check the manufacturer’s information for a statement about safety for functional ware. Reputable brands will provide guidance on what glazes pass FDA standards.
In addition to choosing the right glaze, proper application technique is key. Apply glazes evenly in a thin layer using a soft brush. Too thick of an application can cause crawling or cracking. Allow the piece to fully dry before a second coat if needed. Firing schedule specifics will depend on the type of clay and glaze used.
Multiple glaze layers and colors can be used for decorative effects. But limit accent glazes on surfaces touching food to those confirmed as non-toxic. With careful glaze selection and application, you can achieve beautiful as well as food safe finished pottery.
Final Firing
The final firing is the most crucial step for creating food-safe pottery at home. This firing permanently sets the clay and glaze materials through extremely high temperatures in the kiln. It is critical to follow the recommended guidelines for the firing schedule of your specific glazes.
Most glazes will require a final firing temperature between 2200-2300°F. Slowly raising the kiln temperature according to the rate guidelines allows the glaze materials to mature properly. Firing too quickly can cause defects like pinholes or cracking. Likewise, maximum temperature and hold times need to be precisely followed.
Firing too high can cause glazes to become underfired and prone to leaching. Conversely, firing too low can lead to glaze ingredients remaining soluble. Verify your kiln’s performance with cones placed inside that melt at specific temperatures.
After firing is complete, resist the urge to open the kiln prematurely. Allow the kiln to cool down fully to room temperature before removing finished ware. Thermal shock from handling hot pottery can cause breakage or hairline cracks that compromise safety.
Test-firing tiles with your clay and glaze combination is the best way to confirm a fully matured melt. Send a sample for lead testing if concerned. With careful firing, your homemade pottery can be just as food-safe as commercial ware.
Testing for Safety
Once your homemade pottery is complete, it’s crucial to test it for safety before using it for food. Two key tests are checking for lead and inspecting for crazing.
Lead can leach from the clay, glazes or colorants into food and cause lead poisoning. While lead testing kits used to be expensive and difficult to find, now there are inexpensive kits available online and at most hardware stores. Simply swab the pottery and follow the instructions to check for dangerous lead levels. If lead is detected, do not use the pottery.
Crazing is a network of fine cracks that can form on the surface. Bacteria and chemicals can get lodged in the cracks and contaminate food. Carefully inspect all surfaces of finished pottery in bright light. If any crazing is visible, do not use the pottery for food.
Additionally, test the pottery with very hot water to ensure it can withstand the temperatures needed for cooking and serving food safely.
With the proper clay, glazes, and firing, homemade pottery can be safe for food use. But it’s critical to test for lead exposure and crazing first. Only serve food in homemade pottery that has passed inspection.
Using and Caring For Your Homemade Pottery
Once your homemade pottery is complete, be sure to follow these tips to keep it safe and usable for food:
Handwashing
Always wash your pottery by hand. The clay is porous, so dishwasher detergent can soak in and taint the flavor of your next meal. Handwashing allows you to thoroughly clean the surface while protecting the integrity of the clay.
Avoid Metal Utensils
Never cut or scoop foods with metal utensils on handmade pottery. The metal can scratch and damage the glazed surface, creating pathways for bacteria to hide. Use wood or plastic utensils instead.
Microwave Safety
Unglazed pottery is not microwave-safe, as the heat can cause cracks. If your pottery has an all-over glaze, you can microwave it, but be cautious of extreme temperature changes which can also cause cracking and crazing.
Conclusion
Making your own food safe pottery at home can be a fun and rewarding hobby. The basic process involves choosing an appropriate clay, preparing it properly, shaping your piece, allowing it to dry thoroughly, firing at high temperatures, applying food-safe glazes, and firing again. Proper drying, firing, and glazing are essential for creating non-porous pottery that does not leach chemicals or harbor bacteria.
For beginners, start with a simple clay recipe and shaping method. Allow plenty of time for pieces to dry before firing. Use a food-safe clear glaze for your first attempts. Always run tests to ensure the pottery is non-porous and lead-free. With practice, you can refine techniques and experiment with more advanced clays, shaping methods, and decorative glazes. The most important thing is to have fun while creating beautiful, functional, handmade pottery.

