How Do You Make Fused Glass Art?
Fused glass is a type of art made by heating pieces of glass in a kiln until they fuse together. The glass pieces may be colored, clear, or made into other shapes prior to fusing. Fused glass differs from traditional stained glass, where separate panes of glass are joined together by lead or copper foil.
The history of fused glass art begins roughly three and a half millennia ago, in ancient Egypt. It was by the shores of the Nile that artisans first discovered that placing crushed and powered glass into molds, then firing them produced decorative objects. Over centuries, glass workers in regions like the Middle East, Asia, and Europe developed new techniques for fusing and shaping glass.
Source: https://houseofuglyfish.com/history-of-fused-glass-art/
The basic fusing process involves layering pieces of glass in a desired pattern or design in a kiln. The kiln is then heated to around 1400-1500°F, which melts the glass pieces together. The glass becomes malleable when heated and fuses together into one solid piece as it cools. Firing times and temperatures vary depending on the project. The fused glass can be left smooth or slumped over a mold to create different shapes and textures.
Tools and Materials Needed
Fused glass art requires a few key tools and materials. The most important is the glass itself. There are many types of glass that can be used including:[1]
- Float glass – A common, inexpensive soda-lime glass
- Dichroic glass – Glass coated with a metallic oxide that displays spectral colors
- Frit – Crushed glass often used to create patterns
To cut the glass, you’ll need:[2]
- Glass cutter – A tool with a small cutting wheel on the end
- Glass cutting oil – Used to lubricate the cut
- Breaker/grozier – A tool used to snap the glass along the cut line
For grinding and smoothing the edges, you’ll need:[2]
- Glass grinder
- Silicon carbide grinding heads
- Dust mask – To avoid breathing glass particles
A kiln is necessary for fusing the glass together by heating it to high temperatures. Molds can be used to give shape to the glass.
Other handy accessories include glues, patinas, foils, cleaning products, and finishing supplies like stands and hangers.
[1] https://www.amazon.com/glass-fusing-supplies/s?k=glass+fusing+supplies
[2] https://threeriversartglass.com/
Preparing the Glass
Before assembling your fused glass project, you’ll need to select the right glass, cut the glass to size, grind the edges smooth, and clean the glass.
Selecting glass is an important first step. Different types of glass have different COEs (coefficients of expansion), which determines how they fuse together. For most fused glass projects, 96 COE glass is recommended as it provides a good level of compatibility between colors and brands. Some common 96 COE glass includes bullseye, spectrum, and Uroboros glass. Avoid window glass as it has a different COE and won’t fuse properly.
Once you’ve selected the right glass, you’ll need to cut it to the desired size and shape. Use a glass cutter to score the glass, then snap it along the score line with running pliers. For curved cuts, use glass nibblers. Be sure to wear safety glasses when cutting glass.
The cut edges of the glass will be sharp and need grinding. Use a glass grinder or silicon carbide sandpaper to smooth the edges. Grind until the edges are completely smooth.
Finally, thoroughly clean the glass pieces with a 50/50 mixture of vinegar and water or glass cleaner to remove any oil, dirt, or grease. Allow to fully dry before assembling your project.
Proper glass preparation is key to creating a beautiful fused glass artwork. Taking the time to select compatible glass, make clean cuts, smooth the edges, and clean the glass will ensure a professional result when fired.
For more details on selecting and preparing glass, check out this helpful guide: Ribbon and Holly Glass Dish
Creating the Design
Creating the design is one of the most creative and rewarding parts of making fused glass art. There are several techniques you can use to plan out your design:
Planning the design – Start by sketching out ideas and making small samples to test colors and effects. Consider the overall shape and flow of the design.
Using patterns – Look for inspiration in patterns found in nature, textiles, architecture etc. Draw or trace basic patterns onto the glass.
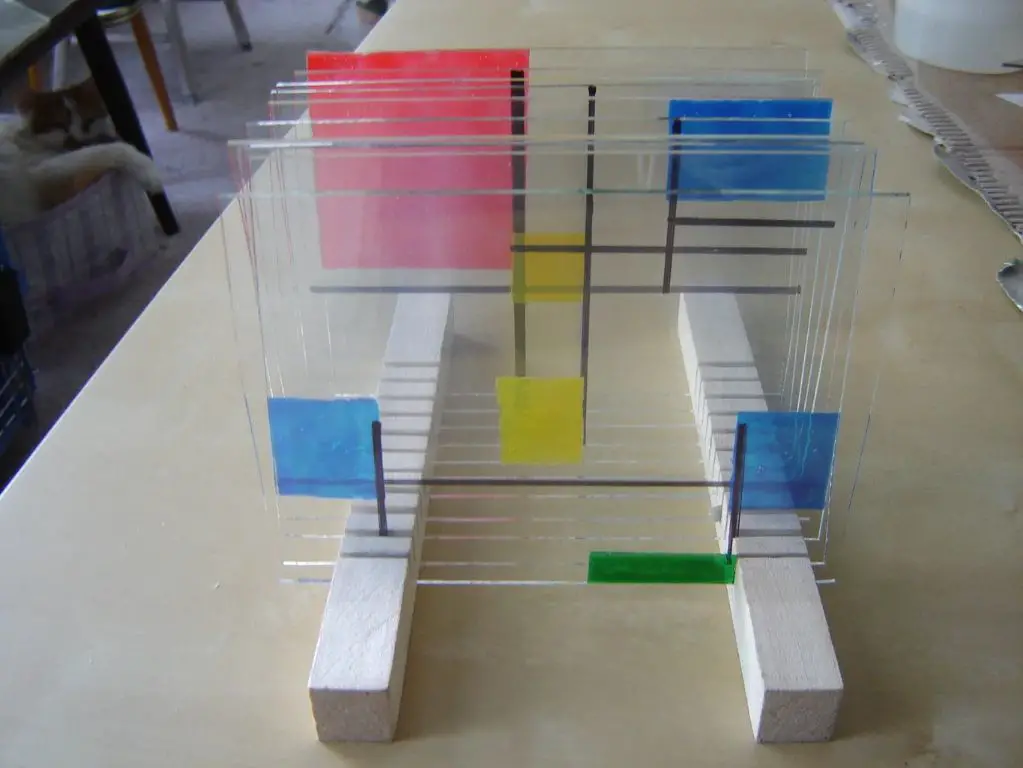
Layering techniques – Create depth by layering solid and transparent pieces of glass. Overlapping colors produces blended effects.
Using molds – For 3D shaped projects, use kiln molds to slump or fuse glass into the desired form.
Focus on creating a cohesive design with interesting details. Simple shapes, bold colors and thoughtful composition make striking fused glass art. Let your creativity shine through in the design process.1
Assembling the Project
After you have cut your glass and created your design, the next step is to assemble your fused glass project. This involves carefully arranging the pieces of glass and using special adhesives and support methods to hold everything in place.1

Start by laying out your glass pieces on your work surface exactly how you want them to look in the finished project. Pay close attention to the spacing between pieces and overall composition. Once you are satisfied, you can start adhering the pieces of glass together.
Many fused glass artisans use special glass adhesives that can withstand the high heat of the kiln. These adhesives keep everything aligned during firing. Apply a small dot of adhesive to each piece of glass where it meets another piece. The adhesive will dry clear.1
For more stability, you can use additional support methods like fiber paper or molded shelves to hold stacked or 3D glass pieces in place. These supports burn away cleanly during firing. Position supports carefully between layers or under heavy elements.2
Once fully assembled, double check that all glass pieces are firmly adhered and supported. Your project is now ready to be fired in the kiln according to firing instructions.
Firing the Glass
The firing schedule for fusing glass consists of three main stages – heating, soaking, and annealing. The glass must be heated up slowly to prevent cracking and ensure even heating. Most beginner fusing projects require heating the kiln to around 1400-1500°F. Once it reaches the target temperature, the glass must soak at that temperature for anywhere between 15-60 minutes depending on the project to fully fuse the glass together. This is the most important part of the firing schedule.
After soaking, the glass enters the annealing phase where the kiln is slowly cooled to around 900°F before turning off the kiln. Annealing prevents residual stresses and breakage by allowing the glass to cool gradually. The final step is normalizing the kiln by running an empty firing cycle to release any absorbed moisture and ensure it’s ready for the next firing. A kiln sitter, pyrometer, or electronic kiln controller is used to precisely control the firing schedule.
Proper firing is critical to achieve a structurally sound fused glass project. Following the recommended ramp speeds, soak times, and annealing schedule will help avoid cracking, breaking, or an under-fired piece of glass art.
Finishing the Piece
After firing, the glass will likely have rough edges that need finishing. There are a few steps involved in finishing the piece to prepare it for display or installation.
Grinding and Polishing
Use a glass grinder to smooth any rough edges and shape the piece as desired. Grind all edges with a coarse grinding head first, then switch to a finer grit grinding head to polish the edges. Lubricate the grinding head with water to smooth the process and prevent overheating. Take care not to grind too aggressively or the glass may crack. Smooth edges will have a polished, glossy appearance.
Adding Hardware
To hang or mount the finished piece, hardware will need to be attached. This may involve drilling holes for hooks, gluing on brackets, attaching picture frame backings, or adding decorative metal findings. Use carbide or diamond-coated drill bits designed for glass when drilling holes. Follow any hardware instructions for proper installation.
Installing in Frame
Fused glass art can be professionally framed under glass or set in wooden or metal frames. Prepare the frame and measure the glass piece to ensure a secure fit. Use appropriate brackets, wire, or other hardware to mount the art securely in the frame, leaving a slight gap between the art and the frame edges. Follow any specific frame instructions and protect the glass from scratching during installation.
Advanced Techniques
Once artists become proficient with basic fusing techniques, they can explore more advanced methods to take their glass art to the next level. Three popular advanced techniques are using dichroic glass, fusing with inclusions, and slumping/draping.
Dichroic glass contains multiple micro-layers of metal oxides that reflect light in a prismatic fashion. When dichroic glass is fired, it produces stunning rainbow-like effects. According to How To Make Fused Glass, dichroic glass allows artists to create unique iridescent textures and patterns in their fused glass projects.
Inclusions involve placing non-glass materials inside a fused glass piece. Items like minerals, metals, beads, seeds, or fabrics can be encased safely inside the glass. Fusing inclusions requires careful consideration of the materials’ compatibility with glass and the firing temperature. As noted in Fused Glass at ART GLASS CENTER, this advanced technique allows for great creativity and customization.
Slumping and draping use specialized molds to form hot fused glass into 3D shapes. The glass bends and conforms to the mold as it slumps due to gravity. Slumping allows artists to create curved plates, bowls, vessels, and other items. It opens up many options for functional and sculptural fused glassware.
Troubleshooting
Fused glass art involves heating glass to high temperatures, so it’s common to run into some problems. Here are some tips for troubleshooting common issues:
To prevent cracks and breaks, make sure to use compatible coefficient of expansion (COE) glass, and full-fuse compatible glass if doing a full fuse. Avoid placing thick glass next to thin glass. Heat glass slowly and steadily, and anneal properly after fusing. If cracks still occur, try adjusting the firing schedule or COE compatibility.1
For even fusing, make sure glass is level in the kiln and weight is distributed evenly. Use kiln posts/stilts for 3D projects. Program the kiln with holds at certain points to allow glass to slump properly. If some areas fuse more than others, adjust the firing schedule or review glass layout.2
To fix small imperfections, use a diamond pad sander or engraving tool. For scratches, try re-firing at a tack fuse temperature. For rounded edges, use a grinder to re-shape. Preventing issues is ideal, but fused glass can often be repaired through re-firing, grinding, sanding and polishing.
Displaying and Selling
Properly displaying and selling your fused glass art can enhance its beauty and allow you to recoup costs and even generate income from your hobby. Here are some tips:
Mounting and Framing
Fused glass is often mounted and framed behind glass to allow light to shine through while protecting the surface. Use specialized picture frame glass like Museum Glass® or opt for a shadowbox-style deep frame. Professional framing can be costly, so learning DIY techniques like selecting matting colors can save money.
Photography Tips
Taking high-quality photos of your artwork is key for online sales or applications. Use a clean, distraction-free background and natural lighting. Experiment with angles and props to accentuate dimensions. Edit photos to optimize lighting, color, and sharpness. Consider investing in a lightbox, tripod, and remote shutter control.
Selling at Art Shows
Local art shows and craft fairs can be a lucrative way to sell your fused glass in-person. Research events, apply early, and bring an attractive booth display. Interact with attendees to share your creative process and passion. Ensure pricing is competitive and fair. Offer informational tags and signage. Collect contact information for follow-ups.
Online Sales
Today’s art market places heavy emphasis on internet visibility. An Etsy shop, Instagram account, and website portfolio enable 24/7 access to global customers. Photograph new pieces promptly for social media and e-commerce listings. Price items competitively based on size, complexity, materials, and labor. Consider custom orders and compressed shipping.


