How Do You Make High Quality Air Dry Clay?
Air dry clay is a type of modeling clay that cures through drying/evaporation without the need to bake it in an oven or kiln. It is made from a variety of materials including ceramic clay, cornstarch, glue, and hardeners. Unlike traditional clays that require firing at high temperatures, air dry clays will harden at room temperature over the course of 24-48 hours. There are a variety of commercial brands as well as recipes to make your own at home.
The main benefits of air dry clay are that it is versatile, accessible, and easy to use. It can be molded into any shape, and unlike polymer clay, does not require special conditioning or baking. The finished pieces will be solid and durable. Air dry clay is great for beginners and hobbyists who want to work with clay but don’t have access to a kiln. It also comes in a wide range of colors.
There are many recipes for making your own air dry clay at home using basic ingredients like glue, cornstarch, baking soda, and water. This allows you to customize features like texture, dry time, strength, and color. The various homemade recipes provide an inexpensive alternative to buying premade air dry clay.
This guide will cover several recipes for making your own quality air dry clay using common household items. It will also provide instructions on working with the clay, coloring, drying, and finishing techniques.
Ingredients
The main ingredients in most air dry clay recipes are a flour or starch base, salt, and warm water. Common flour or starch bases include all-purpose flour, cornstarch, baking soda, or a combination of these. The flour or starch provides structure, while the warm water activates the ingredients to bind together into a clay. Salt is typically added for texture and durability.
Some recipes also include optional ingredients like cream of tartar, oil, glycerin, additional cornstarch, or glue. Cream of tartar can help strengthen the clay. Adding a small amount of oil or glycerin keeps the clay smooth and flexible. Extra cornstarch makes the clay smoother and less sticky. White glue helps make the clay more durable and resilient.
According to https://onelittleproject.com/how-to-make-clay/, a simple air dry clay recipe requires just 3 ingredients: water, cornstarch, and baking soda. More complex recipes may use a combination of all-purpose flour, cornstarch, baking soda, salt, and other optional ingredients.
Recipe Ratios
The ratios of ingredients in air dry clay recipes can vary, but there are some typical ratios that provide a good starting point.
A basic recipe is usually around 2 parts cornstarch to 1 part baking soda or glue. The cornstarch acts as the bulk filler and makes the clay smooth and pliable. The baking soda or glue acts as the binder. More binder makes the clay stronger when dry, while less makes it weaker. Too much binder can make the clay sticky and difficult to work with.
For example, a common recipe is:
– 2 cups cornstarch
– 1 cup baking soda
– 1 cup cold water
Or another recipe with glue is:
– 2 cups cornstarch
– 1 cup white glue
– 1 cup cold water
You can adjust these ratios slightly based on your preference. Using a bit more binder makes stronger pieces for sculptures. Using a bit less makes clay that’s moldable for longer.
The amount of water can also be adjusted to get the right consistency. Start with about 1 cup water per 3 cups dry ingredients. Add water gradually until it reaches a smooth, pliable dough that’s not sticky.
Playing with the ratios helps you customize the clay for your particular needs. Keep notes on what worked to replicate successful recipes (Cited from: https://www.wikihow.com/Make-Air-Dry-Clay).
Mixing the Clay
To start, combine equal parts baking soda and cornstarch in a large bowl. For example, mix 1 cup baking soda with 1 cup cornstarch. Then, slowly stir in 1⁄2 cup cold water a little at a time until a doughy consistency forms. You may need a bit more or less water. Knead the clay mixture by hand for 3-5 minutes until it’s smooth, with no lumps remaining.
The consistency of the clay is very important. Air dry clay should be smooth and pliable, but not sticky. Add small amounts of water or cornstarch as needed if the clay is too wet or dry. Knead thoroughly after each adjustment. The finished clay should be soft, but not tacky.
Use the palm of your hand to push into the clay and roll it out. Fold the clay over itself while kneading to fully incorporate ingredients. Apply even pressure and keep the motions smooth. Knead for several minutes until the clay feels uniform in texture. Avoid overworking it.
If desired, mix in food coloring or acrylic paint in small amounts to tint the clay. Start with just a drop or two and knead it in thoroughly before evaluating the color. Add more pigment gradually until the desired hue is reached. Too much paint can make the clay brittle.
Let the finished clay rest wrapped in plastic for 15 minutes before using. This helps relax the clay and makes it easier to shape.
For sources, see: Techniques for mixing air dry clay acrylic paint and how to use air dry clay without cracking
Storing the Clay
Proper storage is important for maintaining the workability and shelf life of your homemade air dry clay. The key factors to consider are the storage container, temperature, and preventing moisture loss.
Air-tight plastic containers or ziplock bags work best for storing unused clay. Plastic wrap can also be used for short-term storage. Preventing air exposure keeps the clay workable by reducing moisture loss (1).
Refrigeration is ideal, as the cool temperature will slow drying and keep clay workable for months when sealed. At room temperature, expect air dry clay to last around 1-2 weeks before drying out (2).
To preserve clay sculptures or projects in progress, cover tightly in plastic wrap or store in airtight bags. The goal is to prevent moisture loss until you are ready to continue working.
(1) https://www.gathered.how/arts-crafts/art/pottery/how-to-make-air-dry-clay
(2) https://www.hellolidy.com/air-dry-clay-recipes/
Working with the Clay
When working with air dry clay, there are some key sculpting techniques to keep in mind. Start by kneading the clay well before beginning to eliminate any pockets of air. Use your fingers to pinch, roll, and smooth the clay into the desired shapes. Clay sculpting tools like dental tools, silicone tipped shapers, and loop tools can help create finer details and textures.
To avoid cracks while sculpting, keep the clay moist by sealing unused clay in an airtight container or misting with water. Work the clay until soft and pliable before sculpting intricate details. Allow thicker areas of clay like bases to dry slightly before adding thinner protrusions like arms or legs. Avoid overly thin sections that can become brittle as they dry. Let clay pieces dry fully between sculpting sessions.
If cracks do form during drying, they can often be fixed. Lightly mist cracked areas with water then gently press the sections back together, smoothing over the cracks with a finger, silicone shaper, or sculpting tool. Let the clay dry completely before attempting to repair cracks again.
For sculpting inspiration and techniques, check out this helpful beginner’s tutorial: https://airdrycrafters.com/what-are-some-simple-projects-for-beginners-using-air-dry-clay/
Applying Color
There are several effective options for adding color to air dry clay. Paints like acrylic, watercolor, and even oil-based paints work well if properly sealed. Choose acrylic paint for the brightest, most vibrant colors. Watercolors create softer hues. Oil paints produce rich, deep colors, but require extra sealing. When using paint, thin layers work best to avoid cracking as the clay dries.
Natural alternatives like acrylic ink, food coloring, chalk pastels, and mica powder can also add color. Acrylic inks come in a wide array of hues and work similarly to acrylic paints. Food coloring provides translucent tints. Chalk pastels offer dusty colors when rubbed directly into the clay. Mica powder mixed into the clay gives a subtle shimmery effect.
No matter what medium you use for color, seal properly so the colors stay true. Multiple thin layers of acrylic sealer give the best protection. Alternatively, use a sealant like polyurethane, varnish, or epoxy resin. Proper sealing prevents paint from cracking, fading, or rubbing off over time.
Drying the Clay
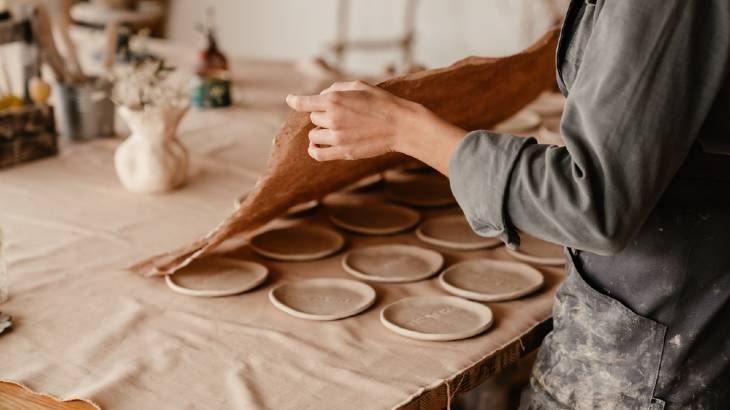
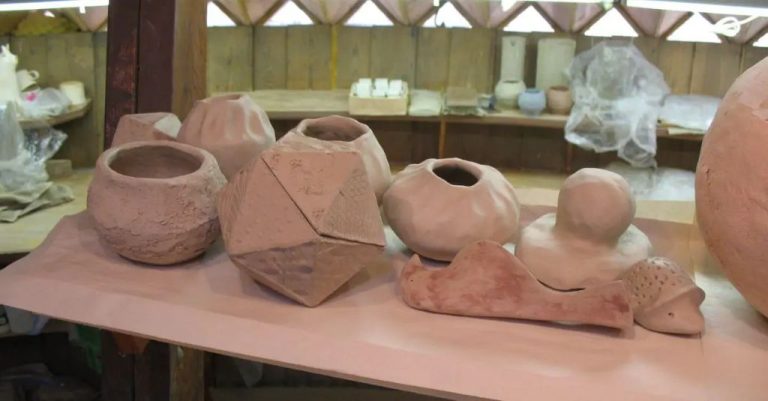
Air dry clay will take 1-3 days to fully dry and cure depending on the thickness and size of your sculpture. Thinner pieces made with a standard air dry clay will be dry to the touch in 24 hours. Allow even small, thin pieces a full 72 hours of drying time before painting or sealing.
To help avoid cracking as the clay dries:
- Avoid making pieces thicker than 1/4 inch. Thick pieces dry too fast on the outside causing cracking.
- Dry flat work on a level surface. Sculptures should dry standing up.
- Rotate your sculpture periodically while drying.
- Mist the sculpture with water if cracks begin forming.
Using an airtight plastic container or cardboard box with a tight sealing lid makes an excellent drying box. Put the drying sculpture inside, keeping it away from direct sunlight. The trapped moisture helps slow down drying. Check daily and leave the lid slightly ajar if condensation builds up.
For best results, let air dry clay cure for 7 days before sanding, painting, or sealing. The clay continues to harden over time. Rushing the curing risks weak spots and cracks developing later. Patience pays off for strong, durable sculptures.
Finishing Techniques
Once your air dry clay sculpture has fully dried, there are a few finishing techniques you can use to smooth, protect, and enhance your creation:
Sanding
Lightly sanding your dried clay piece will smooth any rough edges or imperfections. Start with a fine grit sandpaper around 220-400 grit and gently sand the surface. Take care not to sand away details. Wipe away any clay dust with a dry cloth when finished.
Varnishing
Applying a layer of varnish will seal and protect your sculpture. According to Mastering the Art of Varnishing Air Dry Clay Sculpture, choose an acrylic varnish or polyurethane sealant. Use a soft brush to apply a thin, even coat over the entire dried surface. Let the varnish fully dry before handling.
Sealing
For a water-resistant finish, seal the clay with a product like acrylic sealer or polyurethane. Apply multiple thin coats, allowing each to fully dry. The sealer will protect the clay from moisture damage.
Advanced Recipes
There are many ways to tweak the basic air dry clay recipe to create clay with different properties. Here are some ideas for advanced recipes:
Stronger, Flexible Clay
Add 1 tablespoon of white glue or PVA glue to the basic recipe. This will create a stronger bind and more flexible clay that is less prone to cracking and breakage when drying.1
Lighter Clay
Substitute the baking soda in the basic recipe with an equal amount of cornstarch. This reduces the weight of the clay while maintaining the binding properties. The resulting clay will be lighter and easier to work with.
Smooth Texture
Sift the dry ingredients before mixing to remove any clumps. This helps achieve a smooth, lump-free clay texture.
Coloring Clay
Mix in a few drops of liquid watercolor, acrylic paint, or food coloring to tint the clay. Start with just a little bit of color and mix thoroughly before adding more to get the desired shade.
Scented Clay
Add a few drops of essential oil like peppermint, lavender, or lemon to create pleasantly scented clay. Be careful not to add too much oil as it can prevent drying.


