How Do You Make Pottery?
Pottery is one of the oldest human inventions, dating back to at least 24,000 BCE, when animal and human figurines were discovered in Czech archaeological sites https://en.wikipedia.org/wiki/Pottery. Pottery allowed early human societies to store food and water in containers, and encompasses objects made out of clay and hardened by heat. The pottery creation process involves several steps including gathering clay, forming the clay into desired shapes, drying, firing, and applying glazes or finishes. There are many different types of pottery that have developed across human history and various cultures including earthenware, stoneware, and porcelain.
Pottery was fundamental to early human civilization and allowed food and resources to be stored and transported safely. It was an important advancement that facilitated the transition from nomadic lifestyles to permanent settlements. Pottery artifacts provide archaeologists insights into the habits, diets, values, and beliefs of ancient cultures across the world. Today, pottery remains a popular art form and hobby.
Gathering Materials
The main material needed for pottery is clay. There are several types of clay used in pottery, each with their own properties and characteristics. Some common types include:
Earthenware – Fires at lower temperatures up to 2,200°F. It’s porous and permeable. Common types are red and brown earthenware. (https://www.soulceramics.com/pages/types-of-clay)
Stoneware – Fires at high temperatures between 2,200°F – 2,400°F. It’s less porous than earthenware. It’s commonly used for functional pottery and art pieces. (https://thepotterywheel.com/types-of-clay-for-pottery/)
Porcelain – Fires at very high temperatures around 2,450°F. It’s non-porous, translucent, and very strong. It’s commonly used for tableware, sculptures, and other art pieces.
Ball clay – A secondary clay that fires at high temperatures and is added to stoneware or porcelain to improve plasticity and strength.
Fire clay – Withstands very high temperatures and is used to make kiln linings, kiln furniture, and insulating firebricks.
In addition to clay, potters also need tools like pottery wheels, kilns, trimming tools, and modeling tools. Glazes and slips are also used to decorate finished pieces before the final firing.
Preparing the Clay
Before clay can be shaped into pottery, it needs to be properly prepared. The main goal in preparing clay is to remove any air bubbles and evenly distribute moisture throughout the clay body. This process is referred to as “wedging” the clay. There are a few different techniques for wedging:
Kneading – Place the clay on a flat surface and press down into it with the palms of your hands, folding the clay over itself. Repeat this process, kneading the clay until it has an even consistency.https://thepotterywheel.com/how-to-prepare-clay-for-pottery/
Slamming – Flatten the clay into a slab by compressing it. Then fold the slab over itself and slam it against the wedging table. This process forces air bubbles to the surface. Continue slamming and re-folding until the clay has no visible air pockets.https://thepotterywheel.com/how-to-prepare-clay-for-pottery/
Cutting – Using a wire tool, cut the clay body into several sections. Then stack these sections on top of each other and press them together. Slice through the stack and re-stack in a different order. Repeat until the clay is smoothed out.
It’s important not to over-wedge the clay, as this can cause issues. Look for a smooth, elastic, and bubble free consistency before stopping. Once wedged, the clay is ready to be shaped into pottery.
Forming Methods
There are several techniques for forming pottery pieces from clay. Some of the most common methods include pinching, coiling, slab building, wheel throwing, and using molds.
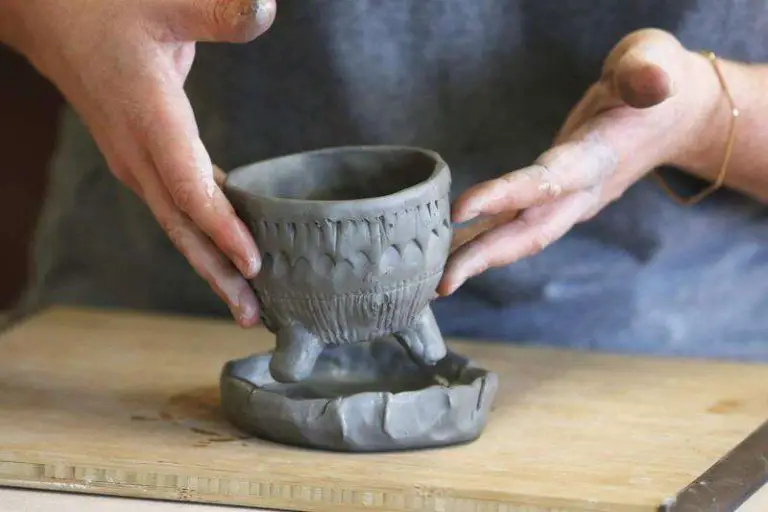
Pinching is one of the most basic handbuilding techniques and involves squeezing the clay between your fingers and thumb to create shapes. It’s great for making simple bowls, cups, and vases. This guide has some tips for getting started with pinching.
Coiling involves rolling and stacking long threads or coils of clay on top of each other to build up a piece. It allows for making larger and more elaborate handbuilt forms. Coiling is often used to create vessels like jars, pots, and sculptures.
Slab building is the process of rolling out flat sheets or slabs of clay and joining them to construct a form. The slabs can be draped, folded, cut, added to, or stacked. Slab building enables working on a larger scale with more control over the thickness and shape.
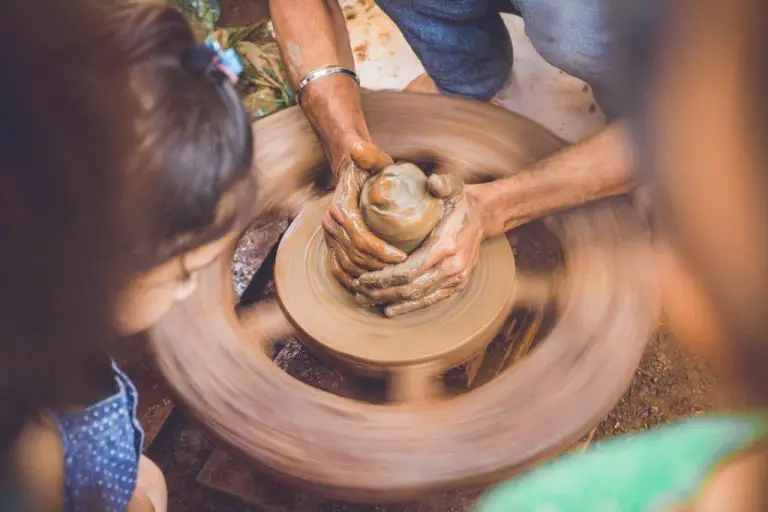
Wheel throwing involves sitting at a potter’s wheel and using the momentum of the spinning clay to raise and shape vessels with your hands. It allows for creating symmetrical pottery forms and is ideal for making cups, bowls, vases, pitchers, and plates. Wheel throwing requires practice to master.
Molds provide predefined shapes to form pottery. Clay can be pressed into single-use molds, poured into multi-piece plaster molds, or draped over hump molds and shaped. Using molds enables consistency and helps beginners achieve professional-looking results.
Drying and Firing
After forming your piece of pottery, the next step is to let the clay air dry. Set the pottery in a sheltered place at room temperature out of direct sunlight and wind. Drafty areas can dry the pottery too quickly and cause cracks (https://www.soulceramics.com/pages/how-to-dry-pottery). The clay needs to dry slowly and evenly. Using a plastic bag or damp cloth over the piece can help control the drying if needed.

Once the clay is leather hard, meaning firm but still able to be tooled a bit, it is ready for the first firing called bisque firing. Bisque firing further dries the clay and makes it permanent. Load the pottery carefully into the kiln and follow the temperature guidelines, generally reaching around 1800°F. The firing process causes chemical changes that harden and strengthen the clay (https://www.britannica.com/art/pottery/Drying-turning-and-firing).
After bisque firing, glazes can be applied to create an impermeable surface and decorative effects. The pottery is then fired a second time in the kiln to around 2200°F to melt the glazes. This glaze firing seals and hardens the glaze coating.
Applying Glazes
Glazes are an essential part of finishing pottery, as they seal the porous clay and create a smooth, glass-like surface. Before glazing, make sure the pottery has been fired to the bisque stage. Bisqueware refers to clay that has been fired once at a low temperature to harden it and prepare it for glazing. There are many options when it comes to choosing glazes.
Glaze types:
- Low-fire glazes – Fire between 04 and 06 cone and work for low-temperature ceramics firings. Common low-fire glaze ingredients are feldspar, silica, kaolin, and dolomite.
- Mid-range glazes – Fire between cone 6 and cone 8 and are suitable for stoneware clay bodies. They tend to be more durable than low-fire glazes.
- High-fire glazes – Fire between cones 9-10 and work with stoneware, porcelain, and high-fire bodies. High-fire glazes have a glassier appearance.
Glazes can be purchased premixed, but many potters also mix their own using recipes. When using prepared glazes, follow the manufacturer’s instructions closely. Mix the glaze thoroughly before applying it to the bisqueware piece. Glazes can be applied using a range of techniques like dipping, pouring, brushing, or spraying. Allow the piece to dry completely before firing.
Make sure to fire glazed pieces to the proper cone recommended for the specific glaze. The glaze melts during firing and fuses with the clay body to create a glossy coating. Pay close attention to firing times and temperatures. Minor variations can greatly impact the finished glazed surface. Cool pottery slowly in the kiln to prevent cracking and crazing of the glaze.
Source: https://www.thecrucible.org/guides/ceramics/how-to-glaze/
Finishing Touches
After firing and glazing, there are a few finishing touches that can be done to complete a pottery piece. Some potters choose to add additional decoration at this stage. For example, you could incise designs into leather-hard clay after the first bisque firing, then glaze over top. Incising allows you to draw or carve patterns with tools. Another option is using underglazes, which are applied before a transparent glaze, to hand-paint designs. Decals can also be applied before glazing to transfer images onto the clay surface.
Many potters like to polish their finished pieces by hand to smooth the surface and make glazes shiny. You can polish greenware, bisqueware, or glazed pieces using fine-grit sandpaper, sanding sponges, or polishing stones. Work in a circular motion and clean the piece thoroughly between grits if sanding. Backus Ceramics recommends finishing with a 3000 grit sanding sponge for glazed pieces.
It’s important to assess the final fired and glazed piece and look for any flaws in the clay body or glaze results. Glazes can turn out patchy or with crawling if the clay or glaze thickness was uneven. Kiln shelf marks may also occur on the bottom of pieces. Fill small holes with clay or grog before refiring. If needed, flaws can be improved by reglazing and refiring the pottery. When satisfied with the finishing, properly sign or brand pieces on the bottom.
Troubleshooting Issues
Pottery making can be filled with many mishaps, especially when you’re just starting out. Some common problems to look out for and how to resolve them include:
Cracking
Cracks can occur during the drying or firing process if the clay body shrinks unevenly. To prevent cracking:
– Avoid clay walls that are too thick or thin. 1/4 – 1/2 inch is ideal.
– Dry pieces slowly and evenly.
– Bisque fire between cone 08-04 before glaze firing.
– Fire on stilts or kiln posts so air can circulate.
– Ramp kiln temperature up and down gradually.
See more tips on preventing cracks at Ceramic Arts Network.
Glaze Issues
Glaze defects like crawling, crazing, or pinholing can occur due to issues with clay body compatibility, firing temperature, or glaze composition. To fix:
– Test glaze on tile before pieces.
– Adjust firing temperature or glaze ingredients.
– Switch to a more compatible clay body.
See common glaze problems and solutions at Ceramic Arts Network.
Firing Mishaps
Problems like under-fired or warped pieces often stem from inconsistent firing. Best practices include:
– Program precise firing cycles for bisque and glaze firings.
– Monitor and log kiln temperatures.
– Stagger and space pieces with kiln posts.
– Load kiln evenly and allow airflow.
See more kiln firing tips at Ceramic Arts Network.
Projects for Beginners
For beginner potters just starting out, it’s best to focus on simple vessels using basic handbuilding techniques. Some good starter projects include:
Pinch pots – These tiny, thumb-sized pots are a classic beginner project. Start with a ball of clay and pinch and push the clay between your fingers and thumb to form a little cup or bowl shape. Pinch pots are fast and fun to make. You can leave them plain or add decoration.
Slab pots – Slab building involves rolling out flat sheets or “slabs” of clay that can be cut into shapes and assembled into a pot. Simple slab-built boxes or trays are great introductory projects. Decorate the surface by stamping, carving, or painting.
Coil pots – Building up the walls of a pot using ropes or coils of clay is another basic handbuilding technique. Coil building takes patience but allows you to create interesting organic pot shapes. Smooth the coils together and carve or add textures.
These straightforward beginner projects help familiarize you with clay properties and working methods. As your skills develop, you can advance to more complex forms and techniques like throwing on the potter’s wheel.
https://wheelandclay.com/blog/pottery-ideas-for-beginners/
Conclusion
Making pottery is a rewarding craft that allows you to create beautiful and functional works of art. With some basic materials, tools, and techniques, anyone can get started in pottery. Beginners should start with simple handbuilding projects using basic clays and glazes. As you gain more experience, consider trying the wheel and sculpting more intricate pieces. The possibilities are endless when it comes to shaping clay into pots, vases, tiles, figures, and more. Immersing yourself in the process of making pottery is not only fun and relaxing, it builds hand skills, problem-solving abilities, and creativity. We hope this beginner’s guide has provided a good introduction to pottery making. With a little practice, patience, and persistence, you’ll be amazed at what you can craft out of a simple lump of clay.
If you’ve enjoyed learning the basics of pottery making, consider taking a class at your local arts center to hone your skills further. Additionally, look for pottery studios in your area that allow studio time for independent work. The more time you spend with the clay, the more comfortable you will become in handling and shaping it. Let this guide be just the starting point for your own creative pottery-making journey. The satisfaction that comes from making something with your own two hands is unmatched. May your future be filled with handcrafted mugs, bowls, and treasures!


