How Do You Make Roman Clay Paint?
Roman clay paint has been used for thousands of years, dating back to ancient Roman times. It is made from natural ingredients like clay, lime putty, and earth pigments. The ancient Romans used roman clay paint to decorate the interiors of homes and public buildings. It creates a smooth, velvety matte finish on walls and ceilings. Roman clay paint is applied by trowel in a technique similar to plastering. It can be tinted in many earthy hues using natural mineral pigments. The ingredients bind together to form a durable, breathable paint that lasts for decades. Roman clay paint is still popular today in traditional decor and sustainable design due to its timeless beauty, versatility and eco-friendly nature.
Needed Materials
The main materials needed to make Roman clay paint are:
- Clay – The Romans used natural clays found locally. Modern alternatives include potter’s clay or drywall joint compound. Wet clay helps bind the pigments.
- Pigments – Iron oxides create red/orange hues. Charcoal or soot make black. Limewash makes white. Other natural pigments like ochre add earth tones. (https://portolapaints.com/pages/roman-clay-series)
- Mortar and pestle – To grind and mix the dry pigments into powder.
- Water – To turn the clay into a wet paste and mix with pigments.
- Containers – To hold the wet clay, pigment powders, and finished paint mixtures.
These basic ingredients can create an inexpensive facsimile of Roman clay paint for walls.
Clay Preparation
Finding the right clay was an important first step in creating Roman clay paint. The ancient Romans used locally sourced clay deposits to obtain the raw materials. Clay was dug up and collected, often near sources of water like rivers where deposits accumulated over time.
Once dug up, the clay needed to be processed to remove any impurities before it could be used for paint. This involved kneading and working the clay with the hands or feet to break up larger clumps. The clay would then be mixed with water into a slurry and poured through a screen or sieve to filter out rocks, roots, grass and other debris. Allowing the slurry to settle and pouring off the water left behind purified clay ready for the next steps.
According to How to Make Your Own Roman Clay Wall Application – https://heartysol.net/how-to-make-your-own-roman-clay/, modern recipes call for using drywall mix as a clay substitute, which eliminates the need for processing and purifying raw clay.
Getting the clay preparation right was an essential foundation for creating usable Roman clay paint in ancient times. The process of finding high quality clay deposits and properly removing impurities resulted in a purified clay base ready to be transformed into paint.
Making Pigments
The ancient Romans created their own paint pigments by grinding natural materials into powders. Some of the most common pigments used were:
Red ochre – A natural clay containing iron oxide, producing a reddish-orange color. Mined from mineral deposits around the Roman Empire. See Roman commerce in pigments.

Burnt ochre – Ochre pigment heated to high temperatures, resulting in a deeper red-brown color. The burning process changed the iron oxide chemically.
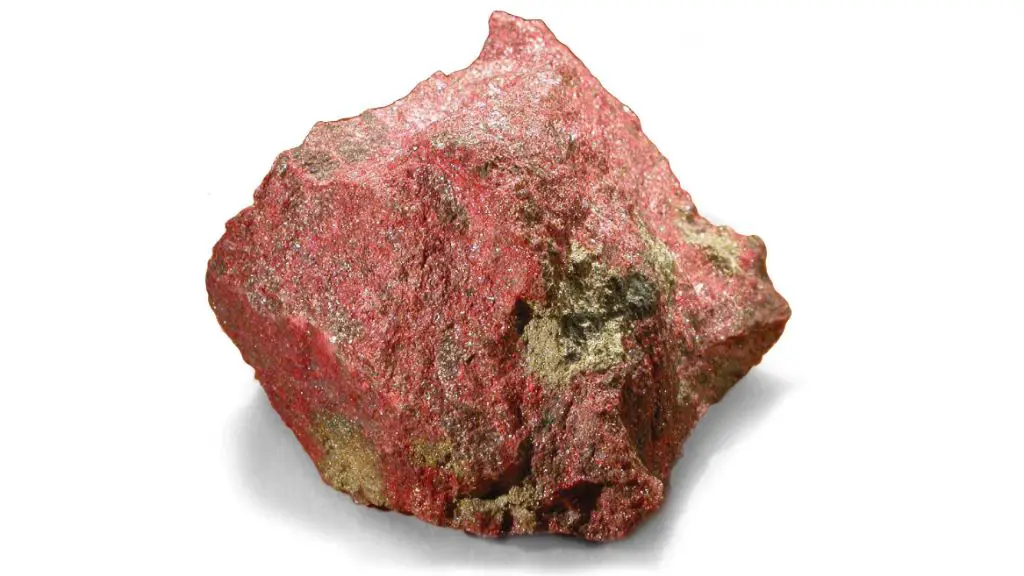
Cinnabar – A naturally occurring mercury sulfide mineral producing a brilliant red color. Mined near volcanoes like Mount Vesuvius. Highly toxic due to mercury content. Referenced in Pigments and painting techniques of Roman Artists.
Malachite – A bright green pigment made by grinding malachite crystals into powder. Malachite is a copper carbonate mineral mined around the Roman Empire.
Azurite – A vivid blue copper carbonate mineral that was mined and ground into powder. Often used to create blue backgrounds.
Mixing the Paint
To make the Roman clay paint, you’ll need to mix the pigment into the prepared clay. The most common method is to mix 2/3 prepared clay with 1/3 pigment paste or powder. First add the clay to a bucket or large container. Then slowly incorporate the pigment, mixing thoroughly with a drill attachment. You want the pigment fully dispersed in the clay. Aim for a smooth, uniform texture free of lumps or dry spots.
The consistency of the paint mixture is important. It should be fluid enough to brush on easily, but not so thin that it drips. Add small amounts of water if needed to reach the right viscosity. Test the paint on some scrap material first before applying to your project surface. Adjust the thickness as needed by adding more pigment paste or a touch of water. Refer to sources like https://heartysol.net/how-to-make-your-own-roman-clay/ for tips on getting the ideal consistency.
Applying the Paint
Proper surface preparation is crucial for the Roman clay paint to adhere well. Make sure the surface is clean, dry, and free of any loose material. Apply a primer if painting over a non-absorbent surface like metal or glass. Use soft natural bristle brushes to apply the paint. Wide brushes work well for large surfaces, while smaller brushes allow more detail work.
Apply the paint in a random criss-cross hatch pattern, working in 3-4 foot sections. Make half-C to S shaped brush strokes in overlapping layers, holding the brush at a 45 degree angle to the wall. Work quickly and maintain a wet edge between sections to ensure a seamless application. Apply two coats for best coverage, allowing each coat to dry completely before adding the next. Thin layers of paint are recommended, no more than 1/16 of an inch thick per coat.
Take care not to overwork the paint or make the surface too smooth, as the authentic Roman look comes from the hand-applied brush marks. Work from top to bottom and keep a wet edge. Feather out edges to blend sections together. Allow the paint to dry fully, then polish gently with a soft cloth to create a subtle sheen if desired.
Sealing and Protecting
Sealing roman clay paint is essential for enhancing its durability and protecting it from damage. After the final paint coat dries, apply a protective sealer to shield the painted surface from moisture, stains, and UV damage.
Traditionally, roman clay paints were sealed using beeswax. Beeswax provides a satiny, slightly glossy finish and protects against moisture and dirt. Modern sealants like varnish can also be used. Varnishes are clear, hard, and glossy finishes made from resins that dry to a tough film. Varnish seals the paint and provides abrasion and moisture resistance. Use a varnish formulated for clay or masonry for best results.
Apply 2-3 thin coats of beeswax or varnish using a high-quality natural bristle brush. Let each coat dry fully before adding the next layer. Proper sealing is crucial for preserving elaborate roman clay paint finishes through the years.
Uses in Ancient Rome
Roman clay paint was commonly used for decorating buildings, monuments, pottery, and murals in ancient Rome. The mineral-based paint provided rich, vivid colors that were used to create elaborate frescoes and motifs in homes, temples, government buildings, baths, and tombs across the Roman Empire.
Fresco painting was one of the most popular uses for Roman clay paint. By applying the paint to wet plaster walls and ceilings, the paint became fully integrated and durable as the plaster dried. This allowed artists to create large, detailed murals depicting gods, daily life, nature, and historical events. Examples have been found at sites like Pompeii, Herculaneum, and the Villa of Livia.
Roman clay paints were also frequently used to decorate pottery, ceramics, and other everyday objects. Pigments like red ochre, yellow ochre, and burnt umber provided rich hues on anything from plates and bowls to lamps and amphorae. The iconic glossy red finish of Arretine ware was achieved using iron-rich clay paint.
Artisans also used mineral paints to help decorate marble, stone, and bronze sculptures found in temples, government buildings, public squares, and private homes and gardens across the empire. The paints allowed more vivid details to adorn statues and architectural elements.
Overall, Roman clay paint provided artists and craftsmen with a versatile, durable pigment that brought color and life to ancient Roman art and design. The mineral-based paint could adhere to nearly any surface to help decorate buildings, pottery, sculptures, and murals with elaborate designs and rich hues befitting the powerful empire. (1)
Modern Uses
Roman clay paint continues to be used today for various arts, crafts, education, and historical recreation purposes. The natural clay-based paint allows modern artists and crafters to work with an ancient medium that has been used for millennia. Some specific modern uses of Roman clay paint include:
Arts and Crafts:
Roman clay paint is often used by modern artists looking to recreate historical painting techniques. The matte, textured finish of Roman clay paint lends itself well to creating earthy, organic artworks. Many modern painters will use Roman clay paints on canvas or mix it with other media like acrylics or oils. Crafters also use Roman clay paint to decorate pottery, sculptures, and other crafts with an ancient Roman aesthetic.
Historical Recreation:
Roman clay paint is favored by living history enthusiasts and historic site curators looking to accurately recreate the look and feel of ancient Roman spaces. Applying Roman clay paint to the interiors of historic homes, museums, and archaeological sites helps transport visitors back in time. The natural pigments and textures allow for an authentic representation of Roman domestic life.
Education:
Educators in art, history, and archaeology will often incorporate Roman clay paint into their lessons and activities. Students get hands-on experience working with an ancient art material, which helps bring history to life. Making Roman clay paint connects students directly to the cultures of the past in an immersive, tangible way. Students also learn about archaeology and art preservation by recreating artifacts and murals using Roman clay paint.
Conclusion
In summary, making Roman clay paint is an intensive process that involves preparing clay, creating pigments from natural materials, mixing them together into paint, and applying multiple coats to achieve a smooth, matte finish. It requires patience and skill to master the technique, but results in a beautiful, historical decorative finish.
The fact that we can recreate these historically accurate paints today allows us to preserve and celebrate Roman artistic achievements. Though it takes effort, using these traditional methods connects us to the ingenious artisans and architects of the ancient world. Roman clay paint adorned the walls of villas and palaces millennia ago, and still lends unique warmth, texture, and artistry to our modern spaces.


