How Do You Make Stoneware Clay Flowers?
Stoneware clay is a type of pottery clay that is dense, durable, and nonporous when fired at high temperatures ranging from 1200°F to 1300°F. It’s composed of natural clay minerals and other ceramic materials that create a sturdy finished product once fully vitrified through the firing process. Stoneware gets its name from its stone-like qualities when fired – it becomes very hard and impermeable to water. This makes it an ideal material for creating lasting decorative objects like flower sculptures.
Some key properties of stoneware clay that make it great for modeling flowers and other decorative items:
- Plasticity – Stoneware clay is smooth and flexible when wet, which allows it to be shaped, rolled, and sculpted before drying and firing.
- Durability – The high firing temperature makes stoneware extremely strong, chip resistant, and waterproof.
- Low shrinkage – Stoneware clay exhibits minimal shrinkage when dried and fired, so sculpted objects retain their shape and proportions.
- Wide temperature range – Stoneware can be fired successfully over a wide range of temperatures, making it very versatile.
- Variety of colors – Natural stoneware clay is white to light grey, but it can be stained or glazed in endless colors.
These characteristics make stoneware an ideal choice for handcrafting detailed floral sculptures that will last for many years when properly fired. The clay is responsive to creative shaping while wet, yet will become permanent hardened artworks after kiln firing.
Gather Materials
The materials needed to make stoneware clay flowers include:
-
Stoneware clay – This is a dense clay that can withstand high firing temperatures. Choose a neutral color like white, gray or brown.
-
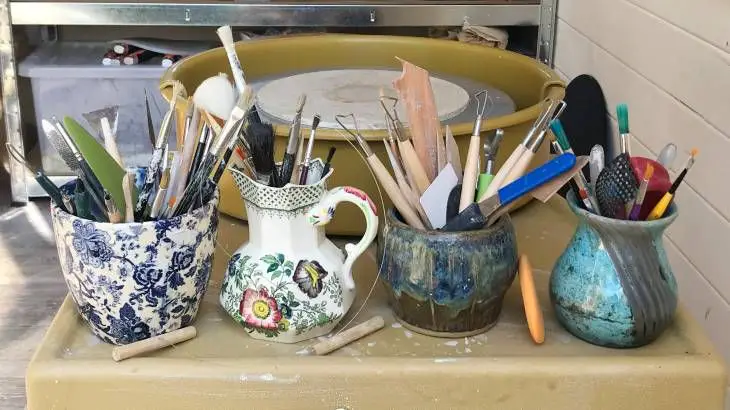
Clay sculpting tools – You’ll need wooden or rubber sculpting tools to shape the petals and other flower parts. Clay loop tools, ribs, dotting tools and stamps are useful.
-
Acrylic paints and glazes – Once the clay has been fired, you can add color with acrylic paints or glazes. Pick bright, vibrant colors.
-
Paint brushes – You’ll need a variety of paint brush sizes to add color and details.
-
Florist wire – The wire is used to create the flower stems and buds.
-
Floral tape – After assembling the flowers, you can wrap stems in floral tape.
-
A pottery wheel may also be useful for shaping flower parts like petals.
The key supplies are stoneware clay, clay tools, paints or glazes, and wire. Gather these before starting to make your flowers.
Shape the Clay
One of the most important steps in crafting stoneware clay flowers is properly shaping the clay. Start by kneading the clay thoroughly to remove any air bubbles and make it soft and pliable. Slam the clay down on your work surface repeatedly to achieve an even consistency throughout.
Next, use a rolling pin to roll out the clay into slabs about 1/4 inch thick. Try to get the slab as even as possible. You may need to flip the clay and roll in different directions to prevent it from sticking. Lightly dust your work surface and rolling pin with cornstarch if needed.
Once your clay slabs are rolled out, use cookie cutters or templates to cut out the specific flower parts you need. Cut stems, leaves, petals, and other elements. Use a sharp tool like a paring knife to neatly cut around your template shapes. Clean up the edges by gently smoothing with your fingers.
As you cut out your clay flower components, arrange them on a cookie sheet or tray lightly dusted with cornstarch. This will prevent them from sticking as they dry.
Create the Flower Parts
Once you have your flower shape, it’s time to create the individual parts that will make up the flower. Here are the main components you’ll want to sculpt:
- Petals – Petals give the flower its distinctive shape and beauty. Roll small balls or ovals of clay for each individual petal. Make some larger and some smaller for variety.
- Leaves – Leaves provide fullness and a natural look to the flower. Cut out leaf shapes or roll worm shapes for leaves. Add veining detail with a toothpick or skewer.
- Stem – Roll a tapered worm shape for the stem. Make it long enough to insert into the base of the flower.
- Center – The flower center houses pollen and reproductive parts in real flowers. Sculpt a small ball or oval shape for the center of your clay flower.
Take your time sculpting each individual component. Consider adding patterns, texture, or other details to make your flower parts more realistic and lifelike.
Assemble the Flower
Once you have created all the individual flower parts, it’s time to assemble them into a complete flower. This step requires patience and care.
Start by attaching the center of the flower. If you are making a rose, this would be attaching the rose bud. Use a small dab of water to slightly moisten the end of the bud, then press it into the center of the flower base. The water will act as glue to hold it in place.
Next, attach each of the petals around the center. For the best adhesion, moisten the base of each petal the same way you did the center bud. Gently press the petal onto the base, overlapping the previous petal slightly to create a natural look.
As you add more petals, turn the flower sculpture around in your hand to evenly distribute the petals in a circular pattern. Add petals one at a time until you fill out the flower.
Finally, attach any leaves, stems, or other decorative elements to complete your flower. Add some final shaping or detailing with sculpting tools. Now your clay flower is fully assembled and ready for drying.
Add Details
Adding details like veining and texturing can really bring your clay flowers to life. Here are some tips for adding realistic details:
For flower petals and leaves, use a dull knife or clay tool to gently score in veins. Look at reference photos of real flowers to see the patterns of veins. Veins are often dark green on leaves and can range from dark to light on flower petals. Go lightly at first since you can always add more lines later.
Texture petals and leaves by pressing in a variety of objects. Try pressing in lace, burlap, or mesh for patterns. Use the back of a paintbrush, toothpick, or skewer to create small indentations. Crumple and smooth aluminum foil for an irregular wrinkled texture.
Add details to the center of flowers using small clay tools. For daisies, use a dotting tool to create a raised center. For lilies, roll tiny teardrop shaped stamens. Reference photos to help recreate specific flower details.
Consider adding clay “pollen” by mixing yellow clay powder into liquid clay resin. You can then paint this resin mixture into the centers of flowers. Let it dry before continuing to work on the flower.
By taking the time to add realistic veins, textures, stamens, and other botanical details, you can really bring your handmade flowers to life!
Dry the Flower
After shaping and assembling your clay flowers, it’s important to let them air dry fully before firing. Lay the flowers on a flat surface in a warm, dry area out of direct sunlight. Allow 1-3 days for the flowers to dry completely. The clay needs to be bone dry with no moisture left.
Test the flowers periodically by touching them lightly. If any coolness or dampness remains, let them dry longer. Don’t rush the drying process or the clay pieces may crack or explode in the kiln. Be patient and allow plenty of time for thorough drying.
Once fully dry, the clay will feel lighter in weight, turn a shade lighter, and have a matte look. At this stage, the flowers are ready for bisque firing before adding color.
Fire the Clay
Firing the clay is one of the most important steps in making stoneware clay flowers. The purpose of firing is to permanently harden the clay through heating it to extremely high temperatures. This transforms the soft, fragile flower into a strong, finished ceramic piece.
It’s crucial to follow the kiln’s firing instructions carefully. Check the kiln’s user manual for the recommended bisque firing temperature, which is usually around cone 04-06. Slowly increase the kiln temperature, holding at about 200°F intervals to allow moisture to evaporate from the clay slowly. Rapid temperature changes can cause cracking or explosions.
Once the kiln reaches the target bisque temperature, allow it to soak for the recommended amount of time, usually 1-2 hours. Then turn off the kiln and allow it to cool completely before opening, about 8-12 hours. The bisque firing makes the flower durable.
After bisque firing, apply glazes or stains if desired. Then fire the flower again at the glaze firing temperature, usually around cone 06. Follow the same gradual heating, soaking, and cooling steps. The glaze firing melts the glaze into a shiny, glass-like surface. With proper firing, the clay flowers will be strong, permanent, and ready for display.
Apply Color
Adding color to your stoneware flowers can really make them pop. You have a few different options when it comes to coloring the clay.
One option is to use acrylic paints. Make sure to use paint specifically formulated for ceramics and clay. Apply several thin coats of paint to the flower, allowing it to dry in between coats. The paint will fuse to the clay when fired.
Another option is to use ceramic glazes. These come in a huge variety of colors and finishes like glossy, satin, or matte. Brush or dip the glaze over the bisque fired clay, coating the entire surface. The glaze melts and fuses to the clay when fired again at a high temperature. Experiment with mixing glazes to create custom colors.
Consider applying different paints or glazes to each part of the flower – the petals, center, stem and leaves. This can look very striking. Metallic glazes in gold, silver or copper can add a lovely shimmering effect. The coloring options are endless!
Display the Finished Flowers
After all your hard work creating your stoneware clay flowers, you’ll want to display them properly so they will last. Here are some tips for displaying your finished flowers:
Seal the flowers with a clear acrylic sealer or polyurethane to protect them from moisture. Apply 2-3 thin coats with a soft brush and allow to fully dry between coats. This will help waterproof your flowers so they can be used outdoors.
Consider different ways to arrange or display your flowers. They can be clustered together in a vase or bowl. You can also attach them to grapevine wreaths, wreaths made from grapevine tendrils, or other bases using hot glue. Get creative with displaying them in old teapots, bottles, or other unique vessels.
Protect more delicate clay flower petals by displaying under a cloche or glass dome. This will keep them safe from getting bumped or broken.
Show off your flowers by placing them as centerpieces on tables and shelves. You can fill bowls or vases with floral foam or Spanish moss to hold the flowers in place.
Mix your clay flowers with other natural elements like leaves, feathers, shells or stones for interesting arrangements. The colors and textures will complement each other beautifully.
With the proper sealing and display, your handmade stoneware clay flowers will last for many years to come. Enjoy their beauty and the satisfaction of creating them yourself.