How Do You Make Terracotta Clay Beads?
Terracotta clay beads have been made and used for thousands of years. Terracotta simply refers to a type of clay that is fired at low temperatures between 1000-1200 degrees Fahrenheit to harden it. This clay has an earthy red-orange color because of the iron oxide content. Terracotta beads were first created in regions like Africa and Asia, dating back to ancient times.
Making terracotta beads involves shaping the clay into the desired sizes and shapes, smoothing and refining them, allowing them to dry, and then baking them to harden the clay. The beads can be left plain or decorated using techniques like painting, glazing, adding texture, or embedding other materials.
Terracotta beads are appreciated for their natural, organic look and feel. They can be used to make all kinds of jewelry, accessories, decorations, curtains, clothing embellishments, and more. Many cultures around the world incorporate terracotta beads into traditional costumes, textiles, and ceremonial objects. The beads bring natural colors and textures to handmade crafts and folk art.
Materials Needed
The most important material for making terracotta beads is the clay. You have two main options – natural clay that you dig up and process yourself, or premixed clay that comes ready to use. Natural clay takes more effort but gives you more control over the texture and color. Premixed clays are convenient but limit your options.
Here are some essential tools for working with the clay:
- Rolling pin – for flattening clay into sheets or coils
- Clay cutters – metal cutters in various shapes to cut out bead forms
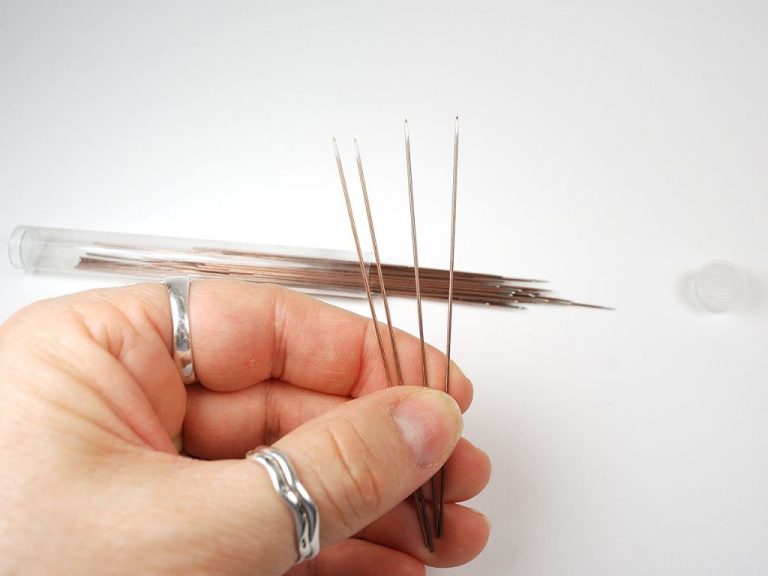
- Needles or skewers – for piercing holes in beads before baking
- Paint brushes – for applying glazes and decorations
Optional decorations include:
- Acrylic paints – for adding color and designs
- Glazes – clear finishes that give beads a glossy look
- Stamps – for pressing patterns into the clay
Preparing the Clay
The preparation of the clay is one of the most important steps in making high-quality terracotta beads. Start with an adequate amount of clay, around 1-2 pounds. Before shaping your beads, you’ll need to properly knead and wedge the clay to achieve an ideal consistency.
Kneading the clay involves pressing, folding, and squeezing the clay repeatedly to mix the moisture throughout. This helps remove any air pockets and results in a smooth, uniform texture. Knead the clay on a flat surface for 5-10 minutes until it is soft, flexible, and no cracks are visible.
Wedging is a technique that takes kneading a step further. It aligns the clay particles longitudinally, further removing air bubbles and making the clay stronger. To wedge, cut the kneaded clay in half. Stand facing a table and slam one half down firmly while turning it. Fold it in half, turn 90 degrees, and slam it down again. Repeat this forceful folding and slamming until the clay has an even texture with no cracks or air pockets.
The clay should now have a firm but malleable texture, like the consistency of gumdrops or modeling clay. Pinch off a small piece to ensure it can bend without cracking. Store any unused clay in an airtight container to prevent drying out. Your clay is now ready for shaping into beads!
Shaping the Beads
Once you have your clay prepared, it’s time to start shaping it into beads. The most common way to form the basic bead shape is by rolling the clay into logs. Take a small piece of clay and roll it between your palms or on a flat surface to create a long cylindrical log. Try to get the log as even in width as possible. The diameter of the log will determine the size of your hole.
Next, cut the log into small segments using a knife or clay cutter. These small pieces will become your beads. Make the lengths about 1-2 times longer than the desired bead width. Consistent sizing will give your beads a uniform look.
Now it’s time to add the hole. Take a needle tool or skewer and press it gently through the length of each bead piece. Work slowly and rotate the bead segment as you push the needle through to create a clean hole all the way through the bead. You want the hole large enough for your stringing material to pass through, but not so large that the bead walls are thin and fragile.
That’s the basic process for shaping simple round beads from clay. You can use this same method with logs cut into different shapes for more unique beads. The key is getting the proportions right before baking so your finished piece looks as intended.
Smoothing the Beads
Once you’ve shaped your terracotta beads into the desired forms, you’ll want to smooth any rough edges or imperfections. This helps give the beads a polished, professional look. Start by gently rubbing the bead between your fingers to round any sharp corners or bumps. You can also use a damp cloth to smooth the surface. Be careful not to over-handle the clay at this stage, as it can distort the shape.
Next, use a toothpick, knitting needle, or skewer to refine the shape and make sure the hole through each bead is uniform. Gently roll and twist the tool to elongate or widen holes as needed. Check for any cracks or thin areas that could make the bead prone to breaking. Fill in gaps with extra clay. The bead should feel smooth and sturdy at this point, with no major flaws.
Smoothing is an important step for achieving a high quality finish. Don’t rush through it. Any imperfections will be more noticeable after firing, so take your time to ensure evenly shaped and unblemished beads.
Baking Clay
Properly baking your clay beads is crucial to harden them and prevent cracking. Terracotta clay should be baked between 1800-2000°F. Lower temperatures may not fully harden the clay, while higher temperatures can cause bubbling or burning.
Baking times will vary based on the size and thickness of your beads, but most beads should be baked for 15-30 minutes. Thicker beads may require up to an hour or longer in the kiln. Check beads frequently as they bake to monitor doneness and prevent overbaking.
To prevent cracking, bake beads slowly by increasing the kiln temperature gradually, about 200°F per hour. Allow beads to fully cool in the kiln after baking before removing to prevent thermal shock. Proper clay conditioning, smoothing, and controlled drying of the beads prior to baking will also help minimize cracks.
Applying Decorations
After your terracotta clay beads are shaped, dried, and bisque fired (first firing before glazing), you can apply decorative finishes to them. There are many possibilities for adding color and creativity to your beads. Here are some of the most common options:
Glazes
Glazes are mixtures of minerals and chemicals that melt onto the clay surface during firing, creating a glass-like coating. They come in pre-mixed colors ready to apply, or you can mix custom glazes from recipes. Use a soft brush to paint glazes over bisqueware beads in one or more layers. The glaze will melt and fuse with the clay body during the final glaze firing, producing a smooth, durable finish.
Underglazes
Underglazes are colors made from pigments mixed with a base solution. They are painted on the raw clay surface before bisque firing. Underglazes do not melt or fuse to the clay. You must apply a clear glaze on top and fire again to make the colors permanent. Underglazes allow for hand painting detailed designs.
Stains
Ceramic stains contain pigments but minimal binders or fluxes. They work by being absorbed into the outer layer of bisque fired clay. Stains create soft, muted earthy colors. They are usually applied with a spray bottle for smooth coverage.
Lusters
Metallic lusters contain ground metals like gold, silver, copper, or platinum suspended in an oil-based carrier. They create a metallic sheen after firing. Lusters are applied by brushing over a fired glazed surface. The beads must be fired again at a lower temperature to bond the luster without melting the glaze.
Firing Glazed Pieces
Always follow the manufacturer’s instructions for firing temperatures and ramp times when using glazes, underglazes or lusters. Glazed beads require a final firing at a higher temperature than bisqueware to melt and fuse the glaze. Use test tiles first to ensure glaze compatibility and finalize the ideal temperature. Allow the kiln to cool completely before removing finished glazed beads.
Stringing the Beads
Once your terracotta beads are baked and cooled, you’ll need to prepare them for wearing or displaying. There are several techniques and materials you can use for stringing clay beads:
Thread: Choose a strong, waxed thread that won’t easily fray. Nylon beading thread works well. Thread a needle and tie a knot at the end. String the beads in your desired pattern, then tie a knot after the last bead to secure them.
Wire: Use a pliable wire like 20-22 gauge craft wire. Cut the desired length and string beads onto the wire. Twist the ends together to close the loop. For a neater look, thread crimp beads onto the wire ends and crush them with pliers to hold the beads in place.
Elastic: Measure around your wrist and cut a length of elastic beading cord for a snug bracelet. Use a needle or stringing tool to thread beads onto the elastic. Tie knots at both ends to secure the beads.
You can combine techniques too. Try wire wrapping seed beads between larger terra cotta beads, or use elastic thread with clasps for adjustable sizing. The options are endless for stringing and displaying handmade clay beads!
Selling and Displaying Your Beads
After you’ve created your terracotta beads, you’ll want to package and sell them. Here are some tips on pricing, packaging, and selling your bead creations:
Packaging and Pricing Your Beads
When packaging your beads, you’ll want to choose materials that protect them from damage. Small jewelry boxes, resealable bags, or bubble wrap pouches all work well. Consider lining boxes with fabric or tissue paper for a nicer presentation.
Pricing will depend on the size and complexity of your beads. Consider material costs as well as time spent designing and crafting. Handmade artisan beads often sell for $5-$20 per strand. Price slightly higher for unique shapes or one-of-a-kind beads.
Display Ideas and Selling Platforms
Local craft fairs and art shows are great places to display and sell your beads. Bring examples arranged attractively on cards, stands, or busts. Have order forms available for custom orders.
You can also sell beads online via Etsy, eBay, or your own website. Photograph your beads professionally against neutral backgrounds. Offer to ship domestically and internationally.
Consider approaching boutiques, jewelry stores, or gift shops to carry your beads on consignment. This allows a wider audience to see your products.
Advanced Techniques
Once you’ve mastered the basics of making simple round or square beads, you can move on to more advanced techniques to create unique and intricate beads.
One advanced technique is making more intricate shapes beyond simple spheres or cubes. You can sculpt the clay freehand into oval, triangular, star, heart, or custom abstract shapes before baking. Let your imagination run wild! Oval and teardrop shapes work well for pendants.
Using molds is another way to achieve intricate designs. You can press your clay into silicone molds to easily replicate detailed patterns. Look for beading molds online or at craft stores, or make your own molds using silicone putty and found objects or 3D printed designs.
Mixing clay colors together allows you to achieve beautiful blends within a single bead. Try mixing colors by kneading them together or rolling snakes of different colors. You can also layer colors for rainbow or ombre effects. Get creative with blending clays for multicolored beads.


