How Do You Make Underglaze Transfers?
Underglaze transfers are a popular decorating technique used in pottery and ceramics. An underglaze transfer is a design created with underglaze that is transferred onto unfired clay. Underglaze is a colored slip that is painted onto the surface of the clay before it is glazed and fired. Underglaze transfers allow potters to apply detailed imagery and patterns onto their pieces.
The process of creating an underglaze transfer involves designing the image, transferring it to tissue paper, cutting it out, and then applying it to an unfired clay surface known as greenware or leatherhard ware. Once the transfer is applied, it becomes a permanent part of the clay body. The pottery piece is then fired, during which the underglaze fuses with the clay. Finally, a transparent glaze can be applied over the transfer to give it a glossy finish.
Underglaze transfers have several benefits. They allow for intricate designs that would be difficult to paint by hand. The transfers offer consistency across multiple pieces. Artists without strong freehand skills can utilize transfers to create complex imagery. Overall, underglaze transfers provide a versatile decorating technique for potters.
Materials Needed
The main materials you will need for creating underglaze transfers are:
- Underglaze – This is the colored material that will be printed onto the transfer paper. You’ll need underglaze in the colors you want for your design. Some commonly used underglaze colors are black, white, blues, greens, browns, and reds. Make sure to use underglazes formulated for transfers. Some options are Amaco Velvet Underglazes, Mayco Underglazes, and Duncan Underglazes (https://ceramicartsnetwork.org/daily/article/How-to-Make-Magic-Rice-Paper-Transfers-for-Pottery).
- Paper – The paper you print the underglaze design onto. Good options are newsprint, rice paper, or deli paper. The paper needs to be thin enough for the underglaze to saturate through. Make sure the paper is acid-free so it doesn’t damage the clay (https://theartofeducation.edu/2019/05/a-step-by-step-guide-to-underglaze-transfers/).
- Brushes – You’ll need small brushes for applying the underglaze onto the paper. Use brushes with soft synthetic bristles.
- Container for underglaze – You’ll need small containers or jars to hold the underglaze while working. Make sure they can seal tightly.
Designing the Transfer
There are two main techniques for designing an underglaze transfer – hand drawing directly onto the transfer paper, or printing a design from a computer:
For hand drawing, use pencils, paints, or inks that won’t smudge or bleed when wet. Lightly sketch your design first before going over lines in pen or marker. Keep in mind the final size and shape of your ceramic piece; leave room for trimming and firing shrinkage. Simple designs with clean lines tend to transfer best. Avoid fine details that may get lost.
For printed transfers, create your design in graphics software and print onto special transfer paper (Source). Printers allow you to create complex, multi-layered designs not feasible by hand drawing. Make sure your printer can print fine resolutionoutput for crisp details. Print designs in reverse as a mirror image so they transfer properly onto the ware. Simple designs can work well, but computer aided design excels at intricate patterns and layers.
In general, simpler designs tend to be more forgiving through the transfer process. Complex designs may lose precision in transfer. Focus on bold outlines and blocks of color rather than fine lines and details, especially for hand drawn transfers. Test your design on a tile before transferring onto a final piece.
Applying the Underglaze
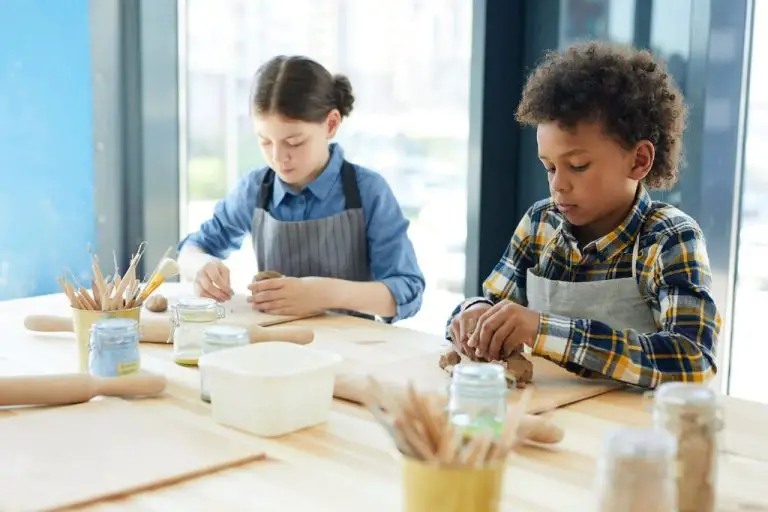
When applying the underglaze to the transfer paper or greenware, it’s important to use proper brush techniques to get clean edges and prevent smudging. Use a soft brush and lightly dab or smooth the underglaze in thin, even layers [1]. Too much underglaze or applying too heavily can cause bleeding under the transfer paper. Work in small sections and let each layer dry before adding more. Carefully brush the edges to taper off cleanly.
When applying to greenware, mist the surface evenly with water first using a spray bottle [2]. This helps the underglaze adhere properly. Use light, smooth strokes and avoid globs or heavy application. Brush from the center outward to avoid smudging edges. Let the underglaze dry completely before proceeding.
Drying the Underglaze
Once the underglaze has been applied to the transfer paper, it’s crucial to allow adequate drying time before the next steps. Underglaze needs to be completely dry in order to transfer cleanly and properly onto the ware. Recommended drying times range from 6-24 hours.
Make sure the underglaze is fully dry before proceeding. There should be no wetness or moisture left on the surface. Test by touching the underglaze gently with your finger to ensure it does not smear or move at all. Insufficient drying can lead to a blurred or indistinct transfer.
Allow the underglaze transfer to dry overnight, or a minimum of 6 hours according to Underglaze Transfer Application Instructions – E-lan Transfers. It’s better to allow too much drying time rather than too little.
Once completely dry, the transfer is ready to be cut out in preparation for application to the ceramic ware.
Cutting Out the Transfer
Once the underglaze has fully dried on the transfer paper, the next step is to carefully cut out the transfer design. This process requires precision in order to get clean edges and avoid tearing the transfer.
An X-Acto knife or sharp scissors are commonly used tools for cutting out underglaze transfers [1]. The blade needs to be new and sharp for the best results. Cutting on a self-healing mat can help protect your work surface.
Take care when handling and cutting the transfer to avoid wrinkles, folds or rips. Work slowly and focus on getting clean cuts around the edges of the design. Don’t cut too close to the edge or you may cut into the actual design. Leaving a small border around the transfer helps with handling.
Use a gentle touch and only minimal pressure when cutting to get smooth edges and avoid rough spots. If any small bits of the transfer get separated, they can be reattached later during application using a damp brush.
Applying the Transfer
When applying the transfer, it’s important to focus on technique to prevent tearing. According to the experts at Bailey Pottery, you’ll want to mist the surface of the greenware with water before applying the transfer using a spray bottle. This helps the transfer slide around and prevents it from sticking in one spot and tearing (Bailey Pottery).
The key is to lay the transfer face down on the pottery surface and use a damp brush to firmly adhere it, starting from the center and working your way out. As you brush, gently move the transfer into place – don’t just press straight down. Use a pouncing motion to allow the transfer to slide into proper alignment without tearing or creasing. Work slowly and methodically (China Clay Art). Proper technique will result in a nicely transferred design.
Sealing the Transfer
Sealing the transfer before applying it to the ware is a crucial step that helps ensure a crisp, clean transfer. Without sealing, the transfer can become blurry or faded during firing. There are a few main reasons to seal an underglaze transfer:
- Sealing prevents colors from running or bleeding during the bisque firing.
- It helps the transfer adhere securely to the ware so edges don’t lift or peel off.
- Sealing prevents pinholes or breaks in fine details of the transfer design.
The most common sealers used for underglaze transfers are:
- Clear glazes like a transparent matte or gloss. These penetrate the transfer and create a protective layer.
- Acrylic mediums or polymers like gloss or matte mediums also seal and strengthen the transfer.
- Sprays like acrylic spray sealers, fixatives or workable fixatives are a quick way to seal transfers.
Apply a thin, even coat of the sealer and allow it to fully dry before applying the transfer to avoid smearing. With proper sealing, the transfer will remain crisp and vivid through the bisque firing.
Firing the Ware
When firing ware with underglaze transfers, it’s important to follow the recommended firing schedule for the specific underglaze product you used. Generally, underglaze transfers should be fired to cone 06-04. Firing too low can prevent the transfer from bonding properly with the clay body. Firing too high can cause the transfer to burn out.
To prevent flaws when firing:
- Make sure ware is completely dry before firing to prevent underglaze from blowing out.
- Use a slow firing cycle with a low temperature hold or soak period to allow transfers to bond gradually.
- Avoid increasing temperature too quickly, as rapid temperature changes can cause breaks, cracks, or other defects.
- Allow sufficient cool down time and avoid cooling ware rapidly after firing.
Test your firing schedule on test tiles first before firing your finished pieces. This allows you to adjust the firing as needed to achieve an optimal result.
Troubleshooting Issues
When making underglaze transfers, there are a few common problems that may occur along with solutions to troubleshoot them:
Glaze Crawling
If the glaze applied on top of the underglaze transfer cracks or pulls away, exposing bare clay, it is referred to as crawling. This happens because underglaze is more porous than glaze, absorbing water from the glaze and drying it out too quickly.1 To prevent crawling, try applying a thinner layer of underglaze for the transfer or allow for extra drying time before glaze firing.
Transfer Flaking Off
If the underglaze transfer starts flaking off the ware, the transfer may have been too wet or thick when applied. Make sure to fully dry the underglaze before transferring and use minimal water when wetting the paper. 2 Letting the ware dry leather hard vs. bone dry can also help the transfer adhere better.
Improving Technique
To get the best results when making underglaze transfers, focus on consistency in process and materials. Standardize mixing ratios, drying times, paper wetness, and firing profiles. Keep notes to replicate successes. With practice in controlling variables, underglaze transfer issues can be minimized for high quality results.


