How Do You Manufacture Clay Tiles?
Clay tiles have been used for thousands of years as durable and decorative building materials for floors, walls, and roofs. The earliest known use dates back to ancient Mesopotamia around 4000 BC. Clay tiles were also extensively used in ancient Greece, Rome and Egypt.
Clay tiles are manufactured from natural clay and clay-based materials that are molded and fired at high temperatures to create hard, durable ceramic tiles. There are many different types of clay tiles, but the four main categories are:
- Terracotta tiles – Made from natural clay and fired with a red-orange color.
- Quarry tiles – Made from natural clay or shale with added minerals for color. Very dense and hard wearing.
- Ceramic/porcelain tiles – Made from refined clays to create a dense, water-resistant tile.
- Terrazzo tiles – Concrete or cement tiles with small pieces of marble, quartz or other materials pressed into the surface.
The manufacturing process for clay tiles generally includes:
- Clay preparation – Refining and mixing the clay
- Molding tiles – Pressing or extruding clay into molds
- Drying tiles – Removing moisture from molded tiles
- Firing tiles – Exposing tiles to high heat in a kiln
- Finishing processes – Glazing and final touches
The following sections will examine each step of the tile manufacturing process in detail.
Clay Selection
Choosing the right type of clay is a crucial first step in manufacturing high quality clay tiles. There are several factors to consider when selecting clay:
Types of Clay
The two main types of clay used for tile manufacturing are earthenware clay and stoneware clay. Earthenware clay contains lower levels of fluxes and requires firing at lower temperatures, while stoneware clay has higher flux content and can be fired at higher temps to make a stronger, more durable tile.
Clay Properties
The clay should have the right levels of plasticity and workability to be easily molded into tiles without cracking or warping in the drying and firing process. The clay color, texture, and mineral content will determine the final look and durability of the tile.
Sourcing Clay
Clay can be sourced from local deposits or purchased from specialty ceramic suppliers. The clay should be tested to ensure it has the proper chemical and physical characteristics for tile making. Some clays may require blending for optimal workability.
Clay Preparation
Once the raw clay has been selected, it needs to go through several preparation steps before it is ready for molding. The first step is crushing the clay lumps using a jaw crusher or pounding mill. This breaks up any large chunks and makes the clay easier to work with. The clay particles should ideally be crushed down to a size of around 1 inch or less.
After crushing, the clay goes through a grinding process. This uses roller mills or ball mills to further reduce the particle size of the clay. Grinding ensures the clay has a fine, uniform texture which is important for the quality and consistency of the final tile product. The typical particle size after grinding is less than 100 microns.
The ground clay is then screened to remove any large particles or contaminants that could have been introduced during the mining and crushing processes. Vibrating screens are commonly used, with mesh sizes ranging from 10 mesh to 80 mesh depending on the desired fineness of the clay. This also allows different grades of clay to be separated.
Finally, different types of clay are often blended together in specific proportions. This creates a clay body with the desired properties for the tile manufacturing process. Blending improves technical qualities such as plasticity, drying behavior, and firing characteristics. The ingredients and ratios of the clay body mixture are optimized based on the manufacturing equipment and specifications of the final tile product.
Molding
There are several techniques used to mold or shape clay tiles during the manufacturing process. Some of the most common molding methods include:
Extrusion
Extrusion involves forcing the clay through a die or plate with holes in it to create a continuous strip or sheet of clay in the desired size and shape. The clay is fed into a large extruder machine and pushed through the die under pressure. As it emerges, the continuous strip can be cut to the length of an individual tile.
Pressing
Pressing is commonly used to make floor and wall tiles. The clay is pressed into molds under high pressure using hydraulic presses. The molds can produce multiple tiles during each pressing cycle. The pressed tiles are then removed from the molds and set aside to dry.
Rolling
Rolling is used to make flat clay sheets or slabs that can then be cut into tile shapes. The clay body is passed between two rollers to compress it to an even thickness. Decorative patterns can also be added using textured rollers.
Soft Mud Molding
In soft mud molding, clays with higher moisture content are pressed into plaster molds by hand to pick up the shape and surface texture. The soft clay tiles are then allowed to firm up slightly before being removed from the molds to dry.
Dust Pressing
In dust pressing, clay powder is pressed into molds rather than solid clays. The clay powder is poured into molds and then compressed under high pressure. This allows very intricate shapes and textures to be achieved.
Drying
After the clay tiles have been molded, they must go through a careful drying process before firing. This is an important step, as drying too quickly can cause the tiles to crack or warp. The tiles are dried in specially designed drying rooms with controlled temperature and humidity.
The temperature in the drying rooms is usually around 100-120°F. The humidity is kept around 60-70%. These conditions allow the water in the clay to evaporate slowly over the course of several days. If the tiles were to dry too quickly, the water would evaporate from the surface faster than it can escape from the interior of the tile. This differential drying rate causes stresses that can lead to cracks and warping.
The drying time depends on the size and thickness of the tiles, as well as the clay body composition. Smaller thinner tiles may only need 2-3 days to dry, while larger thicker tiles may need 5-7 days. The tiles are inspected throughout the drying process to monitor their progress. Once the tiles are fully dried, as determined by their color, hardness, and sound when tapped, they are ready to go into the kiln for firing.
Firing the Clay Tiles
Firing is one of the most important steps in manufacturing clay tiles. This process hardens the clay through intense heat, transforming the soft, moldable clay into a hard, durable tile. Firing takes place inside special ovens called kilns. There are several types of kilns used for firing clay tiles:
Tunnel Kilns – These are long, tunnel-like kilns that tiles pass through on a conveyor belt. Temperatures can reach over 2000°F inside a tunnel kiln. Tiles take several hours to pass through the kiln, allowing the heat to fully penetrate the clay.
Updraft Kilns – With updraft kilns, the heat source is at the bottom while exhaust flues are at the top. Hot air and gases travel upward through the chamber, efficiently transferring heat to the tiles above. Updraft kilns are energy-efficient and suitable for continuous firing.
Downdraft Kilns – In downdraft kilns, the heat source is at the top with vents at the bottom. Heated air is pulled down over the tiles allowing excellent heat transfer and uniform firing. These kilns work well for shorter firing cycles.
The firing process begins by loading tiles carefully into the kiln. Temperatures are steadily increased according to a timed schedule. Firing temperatures typically range from around 1800°F to 2200°F. The tiles soak at the maximum temperature for several hours to fully vitrify the clay. The kiln then cools gradually before unloading.
Firing clay tiles is a precise process. Achieving the right temperatures for the proper duration ensures the tiles become hardened, durable, and ready for final finishing. With quality firing, the tiles emerge ready to install and withstand years of use.
Glazing
Glazing is an important step in manufacturing clay tiles that gives the tiles an attractive and durable finish. The glaze is a special coating applied to the clay tile before the final firing. Glazes are made from fine-ground glass mixed with coloring oxides and chemicals that allow the glaze to melt and fuse to the clay body during firing.
Common ingredients in ceramic glazes include:
- Silica – provides glass and glaze melt
- Alumina – helps control glaze melt and improves durability
- Fluxes – like soda ash or borax to lower the melting point
- Colorants – metal oxides like cobalt or copper for different colors
There are several methods to apply the glaze to the tiles:
- Dipping – submerging the tile in a tank of glaze
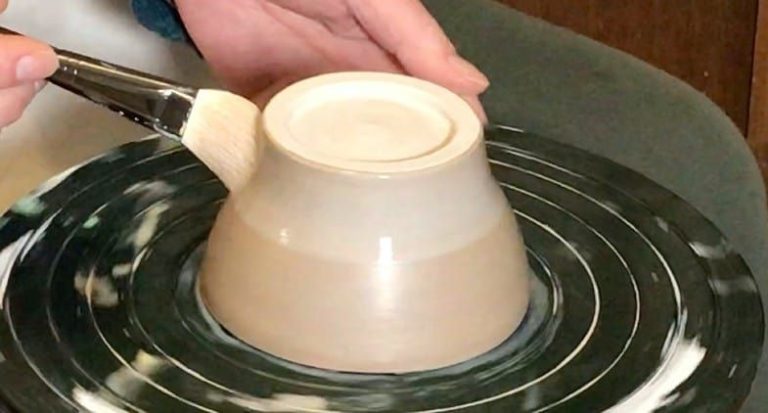
- Brushing – using a soft brush to manually apply glaze
- Spraying – spraying glaze onto the tiles with a pressurized sprayer
- Pouring – pouring the glaze evenly over the tile
Glazing can be done on either the top surface only or both sides for improved sealing and looks. The glazed tiles are then fired in the kiln at high temperatures around 2200°F to melt the glaze into a smooth, glassy coating.
Quality Control
Ensuring a high quality finished product is critical in tile manufacturing. This is done through rigorous quality control testing at various stages of production.
After tiles have been fired, they undergo a battery of tests to verify they meet specifications:
- Strength Testing – Tiles are tested to ensure they can withstand the required amount of pressure and impact for their intended use, whether it be for floors, walls, countertops, etc. Test methods include breaking force, impact resistance, abrasion resistance, etc.
- Water Absorbency – The porosity and water absorption rates of tiles are measured. Tiles intended for wet areas need to have low absorbency.
- Dimension Verification – Tile dimensions are checked to confirm they conform to stated size specifications. This ensures proper fit and grout joint size when installing.
- Visual Inspection – Trained inspectors examine tiles for any defects in appearance, such as cracks, chips, uneven glaze coating, color inconsistencies, etc. Tiles must meet aesthetic standards for surface quality and finish.
By thoroughly testing tile properties at the end of manufacturing, inferior quality tiles are identified and rejected. Only tiles passing the battery of quality control tests are approved for packaging and sale.
Packaging
Once the clay tiles have been fired, glazed, and passed quality control checks, they are ready for packaging. The packaging process will protect the finished tiles during shipping and delivery.
There are a few key steps in the packaging process:
Palletizing
The tiles are stacked neatly on wooden pallets, which provide a stable base for the tiles during transport. The pallets have a standard size that allows them to be easily moved by forklifts and pallet jacks. The tiles are arranged on the pallets in a systematic way to maximize space while preventing breakage.
Wrapping
Once stacked on pallets, the tiles are wrapped in plastic sheeting or placed in cardboard boxes. This protects them from dirt, dust, and moisture during shipping. Stretch wrapping with plastic is common for whole pallets, while boxes allow for smaller shipments.
Labeling
Each pallet or box is clearly labeled with details like the tile type, quantity, production date, and destination. This allows for easy identification during shipping and upon delivery. Barcode labels are often used for inventory tracking purposes.
Proper packaging is a crucial final step in tile manufacturing. It gets the finished products to customers or retailers in pristine condition, ready for installation.
Distribution
Once the clay tiles have been manufactured and packaged, they need to be stored and transported to customers. Proper distribution requires careful planning and execution.
Warehousing
The finished tiles are first stored in a warehouse while awaiting shipment. Climate-controlled warehouses help prevent damage from moisture, freezing temperatures, or excessive heat. Inventory software tracks the stock and coordinates outgoing shipments. Forklifts move pallets of tiles around the warehouse and load them onto trucks.
Transportation
Shipping the fragile tiles requires specialized equipment. Flatbed trucks with air-ride suspension transport pallets of boxes over the road. Straps and corner protectors secure the load during transport. Local deliveries may use smaller box trucks. Internationally, containers holding palletized tiles are loaded onto ships, trains, and trucks through an intermodal network.
Logistics
Logistics coordination ensures the tiles arrive on time and in good condition. Customer orders are planned out weeks in advance to optimize the shipping process. Routing accounts for construction site access, road conditions, and fuel costs. Real-time tracking provides updates on the shipment’s status. Proper paperwork for manifests, invoices, and customs clearance keeps things moving smoothly.


