How Do You Mix Clay Powder For Lippan Art?
Lippan art is a traditional decorative mud wall art form originating from the Kutch region of Gujarat, India. The term “lippan” comes from the Gujarati word lipana meaning “to smear” or “to plaster”. This art form dates back centuries and is an integral part of the local Rabari and Ahir communities. Lippan art is traditionally practiced by women who decorate the inner and outer walls of village homes.
This ancient tribal art uses locally available natural materials like mud, clay, cow dung, lime and natural colors. Intricate geometrical patterns, symbolic motifs like birds, animals and floral designs are created by hand. Each design is unique and carries cultural significance passed down through generations.
Lippan art follows a basic process – first preparing the mud plaster, then etching beautiful freehand designs using a trowel. Patterns emerge through the interplay of positive and negative spaces. Finally, pigments derived from minerals, plants and vegetables are used to add vibrant colors. Bright red, black, white and orange are classic hues seen in lippan art.
While tribal in origins, lippan art has seen global recognition today. The skilled use of texture and color transforms plain walls into lively works of art and make lippan a highly distinctive decorative tradition.
Materials Needed
The main material needed for lippan art is clay powder. There are a few common types of clay powder used:
- Pottery clay – This is natural clay dug straight from the earth. It has good plasticity and sticks together well but tends to be brittle when dry.
- Stoneware clay – Made from minerals like feldspar, this clay can withstand high firing temperatures. It is less sticky and prone to cracking.
- Porcelain clay – Very refined and almost pure kaolin clay. Porcelain has a smooth, white appearance when fired and is stronger than stoneware.
- Modeling clay – Made from a mix of oils, waxes, and clays. It air dries at room temperature and doesn’t require firing.
Aside from the clay, you’ll need some basic sculpting tools:
- Paddles and ribs – For flattening, smoothing, and shaping the clay.
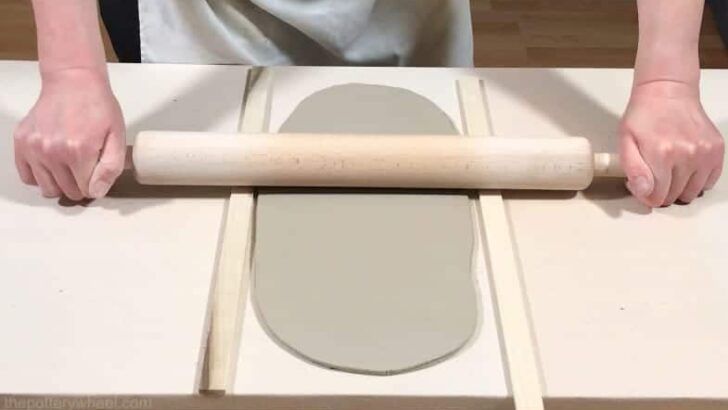
- Rolling pins – To roll flat, even sheets of clay.
- Textured mats – Can imprint patterns onto clay.
- Cutters – For cutting precise shapes.
- Molds – Can form clay into 3D shapes.
Preparing the Clay
The foundation of any lippan art project is properly preparing your clay. Here are the key steps:
First, measure out the amount of clay powder you will need for your project. When starting out, aim for around 2 cups of powder to begin with. Use a scale to weigh the powder if you want to be very precise.
Next, gradually add water while mixing to achieve the ideal consistency. You generally want a mixture that is smooth, flexible, and just moist enough to stick together without being sticky. The typical clay to water ratio is 2:1, but this can vary based on the specific clay you are using.
As you mix, use your hands to knead the clay thoroughly until it reaches an uniform, malleable texture. At this stage, you can add small amounts of additional water or powder as needed. Kneading well removes air bubbles and makes the clay responsive when shaping.
Your clay is ready for molding when it is smooth, supple, and holds its shape without cracking or drying out. Test the consistency by shaping a small piece in your palm. When prepared properly, the clay should keep the form you give it without sticking or cracking.
Shaping and Molding
Once your clay is prepared, it’s time to shape it into the desired form. Lippan art offers endless creative possibilities when it comes to sculpting the clay. Here are some techniques to try:
Use your hands to mold basic shapes like bowls, plates, cups, and figurines. Apply gentle pressure with your fingers and palms to form smooth curves and indentations. Pinching the clay between your fingers or rolling it in your palms allows for detailed handiwork.
Simple tools like paddles, ribs, loop tools, and clay shapers can also assist with shaping. Run the edges of a paddle over the clay’s surface to smooth and compress it. Use loop tools to refine details and carve lines. Clay shapers with silicone tips help create precise shapes and textures.
Consider press molds and templates if seeking consistency across multiple pieces. Press the clay into mold cavities to effortlessly produce identical forms. Make your own templates by cutting custom shapes from wood, plastic or thick cardstock, then trace their outlines on the clay’s surface.
Allow your imagination to guide you as you morph the clay into an array of artistic creations. Relax and have fun experimenting with different shaping techniques.
Textures and Patterns
One of the most distinctive aspects of lippan art is the intricate textures and patterns etched into the clay. After the basic form has been molded, artists use a variety of techniques to decorate the surface and make it truly unique.
A common technique is to carve or incise lines and shapes into the clay using small metal tools or sticks. Geometric patterns like diamonds, zigzags, and concentric circles are often carved to add visual interest. Floral and nature motifs may also be incised for a more organic look.
Piercing is another traditional technique where small holes are punched into the clay using a pointed tool. This creates beautiful, lace-like patterns as light shines through the holes. Piercing can be done in precise geometric alignments or in more free-flowing organic shapes.
Lippan artists also add color using natural pigments mixed with water. Earthy red, brown, black and white are commonly used to accent the carved textures and patterns. More elaborate pieces may have painted imagery of local flora, fauna or cultural symbols.
Whether going for a minimalist abstract look or a busier decorative style, the textures hand-carved and painted onto the clay give each piece of lippan art its distinctive personality and artistry.
Drying and Curing
Proper drying and curing are crucial steps for achieving lasting lippan artwork. Lippan can be dried either by air drying or kiln drying. Air drying takes longer but requires less equipment. Kiln drying is faster but requires access to a kiln.
Air Drying
When air drying, it’s important to allow even, gradual drying of the entire piece to prevent cracking. Place the lippan artwork in a dust-free room with good airflow. Avoid direct sunlight which may dry the surface too quickly. Flip the artwork periodically to ensure uniform drying. Air drying can take 2-4 weeks depending on thickness and climate.
Kiln Drying
Kiln drying uses an electric or gas fired kiln to rapidly dry and cure lippan pieces. Place the artwork on a kiln shelf or post, allowing space between pieces for airflow. Set the kiln to 200-300°F and allow it to heat gradually over 4-6 hours. Hold at top temperature for 1-2 hours per inch of thickness. Cool slowly over another 4-6 hours. Firing too quickly can risk cracks or explosions.
No matter the drying method, the key is to allow even, gradual drying throughout the entire piece. With careful drying and curing, your lippan artwork will have the strength and durability to last for generations.
Applying Finishing Touches
Once your lippan artwork has dried completely, there are a few optional finishing touches you can add to enhance the look. Clear lacquers or colored glazes are commonly used in lippan to impart a glossy shine or layered color effect. Apply lacquer or glaze in thin, even coats, allowing ample drying time between coats. Too much buildup can cause cracking. You’ll also want to polish or sand any rough edges for a smooth finish. Use very fine grit sandpaper and buff gently. For sculptures or pieces made from multiple parts, this is the stage where you’ll assemble the parts using slip (liquid clay), taking care to neatly hide any seams. Let assembled pieces cure fully before lacquering or glazing. With some creative finishing touches, you can really make the deep textures and patterns of lippan art stand out. Just take your time and let pieces dry thoroughly between steps for best results.
Tips and Tricks
Lippan art requires patience and practice to master. Here are some useful tips and tricks to help you avoid common issues and achieve beautiful results:
Avoid Cracking and Breakage
As lippan pieces dry, they can develop cracks and break apart. To prevent this:
- Allow your artwork to dry slowly at room temperature. Avoid quick drying which causes cracking.
- Reinforce pieces with rope or wire while drying for extra stability.
- Handle lippan gently while damp to avoid weakening the structure.
Achieve Desired Colors and Finishes
Lippan can be decorated with natural pigments to create a range of colors. For best results:
- Use high quality mineral and earth pigments, testing samples before applying to your artwork.
- Mix pigments into the clay thoroughly so the color is consistent throughout.
- Apply slips, lacquers, waxes, or oils once dry for glossy finishes and extra protection.
Troubleshooting Issues
If you run into problems with cracking, sticking, or unsatisfactory results:
- Add a small amount of water to clay that is too dry and crumbly.
- Knead in a tiny amount of oil for clay that is too wet and sticky.
- Let clay rest for 10-15 minutes after kneading to allow moisture to evenly distribute before shaping.
- Use wood, cloth, or plastic tools instead of metal which can discolor the clay.
Complementary Techniques
Lippan art can be combined with other art forms and crafts to create unique and visually striking pieces. One popular technique is embroidering or adding painted accents on top of the finished lippan surface. The textures and shapes of the lippan provide an interesting background and canvas for additional artistic details.
Lippan artworks are beautiful displayed on their own, but can also be incorporated into larger installations or displays. For example, multiple lippan tiles or plaques can be arranged into a mosaic or collage. Individual pieces also make for wonderful wall hangings, decorative plates or platters, lamp bases, and more. Get creative with how you present and showcase your finished lippan creations.
No matter how you choose to complement and display your lippan art, the combinations of colors, textures, and crafts result in one-of-a-kind works of art. Embrace your creativity as you explore the possibilities of this unique art form.
Conclusion
Lippan art is a unique and rewarding art form that allows you to create beautiful pottery and clay artworks. By properly mixing the clay powder, shaping delicate patterns and textures into the clay, and following the drying and finishing process, you can make your own stunning lippan pieces.
The creation process requires patience, an artistic eye, and an appreciation for this historic Japanese technique. But with practice, the right clay mixture, and some simple tools, you can design one-of-a-kind bowls, plates, vases, and decorative objects.
Lippan’s elegant shapes, glossy finishes, and intricate designs make it stand out from other pottery styles. Learning how to mix the clay properly is the first step to unlocking your creativity. Once you get the hang of the process, you’ll be able to craft home decor, gifts, or artwork to proudly display.
So don’t be intimidated to try your hand at lippan. By following this guide, experimenting with the flexible medium of clay, and adding your own personal touch, you can become a lippan artist in your own right.


