How Do You Mould Pots Using Pinching Method?
The pinching method is one of the oldest and most basic techniques for forming pottery. Archaeological evidence shows that pinch pots date back over 20,000 years to the Paleolithic era when early humans began making containers from clay. Pinch pots were likely some of the very first ceramic objects made by humans.
The simplicity of the pinching technique allowed even the earliest potters to create functional vessels from clay without the aid of a pottery wheel. Pinching was used across many ancient cultures including the Jōmon people of ancient Japan, Native American tribes, and African civilizations. It continues to be used today by potters looking to handcraft organic and asymmetric pots.
Gather Materials
The first step in making pots using the pinching method is to gather the necessary materials. This includes selecting the type of clay, any tools you may need, and preparing your workspace.
For pinching, you’ll want to choose an air-drying clay or polymer clay that is soft and pliable when starting out. Good beginner choices include Model Magic, Crayola Air Dry Clay, or Sculpey polymer clay. Avoid clays that get too firm or dry out quickly, as these will crack during pinching.
Basic tools include your hands for pinching and a work surface like a table, mat or cloth. You may also want sculpting tools like wooden skewers or toothpicks for poking holes or adding texture. Smooth implements like paintbrushes can refine surfaces. Have a ruler nearby to check thickness and size.
Cover your work area with newspaper, cloth or a disposable surface to keep it clean. You’ll also need an area for the finished pieces to air dry completely, like a rack or shelf.
Prepare the Clay
Properly preparing the clay is an essential first step before beginning to form your pinch pot. Start by kneading the clay vigorously with your hands for several minutes until it becomes uniformly soft and pliable. Kneading helps blend the moisture and eliminate any air pockets. Next, cut off a grapefruit-sized lump of clay and form it into a ball. Then, wedge the clay by slamming it down onto a flat surface while folding it over itself. This process aligns the clay particles and further removes air bubbles. The clay should end up with a smooth, elastic consistency – not too wet or sticky. If needed, add small amounts of water or a clay hardener to achieve the right texture. The clay is now ready to be pinched into shape.[1]
Form the Base
The base of a pinch pot serves as the foundation for the rest of the piece. It’s important to shape a sturdy, even base with a uniform thickness. According to The Pottery Wheel, the base should be around 1⁄2 inch thick at most. If it’s thicker than that, you’ll need to thin it out by gently pushing clay from the base up onto the sides.

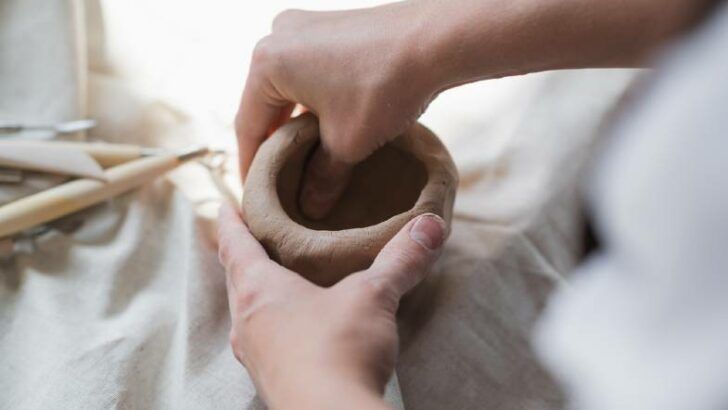
Start by firmly pressing a ball of clay down onto your work surface until it flattens out into a disk shape. Apply even pressure as you work the clay, moving outward from the center while rotating the disk. Eliminate any lumps or air pockets by smoothing the surface. Continue spreading and flattening until the base reaches the desired width – usually 2-4 inches across for a small pinch pot. Check the thickness and adjust as needed. The base should feel sturdy but still flexible enough to manipulate.
Once you’ve formed a uniform base of the right size and thickness, it will be ready to support the walls of your pinch pot. This solid foundation is key to building a successful piece with smooth, strong sides that hold their shape.
Shape the Walls
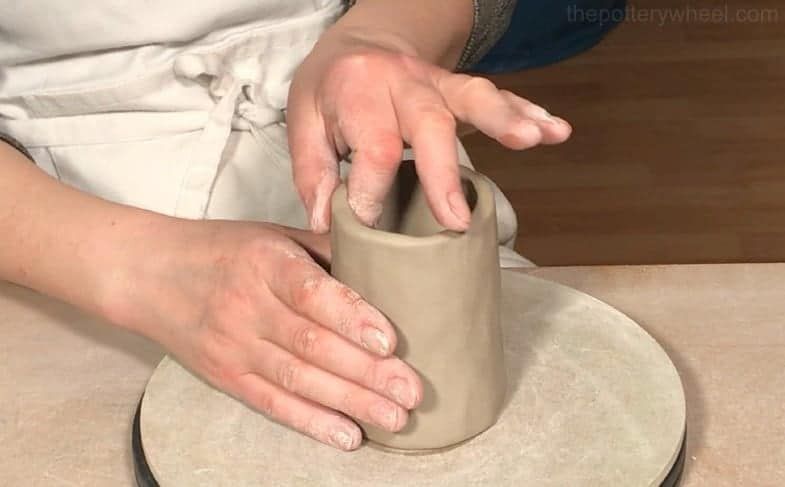
Once you have formed the base, it’s time to shape the walls of your pot. Continue using the pinching technique, working your way up from the base. Gently pinch the clay between your fingers and thumb to draw it upwards into the desired shape. Be careful not to pinch too hard or the clay will collapse.
As you work your way up, maintain uniform thickness of the walls. You may need to periodically re-pinch areas that get too thick or thin. If adding designs, pinch gently so as not to distort the main vessel shape. The key is gradually working the clay without over-manipulating it. Try to keep the walls an even thickness for stability and proper drying/firing. According to expert potters at [Insert Citation Here], evenly-shaped walls are important for evenly distributing moisture and heat.
Continue pinching until you’ve achieved the desired height for your pot’s walls. Leave the rim slightly thicker for stability. Make sure no cracks appear, patching with additional clay as needed. Let the shape rest if it becomes too distorted. With practice, you’ll gain a feel for how much pinching the clay can handle at each stage.
Refine the Shape
Once the basic shape of the pot is formed, the next step is to refine the shape by smoothing, carving, and adding details. As the clay begins to stiffen, use your fingers, tools, and a bit of water to gently smooth the surface. Scrape curved tools against the walls to thin and even them out. Use wooden tools to carve lines and patterns. Add coils, slabs, or appliqués of clay for decorative elements. Attach handles, spouts, or feet as desired. Let the clay firm up a bit more as you work to prevent distorting the overall shape. Check for cracks or weak spots and compress them closed. Refine the shape gradually until you achieve the look you want. The key is to work slowly and carefully to avoid tearing the clay. Mist areas with water if they begin to dry out too quickly.
According to https://www.youtube.com/watch?v=tfrWGDsuq-8, as the pot firms up, use metal and wooden tools to refine textures and shapes. Scrape curved tools against the walls to thin and even them out. Consider adding decorative elements like lines, patterns, coils, slabs, appliqués, handles, spouts, or feet.
Add Embellishments
Once the basic shape of the pot has been formed, it’s time to add embellishments to make it unique. There are many options for decorating and embellishing a pinch pot with added textures, handles, feet, and more.
To add texture, you can press items into the surface while the clay is still soft. Things like seashells, leaves, lace, or even kitchen utensils can create interesting patterns. You can also use clay tools to carve patterns into the pot. Geometric shapes, lines, dots, and spirals all make great textures (https://www.pinterest.es/pin/302022718746089383/).
For pots that will be functional, handles and feet can be very useful. Handles are easily formed by rolling a coil of clay and attaching it to the sides of the pot. Feet can be created by pressing balls of clay onto the bottom of the pot and shaping them. This raises the bottom off the surface and creates a stable base.
The embellishing stage is a chance to get creative. Simple pinch pots can be transformed into animals, faces, or abstract sculptures by adding colorful details. Let your imagination guide you as you turn a basic pinch pot into a unique work of art.
Dry the Pot
Once you have finished shaping your pinch pot, it’s important to dry it slowly and carefully to prevent cracking. Air dry clay is very fragile in its wet state. Here are some tips for proper drying:
Place the pot on a flat, dry surface out of direct sunlight. Avoid placing it on wire racks as they will leave marks. The clay will dry from the bottom up, so laying it with the opening face down will prevent warping. Drying time will vary based on air circulation, humidity, and thickness of the clay, but can take 1-3 days.
For fast drying, bake pots in the oven at the lowest temperature around 200°F, being careful not to exceed 225°F. Check regularly and bake for no longer than 20 minutes to prevent cracking from drying too quickly. Allow the clay to finish cooling to room temperature before handling.
To help prevent cracking, you can reinforce wet pinch pots with strips of dry clay inside and out. Using a similar clay and water mixture without adding extra water also helps reduce cracking. Once completely dry, pots must be fired in a kiln before using. Carefully monitor drying and only move pieces once they are leather hard.
Sources:
https://jennylemons.com/blogs/news/pinch-pots
Bisque Fire
Once the clay pot is fully dried, it can undergo the first firing called bisque firing. Bisque firing hardens the clay so it can withstand the high temps of glazing. For bisque firing, the kiln is heated to around 1800°F for 8 hours though temps and times can vary based on factors like clay type and thickness. Before firing, thoroughly inspect pots for cracks, imperfections, etc. Place pots upside down on the kiln shelf, leaving space between pieces for airflow. Program the kiln with the proper bisque firing schedule. Monitor the kiln during bisque firing and allow it to cool fully before unloading.
Glaze and Final Firing
Glazing is an important step that gives your finished pottery a beautiful sheen and seals the clay to make it less porous. There are many glazing techniques to choose from depending on the look you want to achieve.
Popular glazing methods include dipping, pouring, brushing, and spraying. Dipping involves submerging your bisqueware pot into a bucket or vat of glaze. Pouring glaze works well for the inside of vessels like bowls, cups and vases. Use a soft bristle brush to brush glaze on evenly for handpainted effects. Airbrushes or spray guns can be used for an even, all-over glazed surface.
Consider if you want a single color glaze or multiple colors. Try layering different glazes over each other. Add color by mixing metal oxide pigments into clear glaze. Texture can be created by adding materials like sand or wood ash to the glaze.
Once your pot is glazed, it’s time for the final firing. Place the pottery in a kiln and fire to around 2200°F. The high heat melts the glaze, fusing it smoothly to the clay body to create a glassy coating. Make sure pieces don’t touch each other during firing. The final firing hardens the clay and sets the glaze permanently to complete your handmade pottery.


