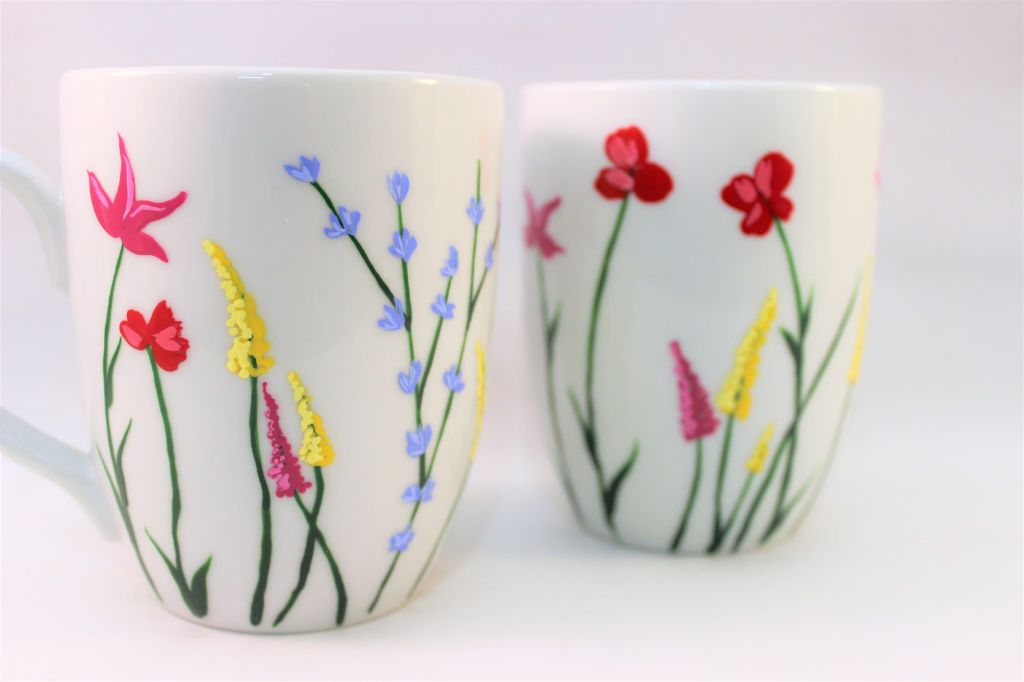
How Do You Paint A Mug That Won’T Wash Away?
The goal of painting a mug that is dishwasher safe is to create a custom design that will withstand repeated washings without fading or chipping. By using the right paints and techniques, it is possible to make a painted mug durable enough for the dishwasher.
There are several key steps to painting a dishwasher safe mug. First, the mug must be properly cleaned and prepped to ensure the paint adheres well. Next, a base coat is applied for a smooth surface. The design is then painted on using high-quality paint formulated for ceramics. To seal and protect the design, a clear glaze or spray sealer needs to be added as a final step. The mug should also be cured in the oven so the paint fully bonds to the ceramic material. Following this process will result in a mug that can be safely washed repeatedly without worry of damage to the painted design.
With the right supplies and techniques, it is possible for even novice artists to create custom dishwasher safe mugs. The end result is a personalized mug that will hold up to daily use.
Prepare the Mug
Before painting, it’s important to properly prepare the ceramic mug. First, wash the mug with soap and water and let it fully dry. Any moisture left on the surface can prevent the paint from properly adhering. Once the mug is clean and dry, lightly sand the outer surface with fine grit sandpaper. This helps roughness up the glazed surface so the paint can grip better. Apply even pressure while sanding and focus on areas that will be painted. Avoid sanding any printed areas you want to preserve. Sanding creates microscopic abrasions that paint can seep into. After sanding, wipe the mug with a dry cloth to remove any ceramic dust. The mug is now prepped and ready for painting.
Choose Paint
When choosing paint for a mug, it’s important to pick one that is non-toxic and food-safe. According to the Reddit thread “Can I paint ceramics at home with food-safe paint? Any tips…” from r/Ceramics, there is no product that you can use entirely at home that is food-safe without access to a ceramic kiln. However, there are some good options for non-toxic paint that works well on mugs.
Acrylic paint works best for durability on ceramic mugs. Be sure to choose a brand that specifically says it is non-toxic and food-safe, like Pebeo Porcelaine.
Also look for paint that has a glossy finish, as the glossiness helps protect the paint from wearing away with repeated use and washing. A gloss finish leads to a more durable mug design.
Base Coat
Before starting your design, you’ll need to apply 1-2 base coats of acrylic paint to the mug. Base coating provides an even, opaque layer that covers the glaze and creates a good surface for painting details. According to The Ceramic Painters Web Site, “Always brush on two coats of the base color. If you apply only one coat and your brush strokes show through, the finished work will look sloppy and amateurish” (Source). Be sure to let each coat fully dry before adding the next. The drying time will depend on the paint type and thickness of the coats. Allow at least 1-2 hours between coats.
Choose a base coat color that matches or complements the colors you’ll use in your design. Neutral colors like white, black, or gray provide a versatile background. Vibrant colors can make the base coat part of the overall design. Just keep in mind that lighter base coats will let the design colors pop, while darker bases mute them.
Create the Design
After the mug has been base coated, it is time to create the actual design. Start by sketching out the design lightly in pencil first. This allows you to plan out the design and make any changes easily before painting. According to The Sketching Pad, when painting pottery, it can help to start with simple designs like polka dots or stripes before attempting more complex freehand drawings or images.
Once the design is sketched out, use acrylic paint to paint the design on the mug. Acrylic paint works well on ceramics and can be purchased at most craft stores. Duncan’s OSKIT-1 Acrylic Paint Set provides a good starter selection of 12 popular acrylic colors in 2 ounce bottles for painting ceramics (https://www.classpop.com/magazine/painting-ceramics). Apply the paint smoothly and evenly, following your sketched design. Allow the paint to dry fully before moving onto any additional painting or finishing steps. The drying time will depend on the thickness of the paint applied.
Take your time painting the design and don’t worry about perfection. The beauty of hand-painted pieces is that each one is unique. If any mistakes occur, they can often be covered up or incorporated into the overall design with some creativity. Focus on enjoying the painting process.
Clear Coating
After the paint has fully dried on the mug, it’s important to apply a clear acrylic sealer to protect the design. According to Varnish for Acrylic Painting on Unglazed Ceramic, you should apply 2-3 thin coats of a water-based polyurethane, allowing each coat to fully dry before adding the next. Make sure to use a sealer that is formulated to be non-yellowing and dries clear. Allow the final coat to cure fully, which can take 24-48 hours.
Once the acrylic sealer has fully cured, the painted mug will be dishwasher safe. The clear coats create a barrier between the acrylic paint and the harsh dishwasher detergents. Taking the time to properly seal the acrylic paint ensures the mug can withstand regular use without the paint deteriorating or washing off.
Heat Set
Once the paint is fully dry, you can optionally heat set it in the oven to improve adhesion and durability, according to the paint manufacturer’s instructions. Acrylic paint brands like FolkArt recommend baking painted ceramics at 350°F for 30 minutes (1). Other brands may recommend slightly different temperatures and times.
Heating the painted mug helps the paint bond to the glazed ceramic surface. Do not microwave mugs painted with acrylics, as this can damage the paint and the mug. The oven allows the mug to heat gradually along with the surrounding air.
Be very careful when placing a painted mug in the oven, as applying too much heat too quickly can cause cracking or damage. Monitor the mug closely during baking. Only bake as long as needed to set the paint.
Sources:
(1) https://plaidonline.com/faq/folkart/folkart-multi-surface-acrylic-paint/how-do-i-cure-painted-glass-or-ceramics-when-using-folkart-multi-surface-satin-acrylic-paint
First Use

Once your mug is decorated and sealed with a clear coat, you’ll want to be gentle the first few times you use it to avoid any damage to the paint. It’s recommended to handwash the mug the first 1-2 times before putting it in the dishwasher. Handwashing allows you to carefully check that the paint is fully cured and sealed.
When handwashing, pay close attention to the paint, looking for any flaws, chipping, or other issues. The warm water and soap can reveal if there are any weaknesses in the paint or clear coat. If you notice any problems, it’s best to touch up the paint and add another layer of clear coat before continuing to use the mug.
Touch ups can be easily done with acrylic paint and clear coat. Make sure to let any touch ups fully cure before use. After the first few cautious handwashes, your decorated mug should be durable enough for the dishwasher. But continue checking regularly for any paint flaws, and touch up as needed.
Care
It’s important to take proper care of your hand-painted mug to preserve the design. Avoid soaking the mug in water, as this can cause the paint to soften and flake off over time. When washing the mug, use a mild dish soap and handwash gently with a soft sponge or cloth. Avoid abrasive scrubbers that could scratch the paint. Rinse thoroughly after washing.
When drying the mug, use the low heat setting on your dishwasher or air dry instead of harsh heated cycles that could cause the paint to crack or fade. You can also gently hand dry the mug with a soft towel.
With occasional gentle handwashing using mild soap and low heat drying methods, your hand-painted mug’s design will stay vibrant for many years to come. Taking care to avoid soaking or harsh scrubbing is key to preserving the mug’s unique painted design. Treating your handmade mug with care will allow you to enjoy its beauty and creative flair for years to come.
Source: https://www.victoriaceramics.studio/post/how-to-care-for-handmade-ceramics
Conclusion
Painting a mug by hand that won’t wash off with regular use requires careful preparation and the right techniques. To summarize, it’s important to thoroughly clean and prime the mug first with a base coat of acrylic paint. Once the base coat is fully dried, you can use paint pens, acrylic paint, or permanent vinyl to create your design. The key is applying a good quality clear coat over the design and properly heat setting the mug afterwards. This seals in the paint and protects it from scratching off with washing. While paint pens and permanent vinyl offer good results for mug designs, using acrylic paint and a clear acrylic sealant is the most durable option.
To achieve the best results, take your time preparing the surface and applying thin, even layers of paint and clear coat. Let each layer fully dry before adding the next. Apply at least two coats of a clear acrylic sealer to protect the design. Always heat set the paint afterward, following the directions on the sealant. Alternative decorating methods like ceramic decals and printable transfers can work, but also require sealing for longevity.
By carefully following these painting and sealing steps, you can create a custom hand-painted mug that will withstand regular washing without losing its vibrancy and color.


