How Do You Paint Designs On Ceramic?
Ceramics refers to objects made from clay that have been permanently hardened by heat. Ceramic materials include earthenware, stoneware, and porcelain. Painting designs on ceramic dates back thousands of years to ancient cultures like Mesopotamia, Egypt, Persia, and China. Ceramic vessels and tiles were often decorated with pigments and glazes for aesthetic and functional purposes. Today, painting on ceramic remains a popular craft and art form.
This article will provide an overview of painting techniques and processes for ceramic mediums. It will cover preparing the ceramic, types of paint, brushes and tools, design inspiration, adding details, and troubleshooting problems. The goal is to equip readers with the knowledge to start painting their own ceramic creations.
Types of Ceramics
There are three main types of ceramics commonly used for painting and design – stoneware, porcelain, and earthenware. Each type has unique properties that impact the painting process.
Stoneware is a dense, hard ceramic made from clay that is fired at high temperatures. The high firing temperature makes stoneware durable, non-porous, and able to withstand high heat. Stoneware has an earthy, matte appearance and works well for handpainted designs.
Porcelain is a delicate, translucent ceramic made from kaolin clay and fired at very high temperatures. It is less porous than stoneware. Porcelain has a smooth, shiny surface and delicate appearance. It can be more challenging to paint on but allows for very detailed designs.
Earthenware is a porous,opaque ceramic made from clay fired at lower temperatures than stoneware and porcelain. It has a coarse texture and is more delicate. Earthenware works well for bold, simple painted designs as paint is easily absorbed into the surface. Special care must be taken when applying paint.
The differences in porosity, texture, and durability mean certain paints and techniques work better on each ceramic type. Understanding the unique properties allows you to select the right ceramic and approach for your painted design.
Preparing the Ceramic
Properly preparing the ceramic surface is an essential first step before painting. There are a few key preparation techniques to ensure the paint adheres well and lasts over time:
First, clean the ceramic thoroughly with mild dish soap and warm water to remove any dirt, dust or oils. Make sure to rinse and dry it completely. According to wikiHow, you may also use a degreasing agent like rubbing alcohol for a deeper clean.
Next, apply a primer or sealer to the ceramic. Primers fill in any small pores and provide a surface for the paint to stick to. Water-based acrylic primers work well for acrylic paints. Let the primer dry fully before painting. According to Classroom, self-etching primer is another good option, as it helps the paint bond directly to the ceramic.
Finally, use a fine grit sandpaper to lightly scuff the surface. This helps the paint adhere better. Be careful not to scrub too hard. According to Classroom, number 220 grit or higher sandpaper works well. Wipe off any residue after sanding before painting.
Properly preparing the ceramic will help the painted designs last without chipping or peeling over time. Always start with a clean, primed and lightly sanded surface.
Paints for Ceramics
When choosing paints for ceramic projects, there are several good options to consider:
Acrylic Paint
Acrylic paint is a popular choice for painting ceramics. Acrylics adhere well to bisqueware and fired finishes and are available in a wide range of colors. Make sure to use acrylics formulated for ceramics that can withstand high temperatures. Acrylic paint can be thinned with water for ease of application. For sealing acrylic paint on ceramics, it’s best to use a ceramic-specific sealer or acrylic spray varnish according to manufacturers’ instructions. (https://acrylgiessen.com/en/painting-ceramics-with-acrylic-paint/)
Oil-Based Enamel Paint
Oil-based enamel paint provides excellent coverage on ceramics and tends to be very durable once cured. Enamel paints come in gloss or satin finishes. Allow sufficient drying time between coats as recommended on the product. Finish with an appropriate sealer or varnish.
Ceramic Glazes
Ceramic glazes are specially formulated for high-fire ceramics and work best on raw clay surfaces. Glazes create a glass-like coating after firing in a kiln. There are many beautiful colors and effects that can be achieved. Glazes bond well to clay bodies when fired properly.
When selecting paints, consider the ceramic surface (raw clay, bisque, or glazed), the desired effects, and firing requirements. Test paints on sample tiles before starting a project. Follow all manufacturer’s instructions for best results.
Brushes and Tools
Having the right brushes and tools is essential for painting beautiful designs on ceramic. Here are some of the key supplies you’ll need:
Brushes
Look for brushes specifically made for ceramic painting. These are usually synthetic brushes with stiff bristles that can apply paint smoothly onto the bisque surface. Some popular options include:
- Round brushes for details and outlines
- Flat brushes for filling in larger areas
- Fan brushes for blending and feathering
- Liner brushes for fine lines and details
It’s good to have a variety of brush sizes and shapes for versatility. According to LALAFINA, their ceramic painting brushes are suitable for acrylics, watercolors, gouaches, and oil paintings with fine tipped bristles good for details (source: https://www.amazon.com/LALAFINA-Ceramic-Painting-Miniature-Detailing/dp/B0CN41HLPV).
Sponges
Sponges help blend and soften edges. Look for soft, porous sponges that can pickup paint easily. Cut sponges into different shapes and sizes for different effects.
Stencils
Stencils make it easy to create intricate designs. Place them against the ceramic and use a sponge or brush to apply paint through the pattern.
Paint palette
Use a palette for mixing paint colors. Ceramic or plastic palettes with wells work best for keeping each color separate.
Water cups
Have small containers of water for cleaning brushes between colors. This keeps the paint palette clean.
Painting Techniques
There are several popular techniques for painting designs on ceramic surfaces. Some of the most common include:
Freehand Painting
This involves painting designs by hand without any stencils or guides. It allows for lots of creativity and original designs. Beginners may want to start with simpler repeat patterns or basic shapes. The more you practice freehand painting, the more skilled you will get at creating intricate designs (Source).
Stenciling
Stenciling involves using a pre-cut stencil with a design pattern cut out of it. You place the stencil on the ceramic surface and apply paint over it with a brush or sponge. The openings in the stencil allow the paint to reach the ceramic in that pattern. Stencils allow you to recreate the same design multiple times (Source).
Masking
Masking uses tape or masking fluid to cover areas you want to remain unpainted. You paint over the bare ceramic areas not covered by the tape or fluid. When ready, you remove the tape or masking fluid to reveal the negative space design. Masking allows for crisp, clean edges in a design.
Sponging
Sponging involves dabbing or blotting paint onto the ceramic using a natural sea sponge or craft foam. It creates soft, mottled textures. You can use different colors and layers to build up depth and dimension.
Stippling
Stippling uses repeated dots of paint applied with a stiff brush to build up texture and patterns. Combining dots of different colors can create interesting mottled effects. Stippling takes patience but delivers eye-catching results.
Design Inspiration
When looking for ideas for painted ceramic projects, it’s helpful to look at examples of ceramic painting designs. On Pinterest, you can find boards dedicated to ceramic painting that showcase beautiful designs. Some popular ideas include:
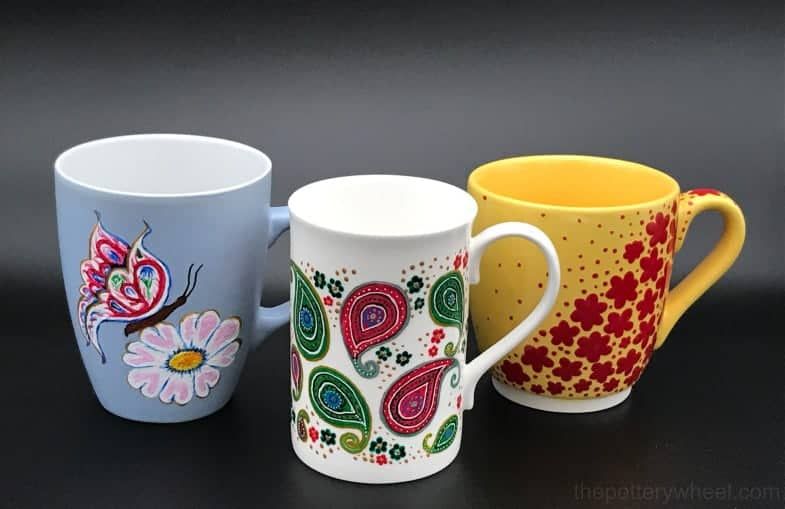
- Floral patterns – Painting delicate flowers and leaves can create a lovely look on mugs, plates, or vases.
- Geometric shapes – Using geometric patterns in bold colors makes for an eye-catching modern design.
- Landscapes – Paint serene natural scenes like mountains, forests, beaches, or sunsets.
- Animals – Add whimsical life by painting cats, dogs, birds, fish, or other animals.
- Monograms – Customize ceramic pieces with inicials or names painted in a stylish font.
You can also find inspiration from art movements like abstract, pop art, or minimalism. Let your creativity shine through in your unique ceramic painted designs.
Adding Details
Adding small details to a ceramic design can really make it stand out. Here are some ideas for adding dimension and interest:
- Outlining main elements with a thin brush and darker shade adds definition.
- Dots and patterns like polka dots, stripes, swirls, etc. make fun accents. Use a small brush or toothpick.
- Add borders using geometric shapes, dots, swirls or even freehand shapes. Vary line thickness for interest.
- Shade lightly around elements to give a 3D, raised effect. Use a soft brush to blend out edges.
- Consider adding shadows and highlights to make elements appear more realistic.
- Metallic paints are great for outlines and accents. Let them stand out or blend with other colors.
Get creative with patterns, textures and layers of detail to make your ceramic design truly unique. Add your own artistic flair with thoughtful small touches.
Clear Coating
Applying a clear coat over painted ceramic is an essential step to protect and preserve your design. The clear coat creates a protective barrier against scratches, fading from light exposure, and damage from handling or cleaning. There are several options for clear coats that work well on painted ceramics:
Polyurethane is the most popular choice for a durable clear coat on ceramics. Water-based polyurethane or oil-based polyurethane both provide a hard, protective finish when applied in 2-3 thin coats. Allow each coat to fully dry before adding the next. Polyurethane resists yellowing and scratches. (1)
Acrylic spray is a readily available option found at most craft stores. Look for acrylic clear coat designed for crafts. Apply several light coats to avoid drips and runs. Acrylic provides decent protection but may be more prone to scratches than polyurethane. (2)
Resin can be brushed over painted ceramics for a glossy finish. Epoxy resin tends to provide the hardest, most durable coating. Mix the resin according to package directions and apply in a well-ventilated area. Resin cures slowly so the piece will need to be left undisturbed for 24-48 hours.
Mod Podge or decoupage medium are budget-friendly options. Use a gloss finish and apply 2-3 coats for a shiny, sealed result. These tend to be slightly less strong than other clear coats but offer an accessible solution.
Always read and follow the product instructions carefully. Allow the recommended drying time between coats. Once fully cured, the clear coat will protect your painted ceramic through years of use.
Troubleshooting
Painting on ceramics can sometimes lead to mistakes and issues, but there are ways to fix common problems.
Fixing Mistakes
If you make a mistake while painting, quickly wipe it off with a damp sponge or paper towel before the paint has fully dried. For dried paint, use paint stripper or rubbing alcohol on a cotton ball to remove it. Be gentle so you don’t damage the ceramic surface. You can then re-paint that area once it’s fully cleaned.
Cracking
If the ceramic paint cracks during firing, the paint was likely applied too thickly. To prevent cracking, apply paint in thin, even coats and allow each layer to fully dry before adding another. The ceramic piece may also have been fired at too high of a temperature. Refer to the paint manufacturer’s instructions for recommended firing temps.
Paint Not Adhering
If the paint scrapes or chips off easily, the ceramic likely wasn’t properly cleaned and prepared before painting. Make sure to wash the ceramic with soap and water and let it fully dry. Additionally, the ceramic may need to be lightly sanded to create a rougher surface for the paint to grip onto. Always check that you are using paint specifically formulated for ceramics.
For additional tips, refer to this article on common ceramic painting problems and solutions.


