How Do You Put Clay On A Wheel?
Pottery wheels have been used for thousands of years to shape clay into pots, bowls, vases, and other vessels. Evidence of pottery wheels dates back to Mesopotamia around 3500 BCE. Before the invention of the wheel, pots were shaped by hand using the coiling method. The pottery wheel revolutionized the process, allowing potters to quickly and efficiently produce uniform pieces.
Clay is the essential material for pottery. Different clay types have varying properties that affect the way they can be worked and fired. When preparing to throw on the wheel, clay needs to be kneaded to remove air bubbles and achieve an even consistency. The most commonly used clay for throwing on the wheel is stoneware, which can be worked into thinner forms without cracking and can withstand high firing temperatures.
Selecting the Clay
Choosing the right type of clay is crucial for successfully working with clay on the potter’s wheel. The main types of clay used for throwing on the wheel include earthenware, stoneware, porcelain, and ball clay (Types of Clay for Pottery – The 5 Main Types of Ceramic Clay). Each type varies in its plasticity, workability, firing temperature, porosity, color, and intended use.
Earthenware is very plastic and easy to work with but fires at lower temperatures and is more porous. Stoneware fires to higher temperatures, resulting in a stronger finished piece that is less porous than earthenware. Porcelain is very smooth and fires to the highest temperatures but can be more challenging to center and throw on the wheel. Ball clay features high plasticity and is often blended with other clays.
Beginner potters typically start with earthenware or stoneware before moving on to porcelain. Consider the project goals, desired characteristics, and firing capabilities when selecting the type of clay. Test various clay bodies to determine what is easiest to center and shape on the wheel.
Preparing the Clay
Before clay can be centered on the pottery wheel, it must be properly prepared through wedging and kneading. Wedging is the process of cutting and reforming the clay to remove air pockets. According to this video, wedging aligns the clay particles, removes air bubbles, and ensures even moisture content.
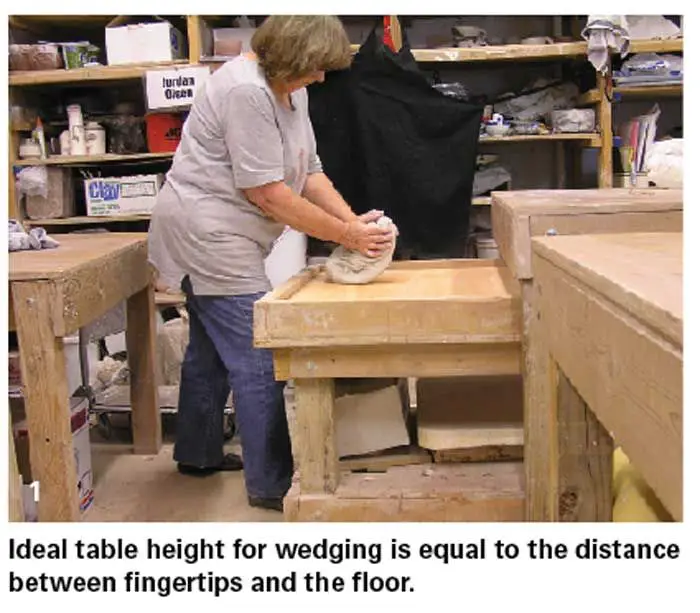
To wedge the clay, start with a clay slab and cut it in half. Slam the halves together and repeat, cutting and slamming until the clay is soft and uniform. Avoid overworking the clay, as it can cause the clay to become stiff. Kneading the clay is similar to wedging, but involves folding the clay over itself repeatedly to achieve an even consistency and moisture level. Properly wedged and kneaded clay is smooth, pliable, and ready to be centered on the wheel.
Centering the Clay
Centering the clay is one of the most important steps in throwing pottery on the wheel. It involves getting the clay centered and consolidated on the wheel head before opening up the walls. According to https://craftow.com/how-to-center-clay-on-pottery-wheel/, here are some key steps to properly center the clay:
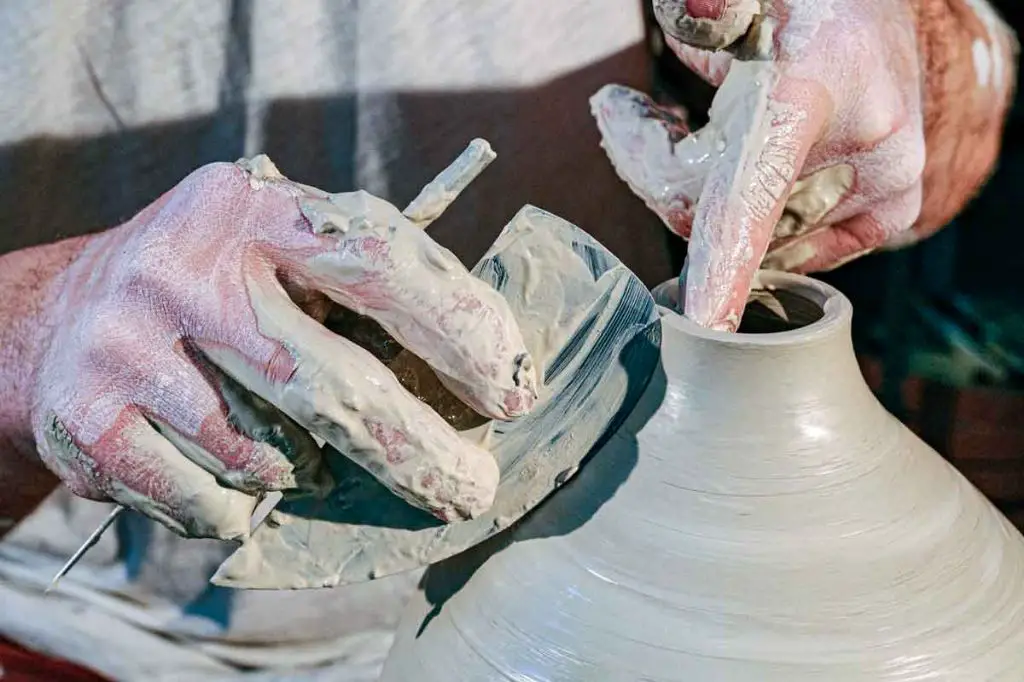
First, you’ll need to firmly place a ball of clay on the center of the wheel head and apply pressure to secure it in place. Next, kickstart the wheel to slowly spin it. Then, keeping your elbows tucked in, place both hands on either side of the clay and gently push inward. Apply even pressure with your fingers and palms to center the clay.
As the wheel spins, continue condensing the clay by pushing from different sides. Use the heels of your hands to compress the clay into a smooth, rounded form. According to pottery wheel beginners on TikTok, avoid overworking the clay when centering. Work patiently and methodically. Keep centering until you have a consolidated cone shape.
Make sure the clay is centered before opening it up. You can test this by stopping the wheel and gently pressing on the sides to check for even thickness. The centered clay should have no wobble. Once satisfied with the centering, you can move onto raising the walls.
Opening the Clay
Once the clay is centered on the wheel, it’s time to open up the ball of clay. This is an important step that creates the interior space that you’ll shape into your final piece.
To open up the clay, start by wetting your thumbs and pressing them down into the center of the ball of clay. Apply even pressure as you push down to create a hole in the center, being careful not to poke all the way through the bottom. Slowly work your thumbs in a circle to expand the opening in the clay. Open it up just enough to create some interior space to work with.
Make sure to keep the walls of the clay even in thickness and centered as you open it up. Go slowly and gently so you don’t distort the shape. The opening you create will become the inside of your final shaped piece.
Raising the Walls
Once the clay is centered and opened, you can begin raising the walls by pulling the clay upwards. It’s important to raise the walls evenly to ensure the thickness is consistent all the way around. As you pull up the walls, apply even pressure by placing your hands on opposite sides of the clay. Continue pulling upwards until the walls are the desired height. According to this source, you should pull the clay at least half an inch to one inch above the rim before moving your hands apart to widen the opening again.
Raising the walls evenly takes practice. If one section starts getting too thin, you can gently push that area inwards while pulling the thicker areas up higher. Adding water can also help soften and even out uneven sections. Go slowly and check the thickness frequently as you raise the walls to maintain an even shape.
Shaping the Piece
Once the walls have been raised to the desired height, it’s time to shape the actual piece. This involves using your hands, fingers, and various tools to refine the form and create the final shape.
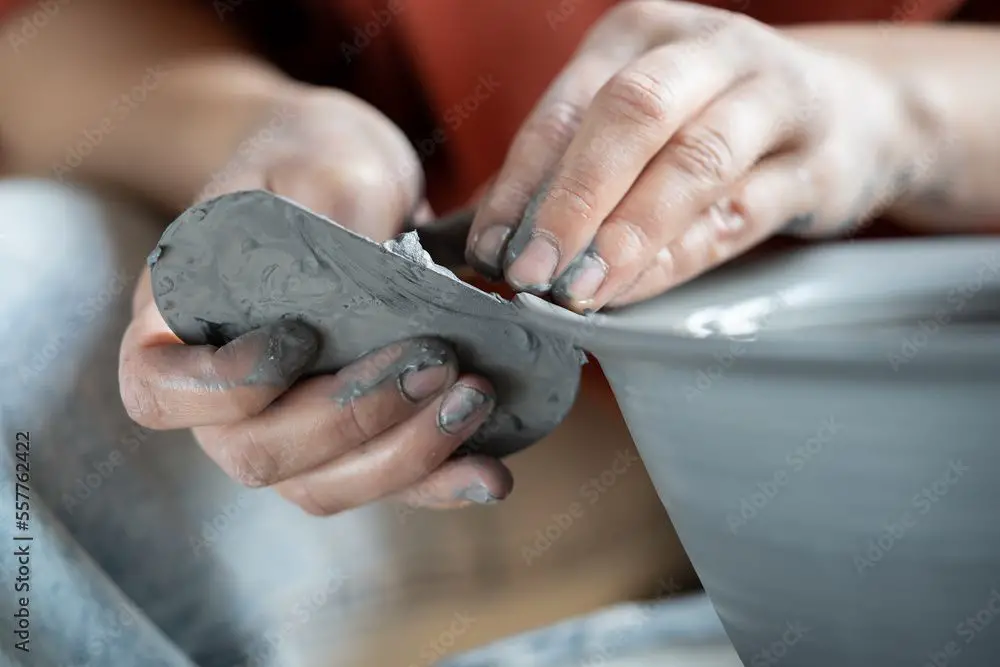
Start by further opening up the mouth of the piece by pushing the walls outward. Use your thumb on the inside and fingers on the outside to gently shape the rim. A rib tool, which is a flat, blunt metal or wooden stick, can help smooth ripples as you shape the mouth.1
Next, refine the overall form by compressing the clay in some areas while pulling it outward in others. Cup your hands and compress the sides or bottom to taper them in. Use your fingers to pinch and pull the clay into shape. Work slowly and deliberately to achieve the desired form.
Shaping tools like loops, ribs, and scrapers can add finer details. A loop tool has a rounded end that makes grooves. A rib tool smooths. A scraper cuts and trims away excess clay. Use these to accentuate certain features or textures.2
As you shape, maintain an even wall thickness throughout the piece. Keep the walls supported by keeping one hand inside and one hand outside the form as you work. Refine the shape gradually, while maintaining the integrity of the entire piece.
Trimming
Once the clay has stiffened up after shaping, it’s time to trim and refine the piece. Trimming involves using metal tools to scrape and cut away excess clay to refine the shape and smooth the surfaces. Metal trimming tools like loop scrapers, ribbon tools, and fine edge kidney tools are essential for high-quality trimming results (https://www.amazon.com/clay-ribbon-tools/s?k=clay+ribbon+tools).
To trim, first securely attach the piece to the wheel head using water. Then lightly hold a metal trimming tool against the surface and rotate the wheel. Apply gentle downward pressure as you trim away uneven sections and smooth the clay. Work systematically around the entire piece. Use broader loop scrapers for general shaping, then finer ribbon tools and kidney tools for detailed refinement. Trimming transforms a roughly shaped lump into a precisely formed work of art with crisp, smooth surfaces.
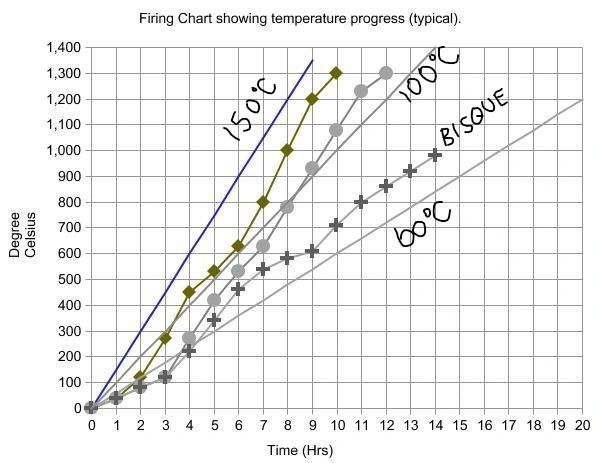
Drying and Firing
After shaping your clay piece, it’s important to allow it to dry thoroughly before firing it in a kiln. Clays contain moisture that needs to evaporate before firing. If fired too soon, trapped moisture can cause cracking or explosions in the kiln.
Place the clay pieces in a safe location where they won’t be disturbed, like on shelves or drying racks. Allow the clay to air-dry completely, which may take a few days to a few weeks depending on factors like climate, thickness of the clay, and drying set up. Avoid drying clay in direct sunlight which can cause cracking. Pieces should be dried evenly to prevent warping.1
Test if the clay is ready for firing by holding it up to your cheek. If it feels cool, it is sufficiently dry. Load the dried clay pieces carefully into the kiln. Fire according to the specifications for that particular clay. Firing hardens the clay permanently into a ceramic material through sintering. Cool the kiln completely before removing the finished pottery.
Conclusion
As you gain more experience throwing on the wheel, you’ll develop your own techniques and style. Here are some final tips to help you continue improving:
- Practice regularly to build muscle memory and coordination.
- Watch videos of expert potters to pick up new skills.
- Experiment with different clays and tools to find what works best.
- Join a ceramics class or studio to get feedback from instructors.
- Start with simple forms and gradually increase complexity as you advance.
- Analyze your mistakes and misshapen pots to understand what went wrong.
- Stay patient through the learning curve – wheel throwing takes time to master.
Throwing pottery on a wheel takes practice, but it’s a rewarding craft. Follow the techniques here as a starting point, then keep trying new things until you develop your own style. The more you work at it, the more natural it will become. Enjoy the journey!