How Do You Sculpt A Clay Heart?
Sculpting a heart shape out of clay can be a fun and creative way to make a decorative piece, thoughtful gift, or symbolic craft. With simple clay sculpting techniques, basic tools, and a bit of practice, anyone can learn how to craft a clay heart. The process involves shaping the clay freehand or using a template, refining the form, adding decorative elements if desired, and baking to set the clay permanently. Making clay hearts is an accessible art form with endless room for personalization. The finished ceramic heart can be painted, varnished, or left natural. This guide will walk through the full process start to finish.
Gather Materials
To sculpt a heart out of clay, you will need the following supplies:
-
Air dry clay – This specialty clay dries and hardens at room temperature without needing to be baked. It comes in various colors and allows easy sculpting.
-
Sculpting tools – Basic sculpting tools like a roller, carving knife, and sculpting pick will help shape the clay. You can find sculpting tool sets online or at craft stores.
-
Rolling pin – Use a rolling pin to roll out the clay into an even flat sheet before cutting out the heart shape.
-
Baking tray – Once sculpted, the air dry clay heart will need to sit on a baking tray or flat surface to fully dry and harden.
-
Acrylic paints – Acrylic craft paints in various colors can be used to paint the finished clay heart.
Having these basic supplies on hand will make sculpting a heart out of clay an easy creative endeavor.
Prepare the Clay
Once you have selected your clay, the next step is to prepare it for sculpting. Clay straight out of the package can be stiff and hard to work with. You’ll need to condition it first by kneading and softening it. Start by cutting off a chunk of clay from the block. The amount you need depends on the size of the heart you want to sculpt, but for a small heart, a chunk the size of a large orange should be enough.
Knead the clay vigorously with your hands, pressing into it and folding it over itself repeatedly. This softens the clay by warming it up with friction and distributes moisture evenly throughout. As you knead, you’ll notice the clay becomes smooth, pliable, and easier to shape. Keep kneading for a few minutes until the clay is soft and no longer feels stiff. Be careful not to overwork it, though, as too much kneading can cause air bubbles.
Next, you want a uniform sheet of clay to cut the heart shape from. Take your conditioned clay and roll it out with a rolling pin on a smooth, clean work surface. Start in the center and roll outward in different directions. Apply even pressure as you roll to achieve an even thickness of about 1/4 to 1/2 inch. The sheet should be large enough to cut out your desired heart size. As you roll, flip and rotate the clay frequently to prevent sticking. Lightly dust with flour if needed. Now your clay is ready for sculpting!
Sketch the Heart Shape
Once you have your clay rolled out into a flat slab, it’s time to sketch the basic heart shape. For this, you’ll want some kind of reference image for the style of heart you want to sculpt. Search online for a simple heart shape sketch or outline. Print out the heart image at the size you want, or have it pulled up on your phone or tablet nearby for reference.
Use a rounded toothpick, knitting needle or other pointed but not sharp tool to sketch the heart design onto the flattened clay. Trace along the lines of the reference heart image to transfer the shape onto the clay. Apply light pressure so you dent the surface of the clay without cutting into it. Sketch just deep enough to leave visible lines showing the full heart shape.
Cut Out the Shape
Once you have the heart shape sketched out on the clay, it’s time to carefully cut it out. For this step, you’ll want to use a craft knife or X-Acto knife. Make sure the blade is new and sharp, so it can easily cut through the clay.
Carefully cut along the sketched lines, keeping your blade vertical as you cut. Apply even pressure as you cut, without forcing the blade through the clay. Take care to keep your fingers away from the path of the blade for safety.
Work slowly and methodically around the heart shape until you have cut all along the sketched outline. Try to keep the cuts smooth for a clean edge around the heart. Don’t worry if there are some small imperfections at this point, as you’ll smooth the edges in the next step.
Once the heart shape is fully cut out, you can remove any excess clay around it. Be sure to keep the heart flat on the work surface as you work to avoid distortion of the shape.
Smooth the Edges
Once you have cut out the basic heart shape, it’s time to smooth the edges and blend the seams. Use your fingers and smooth the outer edges of the heart first. Apply firm yet gentle pressure as you run your fingers back and forth along the edges. This will soften any jagged areas and help round off sharp corners.
Next, use a silicone shaping tool to further blend the seams where the two sides of the heart meet. Gently run the tool up and down the length of the seams, smoothing and shaping as you go. Applying water to the tool can help prevent sticking and tearing. Be careful not to overwork any areas, as too much handling can distort the shape.
Smoothing and blending the edges helps create a polished, organic look for the heart shape. Take your time with this step to ensure the heart has soft, natural curves free of irregularities. The finished product will have clean lines and graceful edges once baked.
Add Texture
Adding texture to your sculpted clay heart can give it more visual interest and dimension. Here are some techniques to try:
Imprint Designs: Use small objects around your home to imprint patterns onto the clay. Try pressing forks, bubble wrap, seashells, leaves, lace, or pasta shapes gently into the surface. This will leave behind an imprint of the texture and design.
Add Ridges or Grooves: Use clay tools or the edge of a butter knife to carve diagonal, vertical, or horizontal lines across the heart. Try alternating between deep and shallow grooves for variety. You can also roll rope-like coils of clay and gently press them onto the heart to create a ribbed texture.
Experiment with crossing lines, zig-zags, spirals or geometric shapes. The ridges and grooves will make the heart more three-dimensional and interesting to look at. Just take care not to overwork the clay or make the lines too deep.
Create Stand
To help your clay heart stand up, you’ll want to create a small stand out of additional clay coils. This allows the heart sculpture to be displayed upright without toppling over.
To make the stand, roll out several clay coils that are approximately 1/4-inch thick. The coils should be long enough to create a stand about 2-3 inches tall. Pinch and blend the clay coils together at one end, gradually tapering them to create a solid base.
Once you’ve created a sturdy clay coil stand, gently press and blend the stand into the back/bottom of the heart sculpture. Blend the stand well so there are no seams or cracks. The stand should look like part of the original clay heart, providing stability and support.
Be careful not to blend too far up the back of the heart or the stand may show at the top. Aim to attach and blend the stand about halfway up the back of the heart sculpture.
Bake Clay
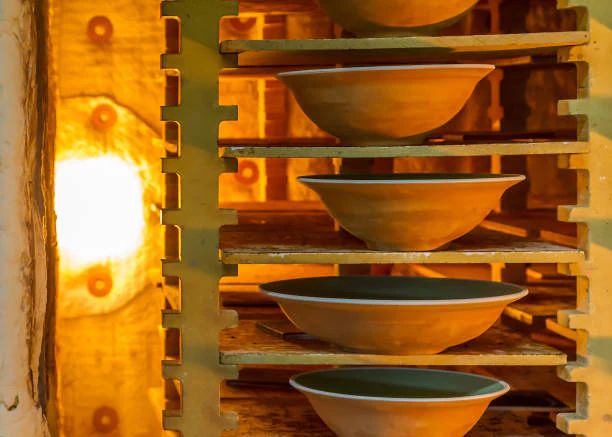
Clay must be fully dried before it is placed in the oven, as trapped moisture will cause cracking or even explode the clay when exposed to high heat. Follow the instructions on your clay’s packaging for baking temperatures and times. For example, some low-fire clays only require 225-250 degrees F for 15-30 minutes to harden them. For polymer or oven-bake clays, temperatures are typically listed at 265-275 degrees F and baking times around 15 minutes per 1/4 inch of thickness.
As a general rule, bake at the lowest temperature and for the shortest time listed. It’s better to underbake initially and add more time slowly to avoid overbaking, which may scorch the clay. Check packaging for details on cooling the clay after baking. Most clays need to cool slowly to room temperature to prevent cracking or crazing.
To fully dry clay before baking, allow work to sit at room temperature for 24-48 hours. Additionally, placing the clay heart in the oven at the lowest temperature setting for 30 minutes will help completely dry it out. Checking that the thickest parts feel hard and devoid of moisture before ramping up the baking process will help prevent cracking and lead to the best finished piece.
Painting & Finishing
Once the clay heart has been baked and cooled, it’s time to add color and finish. Acrylic paints work well for painting clay as they adhere to the surface and dry quickly. First, decide on your color palette. Bright reds, pinks, and purples make beautiful choices for painting a heart. Use a base coat of white acrylic paint if you want the colors to really pop.
Use a small paint brush to carefully paint your clay heart. Acrylic paint can be thinned with water, but too much water will make the paint runny and hard to control. Add multiple thin layers of paint to build up an even coat. Make sure the clay is completely dry between coats. Once the paint is dry, you may choose to add accents like glitter to make parts of the heart shimmer.
After the paint is completely dry, seal the surface with an acrylic sealer or varnish. This will protect the paint and give the heart a glossy finished look. Apply 1-2 thin, even coats of sealer, allowing it to dry between coats. The sealer helps prevent chipping and fading over time. Now your custom clay heart sculpture is complete and ready to gift or display!


