How Do You Soften Clay For Extruder?
Clay extrusion is the process of pushing clay through a shaped die to create a continuous form. This technique is commonly used in ceramic manufacturing to produce pipes, tiles, and decorative moldings. Extrusion requires the clay to be soft enough to flow through the die, but stiff enough to hold its shape after exiting. Finding the ideal softness is key for smooth, consistent extrusion.
Properly preparing and softening the clay is one of the most important steps before extruding. If the clay is too hard, it will require excessive force to push through the die and may jam the extruder. Clay that is too soft will slump or deform after extrusion. Each clay type has its own natural softness based on factors like clay particle size and plasticity. However, clays can be manually softened to the ideal consistency for passing through the die.
This article will explore the various techniques ceramic artists and manufacturers use to soften clay before extrusion. We’ll cover getting the right moisture level, wedging and kneading by hand, using clay softeners, avoiding over-softening, and efficiently softening large batches of clay. With the right preparation, clay can flow through the extruder like toothpaste to create smooth, consistent extrusions.
Clay Types and Their Natural Softness
Clay can be categorized into three major types based on their composition and firing temperatures: earthenware, stoneware, and porcelain. Each clay type has an inherent softness or firmness:
Earthenware – Earthenware clays are low-fire clays, maturing at lower temperatures up to 2,200°F. They tend to be quite soft and porous. Earthenware contains a high percentage of fluxes like iron, magnesium, calcium, sodium, and potassium that promote melting at low temperatures. Common earthenware clays include terracotta and redart.
Stoneware – Stoneware clays are medium-fire clays, maturing between 2,200°F and 2,300°F. They are denser and less porous than earthenware. Stoneware contains smaller amounts of fluxes than earthenware, making them vitrify at higher temperatures. They range from semi-soft to very hard. Common stoneware clays include soldate 60 and speckled buff.
Porcelain – Porcelain clays are high-fire, maturing above 2,300°F. They are very dense and non-porous. Porcelains have high contents of kaolinite and almost no fluxes. They are quite hard compared to other clays. Common porcelain clays include LDP and H550.
In general, higher-fire clays tend to be harder in their unworked form. Earthenware clays are the softest, while porcelain clays are the firmest. Knowing the inherent softness of your clay body will inform how much additional softening is required before extruding.
Getting the Moisture Content Right
Moisture content plays a key role in softening clay. The amount of water present in the clay impacts its plasticity and workability. Achieving the optimal moisture level is essential for softening clay prior to extrusion.
Clay naturally contains some moisture, but often requires additional water to reach the ideal consistency. As a general guideline, clay prepared for handbuilding typically contains 15-25% water by weight. Clay being softened for extrusion should have a slightly firmer consistency, with 10-15% moisture.
There are several techniques for adding water to clay:
- Misting clay while kneading
- Slowly working water into the clay wedging
- Soaking clay in water for an extended time
- Processing clay in a pug mill with an added water spray
The clay should feel cool and pliable at the right moisture level. If too wet, it will be sticky and risk tearing during extrusion. Overly dry clay will be stiff and difficult to work with. Checking moisture frequently allows correcting as needed while softening the clay.
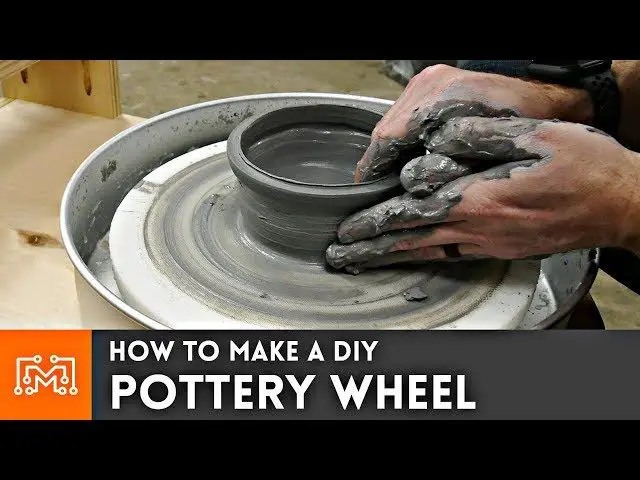
Kneading and Wedging
When clay is extracted from the ground, it contains tiny air pockets and inconsistencies in its moisture level. Kneading and wedging are two traditional techniques potters use to mechanically soften clay by working out these imperfections.
Kneading involves pressing, folding, and pushing the clay repeatedly to blend it. This helps evenly distribute moisture and remove air pockets. The process aligns the clay particles and develops gluten threads, which add plasticity and elasticity. Kneading can be done by hand on a slab or with an electric mixer.
Wedging is a technique of cutting the clay into chunks, pressing them together, and slamming the clay down onto the work surface. This forces out air bubbles and further aligns the clay particles. Wedging takes more physical effort but is very effective at improving the clay’s uniformity. It’s commonly done after kneading.
Together, kneading and wedging mechanically soften and improve clay, creating a smooth, elastic, and plastic texture ready for throwing on the potter’s wheel or extruding.
Using Clay Softener
Clay softener is a commercially available product that can help make clay more malleable. The main ingredient in most clay softeners is bentonite, a natural clay that contains high amounts of montmorillonite. When mixed with water, bentonite swells up and becomes slick and sticky, helping to soften the overall clay body.
When using a commercial clay softener, it’s important to add the correct amounts for your type and quantity of clay. Always start with less softener than the package recommends. You can gradually mix in more if needed. Adding too much softener can make the clay too sticky and difficult to work with.
To add clay softener, first mix the powdered softener with some water to form a concentrated slurry. Then gradually mix the slurry into the clay, kneading thoroughly until the softener is evenly incorporated throughout the clay. Test the softness and add more softener slurry if needed. Kneading for 5-10 minutes ensures even distribution.
Avoiding Over-Softening
While it’s important to adequately soften clay before extruding, you do want to be careful not to make it too soft. Over-softened clay can lead to a few issues:
– The clay will be very sticky and difficult to handle. It may continuously stick to your hands and tools.
– Air bubbles can easily form in over-softened clay, creating problems later when you try to attach extruded pieces or fire the clay.
– Details and finer shapes may get lost or distort as overly soft clay is pushed through the extruder die.
– The extruded clay may slump or collapse rather than holding its shape.
To test if your clay is softened enough without going overboard, form a small ball about 1 inch across with your hands. The clay should be pliable and smooth at this stage without sticking too much to your hands. Press into the ball with your finger – it should slowly bounce back without leaving a fingerprint behind or fully reshaping around your finger. A very slight fingerprint is fine, but the clay shouldn’t fully give way. This shows it’s softened throughout without being overly sticky or mushy.
Softening Clay Without Machines
If you don’t have access to any special equipment, there are a few techniques you can use to soften clay by hand:
Slapping – This involves vigorously slapping a lump of clay between your hands to soften it. Hold a lump of clay in one hand and slap it firmly with the palm of your other hand, then switch hands and repeat. The slapping action helps break down the clay particles.
Kneading – Kneading clay is similar to kneading bread dough. Press into the clay with the heels of your hands, then fold the clay over itself, rotate it 90 degrees, and repeat. This repetitive motion works the clay to make it smooth and malleable.
Wedging – Cut the clay into chunks. Then push a chunk of clay away from you with the palm of one hand while holding the rest firmly on the table with your other hand. This leveraging action elongates and softens the clay.
Be sure not to overwork the clay when softening by hand. This can make the clay dry and tough. Add small amounts of water while kneading or wedging if the clay starts to feel too stiff.
Softening Clay in a Pug Mill
A pug mill is an efficient machine used by ceramic studios and factories to soften and blend large quantities of clay. It consists of a sealed chamber with two counter-rotating shafts equipped with blades that continuously cut and fold the clay to homogenize moisture and make the material more plastic and workable.
When preparing clay in a pug mill:
- Start with clay pieces or dry blocks broken down to fist-sized chunks or smaller.
- Adjust moisture carefully – too wet and clay will be sticky; too dry and it won’t blend thoroughly.
- For optimum consistency, clay exiting the pug mill should form a continuous ribbon without cracking.
- Avoid over-softening clay which can lead to slumping or deformities.
- Soften clay just enough to go through the extruder die smoothly.
- Store softened clay in airtight plastic bags or containers.
With some experience using a particular clay body in the pug mill, you’ll learn the right settings and processing time to achieve perfectly softened clay ready for extruding.
Storing Softened Clay
Once your clay is properly softened, you’ll want to store it in a way that prevents it from drying out before use. Keeping clay moist is crucial for maintaining its soft texture and workability.
The best way to store softened clay is by sealing it in an airtight plastic bag or container. Remove as much air as possible before sealing to minimize exposure to drying air. If storing for more than a few days, it can help to include a damp sponge or towel in the container to regulate humidity.
For larger amounts of clay, wooden boxes or plastic buckets with tight lids also work well. You may need to periodically mist the clay with water to maintain the right moisture level if storing for an extended period. Just don’t oversaturate the clay or it can become too wet.
Refrigeration can help slow the drying process but isn’t required in most cases if the clay is properly sealed. Freezing is not recommended as it can damage the clay structure.
Check on your stored clay every couple of days. If it starts to stiffen up or crack, knead in some water until it regains a soft, pliable texture. With proper storage methods, most clay can be kept workable for weeks to months.
Preparing Clay Just Before Extruding
After you’ve properly softened your clay through kneading, wedging, adding softener, and/or using a pug mill, the final step is to do a quick knead of the clay right before you’re ready to extrude it. This last minute kneading ensures the moisture and consistency is just right for a smooth extrusion. Here are some tips for preparing the clay right before extruding:
- Do a quick hand knead of the clay, working it until it feels smooth, soft, and uniform in texture. This should only take a minute or two.
- If the clay still feels too stiff, add a spritz of water and knead again until optimal softness is reached.
- Avoid over-working the clay at this stage as too much handling can make the clay sticky.
- Check for any hard lumps or dry spots and work those out.
- The clay should feel soft, smooth, and malleable, but not tacky or sticky.
- Pile the kneaded clay near the extruder so it’s ready to load into the barrel.
Those last minute preparations before extruding will help ensure the clay flows smoothly and evenly through the die for a quality extruded output.