How Do You Soften Moulding Clay?
Modeling clay, also known as plasticine, is an oil-based modeling material that stays pliable and can be shaped into different forms. It is a popular choice for artists, sculptors, students, kids, and anyone who enjoys molding clay into creative designs.
With prolonged use and exposure to air, modeling clay can become dried out and stiff over time. Soft and pliable clay is much easier to work with. Learning how to properly soften modeling clay is an important skill for clay artists and hobbyists.
There are several simple, effective methods to soften clay and restore its malleable texture. With a few basic household items and techniques, you can quickly rehydrate and revitalize old, hard modeling clay.
Assess if the Clay Needs Softening
Before taking steps to soften polymer clay, first determine if it really requires softening. Look for any cracks or dried out patches on the surface, which indicate the clay is too firm. Try pressing into the clay with your finger – if it’s too stiff to indent easily, softening will make it easier to manipulate.
Fresh clay straight from the package shouldn’t need softening. But if your clay has been stored for awhile, the surface may have dried out. Older polymer clay tends to become brittle and difficult to condition. Softening brings stiff clay back to a pliable state for sculpting, shaping, and modeling.
Soften in Your Hands
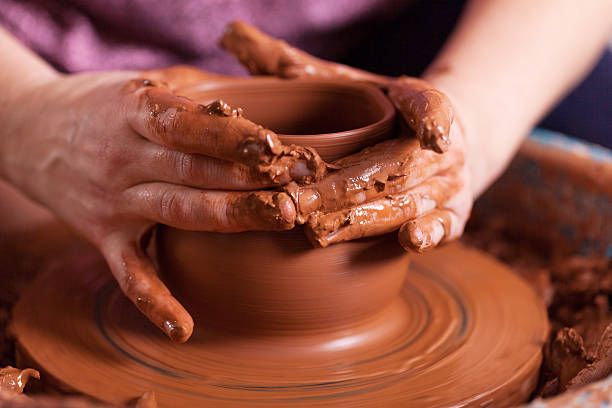
One of the easiest ways to soften clay is to use the warmth of your hands. As you knead and work the clay, the heat from your hands will transfer to the clay and begin softening it up. This method may take a few minutes, but with some diligent kneading and folding of the clay, you’ll notice it slowly becoming more malleable.
Make sure your hands are clean before handling the clay. Then start kneading it like dough, pressing into it firmly and folding it over itself. Rotate and squeeze the clay as you work it. The goal is to warm up the clay while also distributing the moisture evenly throughout. If your hands get tired, take a break, but then get back to kneading until the clay reaches the desired softness.
This hand-warming technique is ideal for small to medium sized amounts of clay. For larger quantities, you may need to combine this method with additional softening techniques. But when you just need a bit of clay softened up, using your own hands is an easy, effective way to go.
Use a Clay Softener
One effective way to soften polymer clay is by mixing in a dedicated clay softener. Glycerin and liquid polymer clays work well for this purpose. They help make the clay more malleable and flexible.
When using a clay softener, only add a small amount at a time. Start with a pea sized amount and knead it thoroughly into the clay. The clay softener will distribute through the material evenly as you knead. Slowly add more softener sparingly until you achieve the desired consistency. Too much softener can make the clay sticky.
Try a Plastic Bag
One convenient way to soften modelling clay is by putting it in a plastic bag and kneading it through the bag. This traps warmth and moisture to help soften the clay without drying it out. Follow these simple steps:
- Take your hardened modelling clay and break it into smaller pieces to fit in a plastic bag.
- Place the clay pieces in a sealable plastic bag, removing as much air as possible before sealing tightly.
- Knead the clay through the plastic bag, squishing and working it with your fingers.
- The warmth of your hands and the trapped moisture in the bag will start to soften the clay.
- Keep kneading and working the clay, focusing on any harder sections, until it reaches the desired soft and pliable consistency.
Using a plastic bag allows you to soften and condition modelling clay without it drying out. It’s a handy method for restoring old clay or clay that’s become stiff and hard over time. With some kneading, the plastic bag helps soften clay quickly and evenly.
Microwave
Microwaving clay is a quick and effective way to soften polymer clay if you only need to soften a small amount. It works by using microwave radiation to warm up the clay and make it more malleable. Here are some tips for microwaving polymer clay:
– Only microwave small amounts at a time. Large pieces may overheat or scorch.
– Place the clay in a microwave-safe container or wrap it in a paper towel. Do not microwave clay while it’s inside a plastic package.
– Microwave in short increments, such as 5-10 seconds at a time. Check the clay and knead after each interval to test the softness.
– Take care not to overheat or cook the clay. Stop when it feels pliable and warm, but not hot.
– Allow the clay to rest and cool down before handling so it doesn’t burn your fingers.
With some trial and error, you can quickly soften a small lump of clay. Just remember to microwave in short bursts and handle with care right after heating.
Avoid Over-Softening
When working with polymer clay, it’s possible to make it too soft and sticky. This can make the clay difficult to handle and shape. It’s best to make small, incremental adjustments when softening clay and reassess the consistency frequently.
Start by kneading or massaging the clay for a short time, such as 30 seconds. Then check if it has reached the desired soft, pliable texture. If it still feels too firm, continue softly kneading for another 10-30 seconds. Excessive handling and warmth from your hands can quickly lead to over-softened clay.
Additionally, only microwave clay in short bursts of 5-10 seconds. The clay can go from perfectly softened to a melted mess very quickly. Frequently stop to check consistency.
With patience and gradual adjustments, you can achieve just the right amount of softness for shaping your clay project. But avoid the temptation to overwork the clay, as this will undermine your efforts.
Keep it Soft
Once you have softened your clay to the desired consistency, it’s important to take steps to keep it soft until you are ready to use it. Here are some tips:
Store unused clay in an airtight container. Clay dries out quickly when exposed to air, so putting it in an airtight plastic container or bag helps lock in moisture. Make sure to press out any air bubbles before sealing the container.
Consider adding a damp paper towel. Laying a damp (not sopping wet) paper towel on top of the clay before sealing the container creates a humid environment that keeps the clay supple. Replace the towel if it dries out.
Allow Adequate Time
Be patient, softening clay takes time. Don’t rush the process. Letting the clay soak up moisture gradually prevents over-softening. If you’re short on time, try microwaving the clay in short bursts instead. But for best results, allow the clay to sit and soak for at least 15-30 minutes before handling. Give it even more time if it’s a large block. Testing the softness periodically by squeezing a piece will let you know if it needs more time. The clay is ready when it’s pliable but not sticky. Rushing the softening process risks making the clay too soft or unevenly softened. Be prepared to wait out the time needed for thorough, even softening throughout.
When to Seek Alternatives
If your modeling clay has dried out beyond repair, it may be time to seek an alternative clay material. Very old clay that has been exposed to air for long periods can harden to an irreversible state. Air-dry clays in particular are designed to harden over time and do not re-soften once completely cured.
If you’ve tried the common techniques of softening in your hands, using clay softeners, microwaving, and sealing in plastic repeatedly with no success, the clay polymer chains have likely hardened permanently. Continuing to try to rehydrate extremely dried out clay wastes time and material.
Instead of struggling indefinitely with an impossible to soften clay, seek fresh clay or switch clay types. Opt for a clay that stays flexible and workable for longer, like polymer or oil-based modeling clays. For air-dry clays, use newly opened packages. When exploring different clay types, consider the project needs regarding flexibility, strength, curing process, and more.


