How Do You Stamp Metal Letters Straight?
Metal stamping is a popular technique for creating monograms, names, and decorative lettering on metal surfaces. It involves using letter stamps and a hammer to imprint letters into malleable metals like aluminum, steel, silver, or copper.
Metal stamping allows you to customize metal objects like jewelry, flasks, pocket knives, tool boxes, and more with personalization or artful designs. The stamped letters stand out in relief and add a handmade, rustic feel. Metal stamping is an affordable and accessible craft, as the necessary supplies are inexpensive and easy to obtain. With some practice and the right techniques, anyone can transform plain metal items into cherished keepsakes using metal stamping.
Gather Your Materials
Before you can start stamping metal letters, you’ll need to gather the necessary supplies. Here’s what you’ll need:
- Metal blanks – These are the flat pieces of metal that you’ll be stamping the letters into. Copper, aluminum and stainless steel all work well. Make sure to have blanks that are the appropriate size for your project.
- Letter stamp set – This is a set of steel stamps, each engraved with a letter, number or punctuation mark. You’ll hammer these into the metal blanks to form the letters.
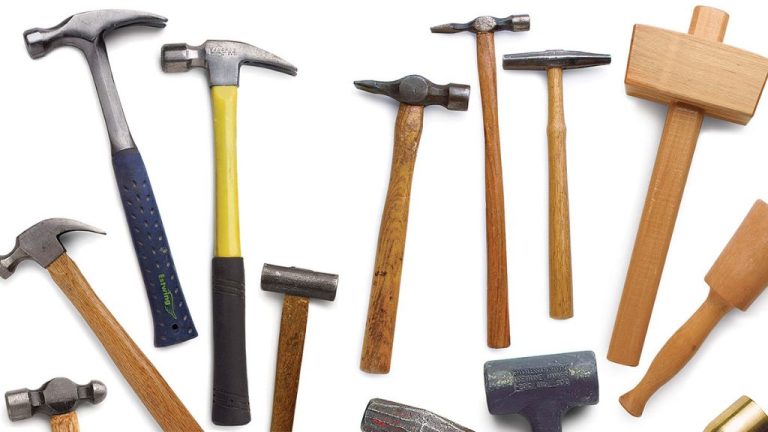
- Hammer – Use a steel hammer, like a ball-peen hammer or mallet. This will be used to hammer the letter stamps into the metal.
- Bench block – This steel block provides a sturdy base on which to hammer the letters. It has a smooth flat surface.
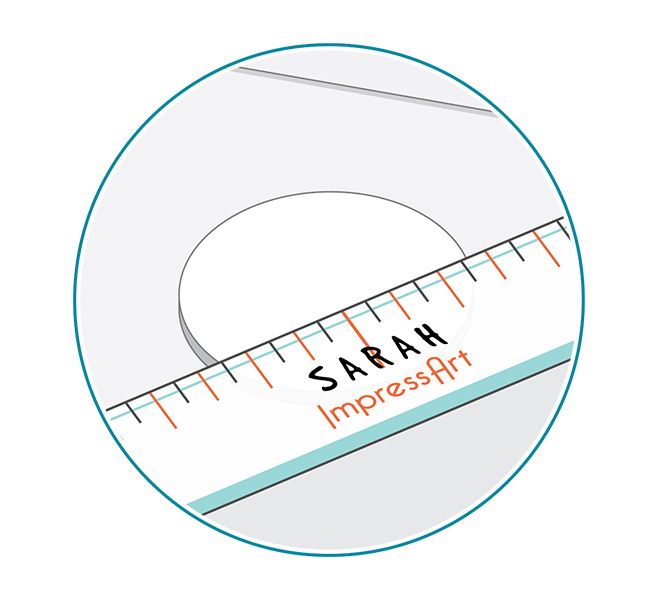
- Ruler – A metal ruler helps align the letters and space them evenly.
- Permanent marker – Use this to draw guide lines on the metal blanks for positioning the letters.
Once you have these essential supplies gathered, you’ll be ready to start stamping your metal letters!
Prepare the Metal
Before stamping your letters, you’ll need to properly prepare the metal blank to ensure the letters imprint cleanly and clearly. Here are the key steps for prepping your metal:
First, sand the metal blank smooth using a piece of fine grit sandpaper. This removes any dirt, oils, or debris that could interfere with the stamping. Rub the sandpaper over the surface in small circles until the metal has a matte appearance and uniform texture.
Next, clean the surface well to remove any residual grit or dust. You can use a jewelry polishing cloth or a degreasing agent like rubbing alcohol. It’s important no residue is left on the metal that could create uneven stamping results.
Once clean, apply a thin layer of layout fluid or stamping lubricant to the metal. This fluid helps the letter stamps glide smoothly over the surface. Let the lubricant dry slightly before positioning your letters. Popular lubricants are ImpressArt stamping/layout fluid or a simple dish soap and water mixture.
Design Your Layout
Before stamping your letters, it’s important to map out the design and position of each letter to ensure they are straight and evenly spaced. According to the video “How to Plan out a Design and Center Your Letters w/Metal Stamping” (https://www.youtube.com/watch?v=n2uLp3EMYZo), start by measuring and marking where you want each letter to go using a ruler and marker.
Decide if you want your letters centered, aligned left, or aligned right. Measure the length of your metal strip and find the midpoint to center them. For left or right alignment, decide how close to the edge you want the letters. Mark a dot with your marker to indicate the position of each letter based on the measurements.
You may also want to map out any additional designs, like borders or images, that you plan to stamp around the letters. Place dots to mark their locations relative to the lettering. Having a design laid out ahead of time will help ensure your finished project looks neat, straight and intentional.

Position the Letter Stamps
To ensure the letters are stamped straight, accurately line each one up before hammering. The best way to do this is to place your metal letter blanks on a bench block. A bench block is a heavy, flat, stationary surface that provides stability while hammering. Tape or clamp your metal blanks to the bench block so they don’t shift around.
Before positioning the letter stamps, draw light guidelines in pencil where you want the letters to be stamped. These guidelines will help you align the stamps precisely. Place the stamp on the guideline, holding it vertically straight up and down. Double-check the alignment before hammering to make sure it’s perfectly lined up. Keep a steady hand as you lower the stamp, so it doesn’t shift out of position.
According to jeweler Lisa Niven Kelly, “The bench block will enable you to line up metal stamps nice and straight for gorgeous results.” She recommends using painter’s tape to hold the metal to the bench block (source). The tape helps keep the metal steady and prevents slippage while hammering the letters.
Hammer the Letters
When hammering the letters, it is crucial to hammer directly downwards with an appropriate amount of force. Hold the hammer at a 90-degree angle above the letter stamp and bring it straight down onto the stamp (Source). Do not hammer at an angle, as this can distort and misalign the stamped letter.
The amount of force needed will depend on the size and intricacy of the letter stamp. Small, simple stamps require less force. Larger, more detailed stamps need a heavier swing and impact from the hammer (Source). Start with a few lighter test taps to determine the appropriate force before committing to a full swing.
Additionally, pay attention to hammer control. Grip the hammer near the base and avoid clenching too tightly. Let the hammer do the work. Keep wrists straight and use your shoulder and arm muscles to lift the hammer up and accelerate it straight down onto the stamp.
With practice and experience, you will get a feel for the right amount of force for different stamps. Straight, controlled hammer strikes are key for cleanly imprinting letters into metal.
Repeat for All Letters
Once you have stamped the first letter, it’s time to repeat the process for all of the remaining letters in your design. Work methodically and systematically across your layout to ensure even spacing and alignment of the letters.
Start on one side of the design, and work your way across, row by row. Pay close attention to the spacing between letters and lines as you progress. You may find it helpful to mark the next position lightly in pencil before stamping the next letter.
Be sure to check the alignment periodically as you go by standing back and looking at the overall effect. Make small adjustments as needed to keep everything straight and evenly spaced. Work slowly and carefully – it’s easy to get letters crooked if you rush this step.
Striking the letter stamps straight down is key during this process. Hold the hammer vertically above each stamp, and hit it with a firm, solid stroke. Use scrap metal to practice your swing first if needed to get the right motion.
Take your time, double check as you go, and repeat for every letter. With focus and patience, you’ll start to see your beautifully stamped words or phrases come to life!
Clean Up and Polish
After you have stamped all of the letters, it’s time to clean up the piece and polish it. Here are the steps:
- Remove any marker lines with a cotton swab and rubbing alcohol. Be gentle and take your time to get rid of all traces of the marker. See this guide for tips: How to Blacken Hand-Stamped Letters
- Carefully file down any sharp or rough edges around the letters using a fine-grit jewelry file. Go slowly and frequently check to make sure you don’t take off too much material.
- Once filed, polish the piece with a sunshine polishing cloth or other fine grit polishing pad. This will smooth everything out and make the letters really shine.
Taking the time to properly clean and polish will give your stamped piece a clean, professional finish. The letters will stand out crisp and clear.
Apply Protective Finish
Once you have completed stamping and polishing your metal letters, it is important to apply a protective finish to help preserve them and prevent corrosion, especially if they will be displayed outdoors. Some good options for protective finishes include:
Clear Coat – A clear coat spray paint or polyurethane will help protect the letters from weathering and oxidation. Make sure to apply several coats and follow the manufacturer’s instructions for drying time between coats. This will help create a durable finish.
Wax – Renaissance Wax or a automotive wax can help protect stamped metal letters and give them a nice finished sheen. Be sure to buff off any excess wax once applied.
Lacquer – An acrylic lacquer sprayed over the letters will help seal and protect them. Multiple thin coats are better than one thick coat when applying lacquer.
Patina – For a vintage, aged look, patina chemical solutions can be applied to chemically alter the metal finish over time. Follow instructions carefully when applying patinas. Top coats are still recommended.
No matter the finish, proper preparation like cleaning and polishing is key before applying any topcoat to stamped metal letters. And be sure to reapply protective finishes periodically to maintain their protective qualities over the years. A finish will help your custom stamped metal letters withstand the elements and remain a long lasting creation. (Source)
Display Your Creation
Once your stamped metal letters are complete, you’ll want to display them properly to show off your hard work. One popular option is mounting or framing the letters. Here are some tips for mounting stamped metal letters:
If mounting on a wall, make sure to use the appropriate hardware like heavy duty screws or toggle bolts so the weight of the letters does not pull them off the wall over time. You can mount the letters flush against the wall, or use spacers to lift them off and create shadow lines for added dimension.
Another way to display stamped letters is inside a picture frame under glass or acrylic. This helps protect the finish and creates a polished look. Make sure to use a frame deep enough to accommodate the thickness of the letters. You may need to secure the letters in place with double-sided tape before slipping them inside the frame if they don’t fit snug.
For a fun project, you can mount your stamped metal letters on reclaimed wood, pieces of scrap metal, license plates, or other found objects that complement the industrial vibe of stamped metal. Get creative with your background and mounting solutions!
No matter how you choose to display your stamped metal letters, follow any protective finish instructions carefully and keep them out of direct sunlight or moisture to help preserve the letters and prevent tarnishing or rust over time. With proper care, your custom stamped creation can be proudly exhibited for years to come.


