How Do You Stamp Wood?
Wood stamping is the process of transferring an inked image onto a piece of wood using a rubber or acrylic stamp. It’s a popular craft and art form used to decorate and personalize wood surfaces. Wood stamping allows crafters to easily add beautiful designs, words, and images onto wood slices, planks, boxes, furniture, and more.
The basic supplies needed are stamps, ink pads, wood pieces, and sealant. Crafters press the inked stamp firmly onto the wood surface to transfer the image. There are many techniques like layering multiple colors and angles that create more intricate designs. Wood stamping first grew popular for printmaking and document marking, but today it’s used for art, crafts, DIY projects, and scrapbooking.
Over 4 million individuals in the United States make use of different types of stamps to enhance their craft work, according to altenew.com. Wood stamping allows endless creativity and customization for wood projects and artwork.
Needed Supplies
When getting started with stamping wood, there are some key supplies you’ll need to gather before beginning your project. Two of the most essential items are the stamps themselves and ink pads for stamping the image onto the wood.
For stamps, you have two main options – rubber stamps or hand-carved stamps. Rubber stamps often feature intricate designs and are easy to use repeatedly for consistent impressions. Hand-carved stamps take more work to create the design, but allow for a high level of customization and a natural, handmade look (Source).
Ink pads are available in various colors and are either water-based or solvent-based. Water-based inks will soak into bare wood better while solvent-based inks work well on sealed surfaces. Have a few different color options on hand for versatility.
Other useful supplies are paper towels for blotting excess ink and smoothing out stamp impressions. You’ll also need wood blocks or planks to stamp your designs onto. Opt for unfinished wood free of prior treatments so the stamp design is clearly visible.
Preparing the Wood
Before stamping on wood, it’s important to properly prepare the surface so the ink adheres well and the image transfers cleanly. Start by sanding the wood smooth, using progressively finer grit sandpaper like 120, 220, and 320. Sand with the wood grain to avoid scratches. Wipe away any dust with a dry cloth. If the wood has a finish or coating, sand through that layer completely so you’re stamping directly on the bare wood.
Next, clean the wood using a 50/50 mix of vinegar and water and a clean rag. Let the wood dry fully. The vinegar helps remove any grease, wax or oils so the wood absorbs ink properly. Finding the direction of the wood grain is also key. Look closely at the lines and texture of the raw wood. You’ll get the best stamp impressions when going with the wood grain, not against it.
Once the surface is smooth, clean and dry, it’s ready for stamping. If desired, some people lightly dampen the wood before stamping to help the ink transfer. Be sure to let any moisture fully dry before inking the stamp.
Inking the Stamp
Properly inking the stamp is crucial for getting a crisp, clear impression on the wood. It’s important not to use too much ink, which can cause bleeding, or too little ink, which leads to a faint imprint.
Start by gently pressing the stamp into the ink pad in a rocking motion to get full, even coverage across the entire surface. Tap the stamp onto a piece of scrap paper to remove any excess ink. You want a thin, uniform coating without any puddling or globs of ink. Test on scrap wood first before stamping your final piece.
It often works best to use a higher quality ink pad designed for stamping, rather than cheaper craft ink pads. The ink should be formulated to transfer cleanly without running on wood surfaces. Pigment-based inks tend to work better than dye-based options.
Take care not to over-ink the stamp. Too much ink will cause bleeding around the edges of the impression. It can also seep deeper into the wood grain and result in a bolder, less defined stamped image. Find the right balance for crisp, detailed stamps.
Stamping the Wood
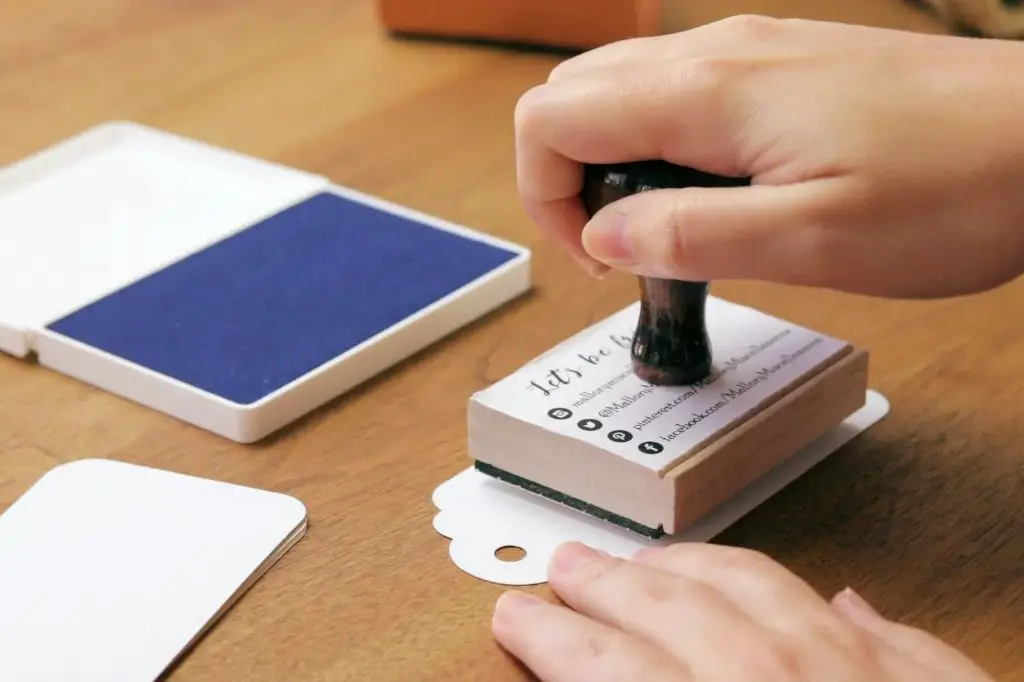
Stamping the wood requires attention to detail in order to get a clear impression. You’ll want to press the stamp firmly and evenly into the wood. Using consistent, even pressure across the entire stamp ensures that all elements of the design transfer properly.
It’s important to align the stamp correctly before pressing down. Place the stamp where you want the impression to appear and gently press down to lightly adhere it. Double check the alignment, making small adjustments as needed. Once the stamp is properly aligned, apply firm, even pressure across the stamp to imprint the image into the wood.
Common mistakes involve applying inconsistent pressure, resulting in light or blurry impressions. If the impression is too light, try re-inking the stamp and pressing more firmly when reapplying. Make sure your work surface provides adequate support underneath the wood being stamped. Stamping on an uneven or soft surface can also cause blurring.
If part of the image appears blurred or missing, check that the wood itself is level. Stamping on warped or uneven wood reduces contact between the stamp and wood. Gently sanding or planing the wood can help level it out before stamping. Always check that the stamp is evenly inked each time for consistent impressions.
Advanced Techniques
Once you get the hang of basic stamping, there are many creative ways to take your wood stamping projects to the next level.
Layering Colors
Layering multiple colored inks on a single design is a great way to add visual interest. Start by stamping the base layer in a light color. Then stamp successive layers in darker colors. The key is to let each layer dry fully before adding the next. This allows the layers to build on top of each other. With practice, you can achieve a blended, painterly look.
Using Multiple Stamps
Using several coordinating stamps together opens up many possibilities. Stamp different designs in a pleasing composition rather than a single repeating motif. Or use stamps of varying sizes for interest. Mixing up the orientation of stamps also adds flair. Don’t be afraid to think outside the box and stamp words, numbers, or abstract shapes along with more traditional designs.
Achieving Gradients
Gradients are a gorgeous effect for wood stamping. Start by inking your stamp lightly at the edges and more heavily in the center. Then stamp the image and quickly repeat, overlapping slightly and building up the color. You can also blend two colored inks on one stamp to achieve a gradated look. Experiment with different hues to find a gradient that excites you.
Protecting and Sealing
After stamping, it’s important to let the ink fully dry before applying any sealant. Most inks will dry within 24 hours. Rushing to seal before the ink has dried can cause smearing or pooling.
Polyurethane is commonly used to seal and protect stamped wood. It helps prevent fading and provides a protective barrier. Apply 2-3 thin coats of polyurethane, sanding lightly between coats. Allow each coat to fully dry before adding the next. Other options like lacquer, varnish, and wax can also be used to seal the wood. According to https://www.splitcoaststampers.com/forums/general-stamping-talk-17/sealing-wood-blocks-25711/, multiple thin coats generally work better than one thick coat.
Other sealants like mod podge, glaze, resin, and shellac can also be used. Experiment to find the one that provides the finish and protection you desire. Properly sealing the wood will help the stamped image last for many years.
Common Mistakes
When stamping wood, there are a few common mistakes that beginners often make. Here are some of the most common ones to watch out for:
Stamping across wood grain – Wood has a visible grain pattern due to the alignment of the wood fibers. When stamping, you’ll get the best impression if you stamp with the wood grain, not against it. Stamping across the grain can cause the stamp to skip and slide, resulting in a faint or uneven impression.[1]
Not sealing properly – It’s important to properly seal and finish your wood project after stamping to protect the design. Insufficient sealing can lead to the ink fading or wearing over time. Apply 2-3 coats of sealant like polyurethane to lock in the ink.[2]
Smudging – If the ink is still wet when handling the stamped wood, it can easily smudge and blur. Make sure to let the ink dry fully before rubbing or handling the wood. Rushing the process can ruin the crisp stamped image.
Other common mistakes are using the wrong type of ink or stamp for the wood material, not applying enough pressure when stamping, and improper storage causing stamps to dry out. Being aware of potential pitfalls can help avoid ruining wood stamping projects.
[1] https://www.youtube.com/watch?v=5UGoJ1R0o-U
[2] https://optlasers.com/common-laser-engraving-mistakes-in-woodworking-and-how-to-avoid-them
Creative Ideas
Wood stamping opens up many creative possibilities. Here are some fun projects you can make using stamped wood:
Coasters – Stamping wooden coasters is an easy beginner project. Let your creativity run wild by stamping meaningful quotes, funny sayings, or decorative patterns onto round wooden discs. Add a sealant to protect from moisture.
Ornaments – Make personalized ornaments for yourself or to give as gifts by stamping names, dates, holidays symbols onto wooden shapes. Hang with a ribbon to decorate your Christmas tree or throughout the year.
Jewelry boxes – Adorn a wooden jewelry or trinket box with custom designs by stamping the top or sides. Stamp with initials, patterns, or artistic shapes for a one-of-a-kind storage item.
Wall art – Use your stamp creations to make eye-catching wall hangings. Stamp inspirational words onto wooden plaques or stamp constellation patterns onto wooden disks to hang up.
The stamping options are infinite, so embrace your creativity! Customize wooden objects with personalization or artwork that matches your style and personality.
Conclusion
Wood stamping is an enjoyable and creative hobby that allows for a great deal of personalization. A wood stamp can be made quickly and inexpensively at home with some basic supplies and simple techniques. The process involves preparing the wood, inking the stamp, and then stamping the design by applying firm, even pressure. While it may take some practice to master, wood stamping allows endless opportunities for customization through stamp design, ink colors, and using different types of wood. The finished stamped items have an artisanal, handmade appearance. Overall, wood stamping is a satisfying way to customize objects and add one-of-a-kind embellishments to crafts, artwork, gifts, stationery, and much more.