How Do You Start Painting Pottery?
Pottery painting is the process of decorating ceramic pottery and stoneware using paints and various art techniques. With just a few basic supplies, pottery painting allows anyone to unleash their creativity by painting beautiful designs on bisque pottery pieces such as mugs, plates, bowls, vases, and more.
The main supplies needed for pottery painting include bisque pottery, acrylic paints, paint brushes, and paint pens. A variety of additional tools can also be used such as sponges, stamps, stencils, glitter, and glaze.
Pottery painting is an enjoyable hobby for all ages that provides many benefits. It promotes creativity, concentration, and fine motor skills. The relaxing, therapeutic nature of pottery painting helps reduce stress and anxiety. Painting pottery is also a great social activity that can be shared with family and friends. With some basic guidance, anyone can start creating their own works of art on bisque pottery.
This beginner’s guide will provide tips on how to get started with this fun and fulfilling hobby.
Types of Pottery
When getting started with pottery painting, it’s helpful to understand the different types of pottery available. Some of the most common options include:
Ceramic bisque– Bisque refers to pottery that has been fired once to harden it, but before any glazing or painting has been applied. The porous, unfinished surface of bisque makes it ideal for painting. Sources: https://www.thecrucible.org/guides/ceramics/, https://thomastonauction.com/types-of-pottery-every-collector-should-know/
Terracotta – Terracotta is an unglazed type of earthenware made from clay that contains iron oxide, giving it a distinctive reddish-orange color. It’s a popular choice for painting due to its porous texture. Source: https://www.thecrucible.org/guides/ceramics/
Porcelain – Porcelain is a delicate, translucent ceramic made by firing refined clay at high temperatures. The smooth, glass-like surface requires special paints and techniques for decoration. Sources: https://thomastonauction.com/types-of-pottery-every-collector-should-know/, https://www.thecrucible.org/guides/ceramics/
Stoneware – Dense and watertight stoneware is fired at higher temperatures than earthenware. The non-porous finish requires paints specifically formulated for stoneware. Source: https://www.thecrucible.org/guides/ceramics/
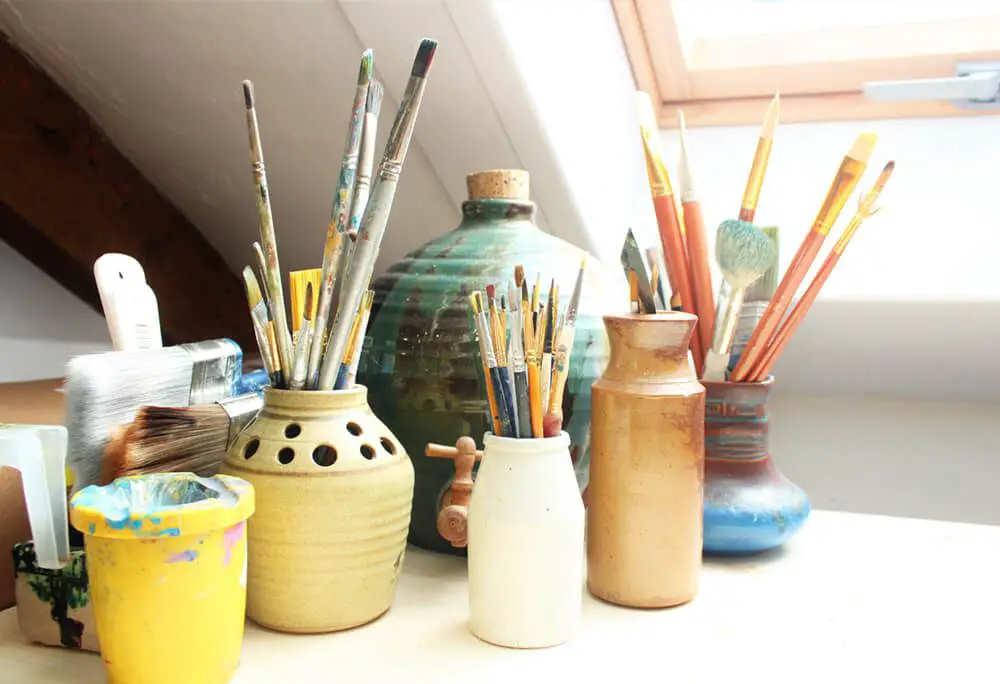
Supplies Needed
Painting pottery requires a few key supplies to get started:
- Paint brushes – Use a variety of brush sizes and shapes like flats, rounds, filberts. Have both fine detail brushes and wider brushes for covering larger areas.
- Acrylic paint – Acrylics work best on pottery and ceramics. Make sure they are non-toxic and dishwasher safe. Choose a range of opaque and transparent colors.
- Paint pens – Great for details and outlines. Look for ceramic paint pens designed for smooth gliding on pottery.
- Paint palette – Use a palette for mixing paints and keeping brushes wet. Disposable paper or plastic palettes are convenient.
- Sealant – A water-based acrylic sealant is essential to seal and protect finished painted pieces. Select a non-toxic sealant made for pottery.
Gather these before starting to paint pottery to ensure you have what’s needed to get creative!
Prepare Workspace
Having an organized workspace set up properly will make painting pottery easier and more enjoyable. Make sure your workspace has the following:
- Cover the work surface with newspaper, plastic tablecloths or wax paper to protect it from paint and glaze splatters. Having a portable, easy-to-clean surface is ideal.
- Ensure there is adequate overhead and task lighting, such as from a window or lamp, so all surfaces and details can be seen clearly. Proper lighting is essential for control and doing detailed work.
- Provide ventilation to allow fumes from paints, glazes and other products to escape. Consider working near an open window, door or fan.
- Have a source of water and rags/paper towels for cleaning up spills and messes as you work. It’s best to wet and wipe frequently.
With a prepped surface, good lighting, ventilation and access to water, you’ll have an organized area for starting to paint pottery.
Prep the Pottery
Before you begin painting, it’s important to properly prepare the surface of your ceramic or pottery piece. First, clean the piece thoroughly with soap and water to remove any dirt or residue. Make sure to scrub in any small crevices. Then, lightly sand the entire surface with fine grit sandpaper, using circular motions. This helps remove any paint or glaze from previous firings and creates a rougher texture for the new paint to adhere to. Wipe away all dust with a dry cloth once sanding is complete. Your pottery is now ready for painting!
[Source: https://www.classpop.com/magazine/painting-ceramics]
Plan Your Design
Before starting to paint your pottery, it is important to plan out your design. This will help the painting process go smoothly. Start by deciding on the overall pattern or image you want to create. Will it be flowers, animals, abstract shapes? Making a few sketches can help visualize how your design will look on the final piece. Consider how the pottery will be used – will it be decorative or functional? A mug design may be simpler than a large serving platter. According to Pinterest, some popular pottery painting ideas are flowers, landscapes, and geometric patterns.
Base Coats
The next step is to apply one or more base coats of paint to the bisque pottery before adding any details or designs. Make sure to allow each base coat layer to fully dry before adding another layer. According to The Ceramic Painters Web Site, “Your piece should have a Base coat using an opaque stain. Use a soft brush, apply antiquing to a small area at a time, and wipe off the excess with a soft lint-free cloth.”
Base coats provide an even layer of color and help the details and designs really stand out. Apply the paint in smooth, even strokes using a soft brush. Let each coat dry completely before adding another. This prevents the layers from mixing and muddying the colors. If needed, very lightly sand the base coats between layers to smooth out any bumps or ridges before adding the next coat. Be sure not to sand away the color. When applying base coats, cover the entire piece evenly.
Once the base coats are fully dry, the pottery is ready for additional painting details and designs. The base colors create the perfect background canvas on which to add the finer artistic details.
Add Details
Once you have applied the base coats and allowed the paint to dry completely, it’s time to add details and bring your design to life. This is where you can get creative with different paint techniques to make parts of your design stand out.
When adding details:
- Paint smaller design elements like patterns, textures, accents, etc. Use a variety of brush sizes and shapes for different effects.
- Refer back to your original plan so you don’t miss any key details. Add them in the appropriate areas.
- Allow the paint to dry fully between adding details. Multiple thin layers are better than thick single coats. Drying between coats prevents colors from bleeding together.
Take your time perfecting details as this stage can make or break your overall design. Meticulous brushwork brings pottery to life. Refer to reference images for inspiration. Step back periodically to check proportions and perspective.
Seal the Paint
Sealing the paint is an essential final step to help protect your painted pottery piece. A sealant creates a protective barrier over the painted design to prevent chipping, scratching, and fading over time. It’s important to let the paint fully cure for the recommended time on the paint bottle before sealing, usually 24-48 hours.
There are a few main options for sealants to use on painted pottery:
- Water-based acrylic sealers – These are non-toxic and often used for sealing craft paints. Brands like Mod Podge offer acrylic sealants in matte, glossy, and satin finishes. Allow full cure time before use.
- Epoxy resin – Epoxy creates a thick, durable, plastic-like coating that is highly waterproof. It requires mixing two parts and proper ventilation during application and curing. Allow a full 24 hours cure time before use.
- Spray sealants – Matte spray sealants like Krylon’s UV-Resistant Clear Coating offer quick waterproof and UV protection for painted designs. Multiple light coats are best to avoid drips.
Always test sealants on an inconspicuous area first and check that it dries fully clear without interfering with the painted design. With a quality sealant, you can help keep your painted pottery protected for years of enjoyment.
Advanced Techniques
Once you have mastered the basics of pottery painting, you can experiment with more advanced techniques to add extra dimension and artistry to your pieces. Some popular advanced techniques include:
Sponging
Sponging involves dabbing paint onto the pottery using a natural sea sponge. Cut or tear the sponge into a shape you like. Dip it lightly into paint and dab it onto the bisqueware. Sponging creates a mottled, textured effect. You can use multiple colors of paint in a random or intentional pattern.
Stenciling
Stencils let you create crisp, intricate designs. Position a pre-cut stencil over the pottery and use a stencil brush or sponge to apply paint through the openings. Carefully lift the stencil straight up to reveal the pattern left behind. Stencils work great for adding repetitive patterns or layering different designs.
Glazing
Glazing involves covering the painted bisqueware with a thin layer of liquid glass to create a shiny, protective finish. The glaze can be clear to highlight the paint colors or tinted to add extra color. Use a soft brush to paint on the glaze. Multiple coats are often needed. Glazing requires a kiln to fire and set the glaze.
Faux Finishing
Faux finishing techniques mimic the look of other materials, like wood, marble, and metal. You can use sponges, crumpled plastic, and textured brushes to create faux finishes. Examples include crackle effects, color washing, and wood grain. Faux finishing takes practice but adds beautiful, professional touches.
Consult pottery painting books or online tutorials to learn the intricacies of these popular advanced techniques. With a little practice, you’ll be able to create stunning works of art on clay.