How Do You Use Air Dry Clay For Beginners?
What is Air Dry Clay?
Air dry clay is a modeling material that dries into a hard finish at room temperature without the need for baking. It is a popular choice for beginner sculptors and crafters because it is inexpensive, easy to find, and very versatile. There are several types of air dry clay:
Polymer Clay – Made from PVC, resin, and minerals. Polymer clay is lightweight, smooth, and easy to condition. It dries hard and durable. Brands like Original Sculpey are polymer-based.
Natural Clay – Made from natural ingredients like cornstarch, glue, and cellulose. Natural clays are non-toxic and biodegradable. Brands like Model Magic are natural clay.
Homemade Clay – Can be made by mixing glue, cornstarch, and other household ingredients. Homemade clay is fun for simple projects and custom colors.
The main benefits of working with air dry clay are that it’s affordable, readily available, and dries smoothly into a permanent finish. It’s easy to sculpt and mold using simple tools and hands. Air dry clay is also safe for all ages. Once dry, items can be painted with acrylics or sealed with varnish or glaze.
Supplies Needed
When working with air dry clay, you’ll need a few basic supplies:
– Clay – Air dry clay, sometimes called pottery clay, is the main material. Choose an air dry clay formula that doesn’t require baking or firing.
– Craft knife – A small craft knife with changeable blades lets you precisely cut shapes and scrape away excess clay.
– Rolling pin – Use a standard rolling pin to roll out clay and flatten it to an even thickness. Acrylic or wooden work well.
– Cookie cutters/molds – Cookie cutters and molds in various shapes help cut uniform clay shapes quickly.
– Paint brushes – Small paint brushes allow you to paint details and designs on dried pieces.
– Acrylic paint – Any acrylic craft paint works for adding color and designs. Water-based is best for clay.
Safety Tips
When working with air dry clay, it’s important to keep safety in mind, especially when children are involved. Here are some tips:
Supervise children – Don’t leave kids unsupervised when working with air dry clay. It can get messy and small pieces could become a choking hazard if put in mouths.
Work on a protected surface – Cover any tables or floors with a drop cloth, plastic mat or layers of newspaper before starting. Air dry clay can stain surfaces.
Wash hands after – Have kids wash hands thoroughly with soap and water when done. Air dry clay can dry out skin and get lodged under fingernails if allowed to sit.
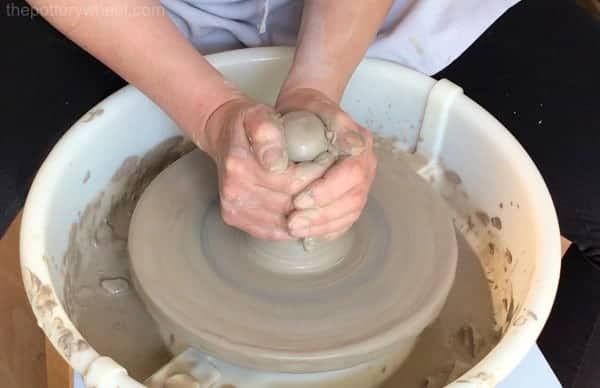
Conditioning the Clay
Properly conditioning your air dry clay is an important step before starting any sculpting project. Air dry clay often arrives in solid blocks or slabs, which need to be kneaded thoroughly in order to warm up and soften the clay.
Start by kneading the clay with your hands for several minutes until it becomes pliable. Kneading helps distribute moisture evenly throughout the clay. If the clay is too stiff, add a few drops of water and continue kneading to incorporate it. You’ll know the clay is ready when it’s smooth, soft, and easy to shape.
After conditioning, rewrap any unused clay tightly in plastic wrap or store in an airtight container. Proper storage keeps the clay from drying out between uses. Air dry clay will last for months if conditioned clay is wrapped up air-tight. Just remember to knead it again before your next sculpting session.
Sculpting Techniques
There are several basic sculpting techniques that work well with air dry clay for beginners:
Pinching
Pinching is likely the easiest sculpting method. Simply take a ball of clay and use your fingers and thumbs to pinch and pull the clay into the desired shape. Pinching works well for making simple objects like bowls, cups, and vases. Start with basic shapes and refine the form by smoothing and adding details.
Coiling
For coiling, roll pieces of clay into long coils or snakes. Then wind the coils around each other to build up 3D shapes. Coiling is great for making pots, bowls, sculptures. Attach each new coil by smoothing and blending it into the previous coil.
Slabs
To make slabs, roll out the clay with a rolling pin until flattened and cut shapes using cookie cutters or a knife. Decorate the slabs by carving patterns or attaching objects. Then stack and join the shaped slabs to form 3D creations. Slabs work nicely for making geometric shapes and textures.
Molds
For beginners, press clay into ready-made silicone molds to easily make detailed shapes like animals, leaves, or geometric designs. Release the clay from the mold once it firms up a bit, then continue shaping or decorating if desired.
Smoothing and Shaping
Once you’ve sculpted your air dry clay creation, there are several techniques you can use to smooth shapes and refine details:
Fingers – Your own hands are great sculpting tools for smoothing and shaping clay. Use your fingers to gently blend seams, soften edges, and add texture. The warmth from your hands can help soften and smooth the clay.
Craft Knife – Use a craft knife to trim away excess clay and sharpen edges. Scrape the knife gently across the surface to smooth rough areas. Craft knives give you precision and control for detailed shaping.
Spatula – A rubber or metal spatula is helpful for flattening surfaces and blending textures. Use the straight edge for smoothing flat areas, or the tip for getting into crevices and details. Rub gently to soften.
Sandpaper – For smoothing and distressing, use fine grit sandpaper to gently rub the clay surface. Try wet sanding for smoothing without removing clay. Be careful not to rub too hard or you may scrape away detail.
Baking and Drying
After sculpting your air dry clay creation, you’ll need to allow adequate time for the clay to dry fully. Depending on the size and thickness of the piece, the drying/curing time can range from 24 hours to several days. The denser and thicker the clay, the longer the drying time required. Here are some air dry clay tips for proper drying:
– Allow air dry clay sculptures to dry at room temperature, away from direct heat or sunlight. Excess heat can cause cracking.
– Place pieces on a wire rack or dry cleaning rack to promote circulation as the clay dries. This prevents moisture from accumulating on the surface.
– Turn pieces periodically while drying. This allows any moisture to evaporate evenly.
– Hollow pieces or those with enclosed areas will take longer to fully cure. You may need to periodically vent or insert a straw to allow inner moisture to escape.
– Use a hair dryer on a low or no heat setting to speed up drying time if needed. Keep the dryer moving constantly.
While air dry clay will cure naturally at room temperature over time, you can also use a standard oven to accelerate drying:
– Preheat oven to 200°F or the lowest possible temperature. Place pieces on a baking sheet lined with parchment paper.
– Bake clay sculptures for 15-30 minutes, checking frequently to prevent overheating. The clay should feel dry but not too hot.
– Allow the clay to cool fully before handling. Baking makes the clay more brittle.
– Don’t bake pieces with enclosed air pockets, as expanding air can cause them to crack or burst.
With some trial and error, you’ll get a feel for how long your specific clay sculptures need to dry fully. The baking and drying process ensures your finished pieces are rock solid and durable for displaying.
Painting
Acrylic paints are the ideal choice for painting air dry clay. They come in a huge variety of vibrant colors and adhere well to the clay surface. Acrylics also dry quickly and are water-soluble, making cleanup easy.
When selecting acrylic paints, opt for those designed specifically for crafting and model work. These have more concentrated pigments and better coverage than standard acrylics. Liquitex and FolkArt are two popular brands for painting clay.
Use very fine-tipped round or liner brushes to paint the smallest details. For larger areas, try flat and filbert brushes. You may also use soft sea sponges or cotton swabs for textured effects.
Apply a sealer like matte, gloss, or satin varnish after the paint has fully dried. This seals in the paint and provides protection. Multiple thin coats of sealer are better than one thick coat.
Storage
Properly storing your unused air dry clay is important for keeping it usable for future projects. Here are some tips for storage:
Seal containers tightly. Air dry clay dries out quickly when exposed to air, so make sure to seal up any containers, bags or packaging it came in. Tightly twist lids on jars, or seal bags with clamps, clips or tape.
Refrigerate unused clay. The cool environment of the refrigerator helps keep air dry clay soft and pliable. Store your clay in a sealed container in the fridge and it can stay usable for up to 6 months. Make sure to let the clay warm back up to room temperature before using if refrigerated.
Fun Project Ideas
Air dry clay is extremely versatile and can be used for many fun crafts and projects. Here are some beginner-friendly ideas to try:
Magnets
Make customized refrigerator magnets by shaping the clay into your favorite animals, food items, letters or shapes. Let the shapes dry fully and then paint them with acrylic paints. Glue a magnet onto the back and decorate your fridge or metal locker.
Jewelry
Fashion cute clay earrings, pendants and beads for necklaces. Add glitter or beads for extra decoration. Use cookie cutters and stamps to create interesting shapes and designs. Apply a clear glaze or leave unpainted for a natural clay look.
Figurines
Craft any figurine your heart desires, like animals, gnomes, action heroes or holiday decorations. Let your imagination run wild. Use toothpicks to hold up arms or legs while drying if needed. Paint with acrylics and add fun details.
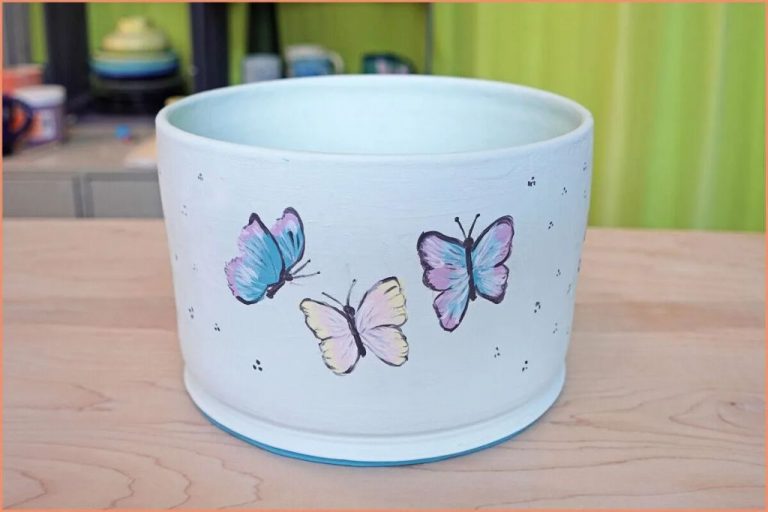
Bowls
Make one-of-a-kind bowls, platters and vases. Upcycle glass or plastic containers as molds. Drape clay over the molds, let dry, then remove mold. Decorate with paints, markers and more. Great for holding trinkets, coins, jewelry or potpourri.