How Do You Use Clay Slip?
What is Clay Slip?
Clay slip is a liquid mixture of clay and water used in pottery and ceramics. According to Soul Ceramics, it typically contains a fairly even concentration of clay, in a ratio of approximately 1 part dry clay to 1-2 parts water.1 The clay particles are suspended in the water, creating a creamy, liquid clay material.
Clay slip differs from glaze in that it contains only clay and water, while glazes contain additional fluxes, colorants, and minerals. Glazes are applied on top of an already fired ceramic piece and require high heat to melt and fuse to the surface. Clay slips can be applied to greenware or bisqueware clay before firing. The main purpose of slip is to join pieces of clay together, seal the clay surface, and can also be used decoratively.
Uses for Clay Slip
Clay slip has many uses in pottery and ceramics. Three of the most common uses are joining unfired clay pieces, filling holes and cracks, and adding texture.
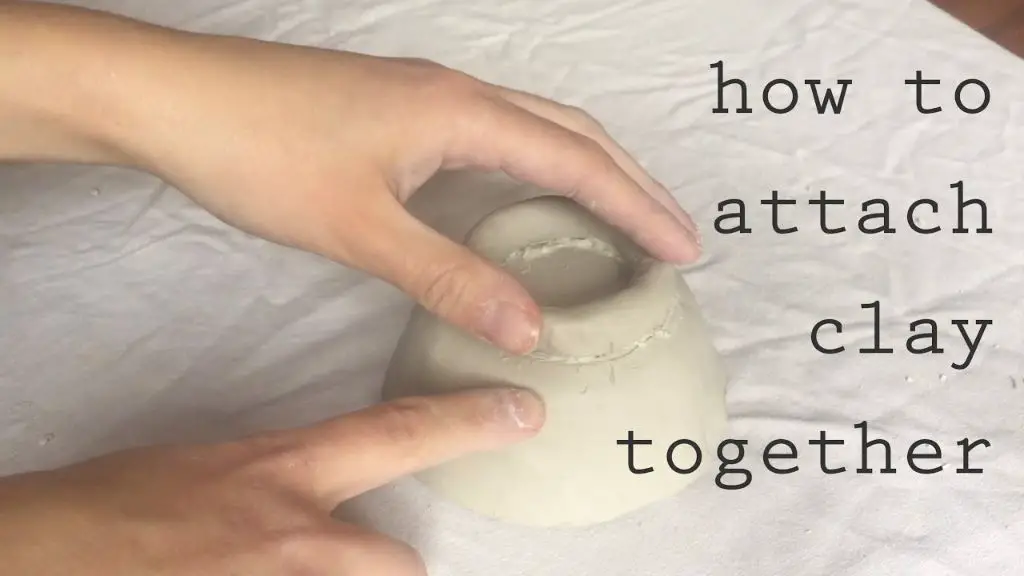
Clay slip is often used as an adhesive to join two unfired clay surfaces together. The process involves scoring or scratching the surface of the clay pieces to be joined, then applying a layer of slip. The slip helps adhere the clay pieces and fills in the scored grooves, creating a strong bond once fired (Source).
Slip can also be used to fill small holes or cracks in unfired clay pieces. By filling these imperfections with slip, the surface becomes smooth and the structural integrity is improved. This helps prevent cracking or weak points once the clay is fired (Source).

Finally, clay slip is commonly used to add texture and decorative effects to pottery. Different techniques like dipping, pouring, splattering, or trailing slip can create unique patterns and visual interest. The slip maintains its texture after firing, so it’s an accessible way to get creative with clay surfaces.
Making Clay Slip
Clay slip is made by mixing clay and water together into a liquid state. The ratio of clay to water is important for getting the right consistency. A good starting point is a 1:4 ratio of clay to water by weight. For example, 1 pound of clay powder to 4 pounds (or 4 cups) of water.
To make the slip, start by breaking up dry clay into small chunks or a powder. Any natural clay can be used, such as stoneware, porcelain, earthenware, etc. Next, add the clay bits to water in a large container. Use a stick blender or whisk to mix the clay and water together, making sure there are no dry lumps. Let the mixture sit for several hours so the clay can fully integrate with the water. Then mix again until smooth and blended. The consistency should be like heavy cream or melted ice cream.[1]
Add water or clay powder as needed to adjust the thickness. Aim for a viscosity that easily pours but is not too thin and watery. Test the slip on a vertical surface to check consistency. The slip is ready when it slowly runs down without immediately dripping off.
Strain the clay slip through a fine mesh sieve or cheesecloth to remove any remaining lumps or debris. Store leftover slip in a sealed container and remix before using if it separates over time.
Applying Clay Slip
There are several different techniques for applying slip to clay pieces:
Brushing
Brushing slip onto the surface of leather-hard or bone-dry clay is one of the most common application methods. Use a soft brush to apply an even layer of slip over the clay body. Brushing works well for covering large surface areas smoothly and evenly [1].
Dipping
Dipping involves submerging an entire piece into liquid slip to fully coat the clay body. This technique ensures complete and consistent coverage. Pieces can be dipped into slip at any stage from wet clay to bisque ware. For raw clay, allow excess slip to drain off and leather harden before continuing [2].
Pouring
Pouring slip over specific areas or the entire surface of a clay piece creates flowing, dripping effects. Tilt and rotate the clay to guide the slip where desired. Let it pool in recesses to accentuate textures. Pour slip over raw, leather-hard, or bisqued clay. Pouring works well for covering large areas efficiently.
Clay Slip Recipes
Standard Clay Slip Recipe
A basic clay slip consists of clay and water. According to the Clay Recipes on kengeorgepottery.tripod.com, a standard clay slip recipe is:
- A small amount of clay
- Just enough water to create a batter-like consistency
The specific ratio of clay to water can vary depending on the desired consistency. Many sources recommend starting with equal parts clay and water by volume, then adjusting as needed. The slip should be fluid but not watery.
Recipes with Additives
In addition to basic clay and water, other ingredients can be added to clay slips for certain effects:
- Colorants like stains or oxides for tinting the slip
- Opacifiers like tin oxide or zirconium silicate for opacity
- Sodium silicate or other flux as a melting agent
- Citrus juice, vinegar, or soda ash to adjust pH
- Paper fiber for paper clay slips as shared in the Magic Paper Clay Slip Recipe from Arizona Clay
When adding anything beyond basic clay and water, test batches first. Measure carefully and note the recipe to recreate consistent results.
Clay Slip Tips
Avoiding cracks and achieving the right consistency are two of the most important clay slip tips for success.
Cracks can occur if the slip dries too quickly. To avoid this, keep the slip container covered when not in use so it doesn’t dry out. Mix in a little water if it starts to thicken. If applying to greenware, allow the piece to firm up a bit first so the slip doesn’t make it too soft.
For consistency, thicker slips made with high-plasticity clay are great for smooth surfaces like bowls. Thinner slips work well for coating textures. Test consistency on a piece of scrap clay first. Slip should coat evenly without running off too much. Add water or clay powder to adjust as needed.
For storage, slip will keep almost indefinitely if kept moist in a sealed container. To revive thickened slip, stir in water until it reaches the desired consistency again.
Clay Slip Texture
Clay slip can be made with different textures depending on the look and feel desired. Some common clay slip textures include:
Smooth
A smooth clay slip has a fine, even texture without any visible granules. This is achieved by sieving the slip through a fine mesh screen to remove any larger particles. Smooth clay slip results in an unblemished surface when applied to clay. It’s ideal for minimalist designs where texture is not wanted.
To make a smooth slip, be sure to use a fine clay body that has been well processed and sieved. Add enough water to reach a creamy yogurt-like consistency. Do not over-mix, as this can introduce air bubbles. Strain the slip through a fine mesh sieve before using.
Examples: Jennifer Owen often uses smooth clay slip.
Sandy
A sandy clay slip has a coarse, gritty texture from small granules of unfused clay. This creates an organic, rough surface when applied to clay. Sandy slips are ideal for more rustic designs.
To make a sandy slip, use a coarser clay body containing varied particle sizes. Add less water so the slip is fairly thick. Do not sieve – the granules provide the desired texture. Only strain out larger chunks. The slip should flow slowly and have a grainy consistency.
Examples: This pillar vase by Liv Antonecchia has a sandy colored slip.
Rough
A rough clay slip has an irregular, bumpy texture from chunks of clay. This creates a highly textured, organic effect. Rough slips work well for more abstract, free-form designs.
To make a rough slip, use a coarse clay body with varied particle sizes. Add minimal water so the slip is very thick. Do not sieve or strain. The chunks of clay will provide texture. The mixture should be gloopy and hold its shape.
Rough slips create a matte, rustic look. They highlight the clay’s raw imperfections rather than masking them. Rough textures can be accented with tools after applying slip.
Clay Slip Color
Clay slips come in a range of natural clay colors like red, brown, tan, and white. The natural clay color depends on the type of clay used to make the slip. For example, white slips are often made from kaolin or ball clay, while red slips use iron-rich clays.
Colored slips can be made by adding metal oxide stains, also called ceramic stains, to natural clay slips. Common stains include cobalt for blue, copper for green, and iron for rusty orange colors. Stains are available in liquid or powder form and only small amounts are needed to achieve deep, vibrant colors in slips. According to this article, it’s important to thoroughly mix in stains and test colors before applying colored slips.
In addition to stains, some colored slips are made by mixing colored clay bodies into the slip. This can produce a wide palette of colors like pink, purple, yellow, black, and more. Pre-mixed colored slips are also available commercially in liquid and dry form for convenience.
Firing Clay Slip
Firing is an important step when working with clay slip. There are two main firing stages:
Bisque Firing
Clay slip should be bisque fired before applying any glazes. Bisque firing prepares the clay by hardening it and making the surface porous enough for glazes to adhere properly. When bisque firing slip, it’s important to follow the temperature guidelines provided by the clay manufacturer. Firing too hot can cause bloating, cracking or melting. Most mid-range clay slips bisque between cone 04 and cone 6. Slow bisque firing is recommended to allow any moisture to evaporate slowly and prevent cracking.[1]
Glaze Firing
After bisque firing, clay slip can be glazed and fired to maturity. It’s important to choose a glaze that is compatible with the clay body and firing temperature. Mid-range slips are typically fired between cone 4 and cone 6 for glaze firing. Slow glaze firing allows glazes to mature smoothly. Make sure the glaze has fully melted before shutting off the kiln. Cool slowly to prevent glaze defects like cracking.[2]
Safety with Clay Slip
When working with clay slip, it’s important to take safety precautions to avoid potential hazards.
One key safety concern when working with dry clay slip is avoiding breathing in the dust. According to the Office of Environmental Health and Safety at Princeton University, “Clay is made by mixing dry clay with water in clay mixer. Clay slip is made by adding talcs which themselves can be contaminated with fibrous asbestos or crystalline silica.”
To avoid breathing in dry slip, it’s recommended to:
- Wear a protective mask or respirator when handling dry slip
- Mix slip in a well-ventilated area
- Use a vent system to control dust at the source
It’s also important to be cautious when walking on wet slip, as it can become very slippery. To avoid slips and falls, wear shoes with good traction and clean up spills immediately.
Following basic studio safety rules like cleaning up dust and slip spills can help minimize potential hazards when working with clay.

