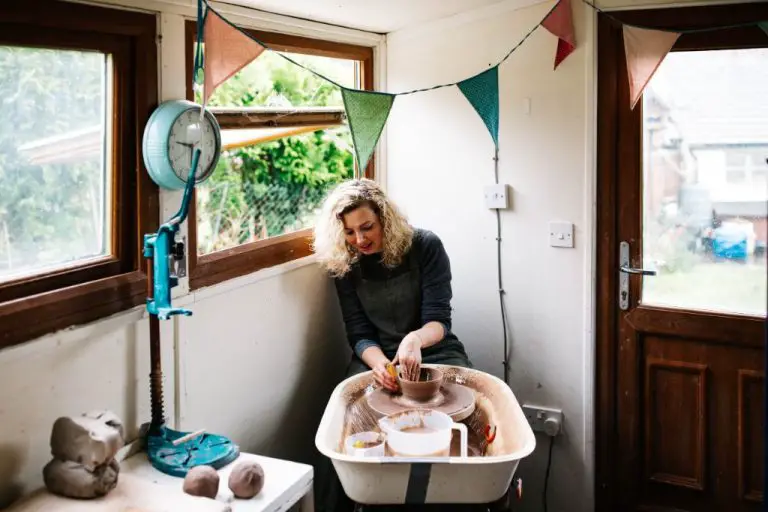
How Do You Use Textured Rollers?
Textured rollers are paint rollers with a textured surface that creates a decorative pattern or texture on painted surfaces. They can be used on walls, furniture, craft projects and more to add visual interest. Textured rollers come in a variety of patterns like stripes, swirls, diamonds, etc. The size of the pattern depends on the nap length and thickness of the roller sleeve. The main types of textured rollers available are:
- Embossed rollers – Have a raised pattern for a 3D effect
- Engraved rollers – Have an indented, carved pattern
- Specialty rollers – Create patterns like bricks, stones, waves etc.
Textured rollers allow anyone to easily create faux finishes that would otherwise require professional skills. They provide an affordable way to give walls, furniture and home décor a high-end, customized look. Using a textured roller adds visual depth and makes ordinary paint jobs extraordinary.
Prepping the Roller
Before using a new roller, it’s important to properly wash and prepare it. Brand new rollers often have lint, debris, and loose fibers that can wind up in your paint. To avoid this, start by running the dry roller under warm water while rubbing your fingers over the nap to remove any loose particles. According to Family Handyman, this process helps activate the adhesive and tighten the nap.
After washing, spin the roller against your hand to remove excess water. Some painters recommend fully saturating the roller with water first by letting it soak or spraying it down as suggested by Sawdust Girl. This allows the roller to fully absorb water into the fibers. Then spin off the excess before starting to paint. Proper prep removes debris, loose fibers and ensures the roller is ready to soak up and distribute paint smoothly.
Choosing Paint
When choosing paint for a textured roller, it’s important to consider the viscosity or thickness of the paint. Thicker paints like latex work best to hold the texture from the roller. According to Family Handyman, latex paint is ideal for textured rollers because it’s thick enough to carry the texture well. Oil-based paints and thinner paints like milk paint can have a harder time holding the texture impression from the roller.
It’s also important to choose a paint that is compatible with the material of the textured roller. Latex paint works well with most textured foam and polyester blends. Always check the manufacturer’s recommendations for which types of paint work best with the textured roller.
Additionally, make sure to pick a paint that matches the level of texture on the roller. More subtle textured rollers pair better with lower-sheen paints like matte or eggshell. Bolder textures tend to work better with satin, semi-gloss or gloss paints. The higher sheen helps highlight the texture. Consider the finished look you want to achieve when choosing the right combination of textured roller and paint.
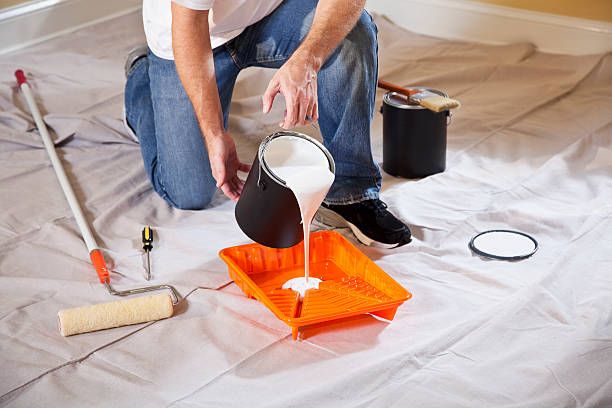
Loading the Roller
Properly loading the roller with paint is crucial for achieving an even finish on your walls. You’ll want to fully immerse the roller in paint to saturate all the fibers and bristles. According to Family Handyman, you should “load the roller by submerging it one-third of the way into the paint.” Press gently as you roll back and forth in the paint tray to work the paint through the entire roller.
As you’re loading the roller, be sure to distribute the paint evenly across it. Roll the saturated roller against the ramp inside the tray to remove any excess paint. You want the roller to be thoroughly coated but not dripping. The proper loading technique involves rolling the paint up the ramp and then onto the textured surfaces to achieve full, even coverage across the roller.
Take care not to overload the roller with too much paint. Start conservatively, then add more paint if needed. It’s easier to apply multiple lighter coats than to deal with drips from overloaded paint.
Applying Paint
When applying paint with a textured roller, technique is important for achieving an even finish. As recommended by The Family Handyman, work methodically in sections no larger than 3×3 feet. Overlap the edges of each section to blend them together seamlessly.
When rolling onto walls, apply the paint in a “W” or “M” shape. Roll in different directions with each stroke instead of simply rolling up and down. This helps prevent roller marks in the texture. Make your final strokes downward to finish blending the texture evenly across the surface.
Take care to maintain consistent pressure and rolling speed for uniform results. Work from top to bottom, or vice versa if right-handed. Allow the paint to fully dry between coats for best adhesion and texture depth.
Ceiling Painting
When painting ceilings with textured rollers, it’s important to have the right strategy and tools. Here are some tips for getting great results:
Cutting in the edges along the ceiling line before rolling paint is crucial. Use a high-quality angled brush to carefully cut in around the perimeter. This will give you a clean border to roll into. Consider using painter’s tape for extra sharp lines if needed.
Use a pole extender for your roller to easily reach ceilings without climbing a ladder. Extendable poles allow you to reach up to 9 feet with ease. Choose a lightweight but sturdy metal or composite pole that can securely hold roller sleeves.
Work in 3-4 foot sections across the ceiling, applying a light coat of paint with the roller. Overlap sections slightly as you move across the room to prevent noticeable lap marks. Gently roll in different directions to fully cover the textured surface.
Apply at least 2 coats of paint, letting the first coat fully dry before adding the second. Textured surfaces often need more paint for adequate coverage compared to smooth ceilings.
Work methodically and carefully to avoid drips. Keep a wet edge as you paint, blending sections together seamlessly.
Use a roller screen or grid when taking breaks to prevent drying out. This will maintain the proper amount of paint saturation on the roller.
Check for missed spots and touch up if needed when the final coat has dried. Use a small trim brush to catch any visible seams or edges.
With the right prep and painting technique, you can get beautiful, professional results on popcorn and other textured ceilings.
Cleaning Paint Rollers
It’s important to properly clean paint rollers between coats and after finishing a project. Allowing paint to dry on the roller will make it difficult to use again and shorten its lifespan. Here are some tips for cleaning paint rollers:
Start by removing as much excess paint from the roller as possible by rolling it against the inside wall of the paint tray. Next, rinse the roller thoroughly with warm water, using a hose if working outside. Add a small amount of mild dish soap and gently rub the roller cover under running water to remove all traces of paint. According to This Old House, wrapping the roller cover in plastic wrap or aluminum foil between coats will keep it usable for longer.
It’s important not to let rollers fully dry with paint on them. As Real Simple recommends, continue rinsing and washing until the water runs clear. Allow the cover to air dry before storing or reusing. With proper cleaning, paint rollers can last through multiple projects.
Maintaining Shape
Properly storing textured paint rollers is key to maintaining their shape and texture between uses. According to DIY experts, always store rollers with the nap facing upwards to prevent flattening (source). Letting a roller dry lying flat causes the texture to become misshapen and compacted. If a roller has become flattened, it’s possible to revive the nap by combing it gently with a wire brush or paintcomb.
However, the best way to preserve texture is proper storage. Many pros recommend slipping a roller cover onto a handheld paint roller frame after use. Allow it to fully dry in this upright position before removing and storing for later use. This maintains the nap’s texture and springiness. Simply re-wet and reload paint when it’s time to use that roller again.
Troubleshooting
Using textured paint rollers can sometimes lead to issues like uneven coats, lint streaks, and improper paint loading. Here are some tips for troubleshooting common problems:
If you end up with an uneven coat or roller marks, make sure to let the paint fully dry first. Then, lightly sand the area with fine grit sandpaper to smooth it out before applying another coat. Going over it while still wet can make the problem worse. It’s also important to not overload the roller with too much paint, which can cause drips and uneven coverage [1].
Lint streaks are usually caused by loose fibers on the roller sleeve. Make sure to remove any obvious lint by using masking tape before starting. As you paint, periodically check for new lint and remove it. Using high-quality roller covers can also cut down on fiber shedding and lint issues.
When loading the paint onto the roller, avoid over-saturating it. Roll off any excess paint on the inner tray first, then evenly distribute it across the entire sleeve. Improperly loaded rollers will apply paint unevenly. Load only what the roller can reasonably hold for even coverage [2].
When to Use Textured Rollers
Textured rollers, also known as stipple rollers, are best suited for painting projects with rough or uneven surfaces that standard rollers may not be able to handle as effectively. Some examples of projects well-suited for textured rollers include:
Painting ceilings – Textured rollers can help achieve an orange peel or splatter texture on ceilings. They are useful for stippling over existing textured ceilings or creating a textured look on smooth ceilings.1
Painting stucco or brick – The nubby fabric of textured rollers can work paint into the grooves and indentations of stucco or brick surfaces. This allows for better coverage compared to standard rollers.2
Painting over existing textures – For surfaces with Venetian plaster, knockdown, or other heavy textures, a textured roller can help adhere paint over the bumps and ridges.1
The nubby surface of textured rollers does soak up more paint than standard rollers. The stippling effect also leads to a slightly uneven, mottled finish. For smooth drywall or wood surfaces, a standard woven or microfiber roller may provide better coverage.