How Do You Write Names On Air Dry Clay?
Air dry clay, also called modeling clay, is a lightweight and easy-to-use material that dries into a hard, durable ceramic shape at room temperature. Unlike traditional oven-baked clays, the air drying process allows even young children to create lasting keepsakes and art projects without any baking required.
One especially popular use for air dry clay is making handprint impressions and customized name plates. The clay can be rolled flat, textured, and shaped anyway you like, then imprinted with a name while it’s still soft. As it hardens, the clay will retain the letters and handprint perfectly. Air dry clay is an ideal material for capturing keepsakes of a child’s hands and proudly displaying their name.
With a few simple techniques, you can easily impress names and messages into air dry clay that will last for years. Let’s explore the step-by-step process.
Gather Your Supplies
Before starting your clay project, you’ll need to gather a few basic supplies. The main ingredient is air dry clay. Look for a clay that air dries to a hard finish within 24-48 hours. The clay should be smooth and pliable enough to engrave letters into.
You’ll also need clay tools like sculpting sticks or silicone tipped tools to carve the letters. These give you better control and help prevent fingerprints in the clay. Acrylic paint in various colors provides a fun way to accent the engraved letters or add background designs. Round paint brushes work best for detailed acrylic painting.
Here’s a list of supplies to have on hand:
- Air dry clay
- Clay sculpting sticks
- Paint brushes
- Acrylic paint
With these basic supplies, you’ll be ready to create beautiful engraved and painted names and words in clay.
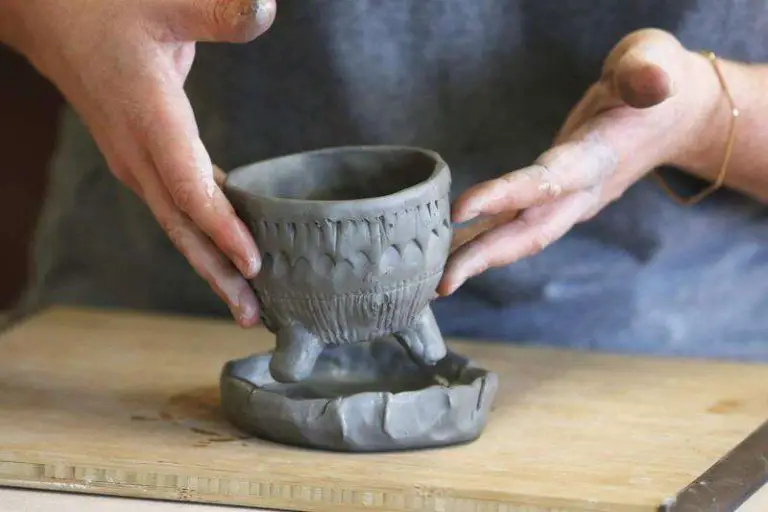
Prepare the Clay
Before writing a name on your air dry clay, you’ll want to properly prepare it first. Start by kneading and working the clay with your hands to make it soft and pliable. This helps remove any air bubbles and allows the clay to be molded into the desired shape.
Next, use a rolling pin or acrylic rod to roll out the clay until it is an even thickness. The thinner you roll the clay, the more delicate the finished piece will be. Aim for 1/4 inch thick for writing names and letters. Use your hands to gently smooth out the surface, removing any creases or imperfections.
Make sure your work surface is clean so that no dust, hair, or debris gets embedded into the clay. You want a perfectly smooth canvas before starting to write or engrave letters. Preparing the clay properly ensures clean, crisp lines and makes your name design stand out.
Write the Name
When writing a name on air dry clay, you have a few options for tools. Many find using sculpting sticks, popsicle sticks, or other clay tools allow for the most control and precision.
Consider whether you want the name to be written in cursive or print. Cursive can look very elegant on clay, but print is often easier to read. If writing a child’s name, print is likely the best option.
Take your time engraving each letter. Air dry clay is very forgiving, so if you make a mistake, you can easily smooth it over and rewrite the letter. Engraving the letters makes an indent that gives the writing more definition.
Once you finish writing the name, you can go over it again to sharpen edges or tidy up any imperfections before moving onto the next steps.
Engrave the Letters
Once the name is written on the clay, it’s time to engrave the letters. This helps the name stand out and makes it more legible. Use small sculpting tools or even items like paper clips to press into the clay and carve out the letters.
Press the tool gently but firmly perpendicular to the surface to make indentations for each letter. Take care not to poke all the way through the clay. Engraving adds a nice dimension and emphasis to the name.
If you make any mistakes, you can easily smooth them over with your fingers or a craft stick and rewrite the name. Engraving takes some practice, so don’t worry if your letters aren’t perfect. The beauty of air dry clay is that it’s very forgiving.
Get creative with your engraving. Try different width tools for thick and thin lines, or experiment with cursive or calligraphy styles. Engraving the letters makes the name design stand out on your finished clay piece.
Add Accent Colors
Once you have engraved the letters into the clay, it’s time to make them pop by painting accent colors into the indentations. This not only makes the name stand out more, but also adds a fun, creative touch.
Select acrylic paint colors that coordinate well with the clay’s base color. For light clay, darker colors like black, navy or forest green work nicely. On darker clay, opt for bright colors like white, gold, red or blue. Metallic paints like gold, silver or copper can create cool effects too.
Use a small paint brush to neatly apply the paint into each letter. Make sure to fill the engraving fully and avoid getting paint on the clay’s surface. Let the paint dry completely before continuing to the next step. This ensures the colors stay vivid and won’t smear.
The accent colors breathe new life into the name and make it stand out beautifully on the clay. Feel free to get creative with different color combinations – the options are endless!
Seal and Protect
Once your clay art piece is complete, it’s important to seal and protect it. This prevents the engraved letters and accent colors from chipping or fading over time.
After allowing the clay to fully cure according to package instructions, apply a layer of acrylic sealer or varnish. Use a soft paintbrush to gently coat the entire surface of the clay. Allow the sealer to dry completely.
Sealing creates a protective barrier that prevents moisture and oils from penetrating the clay. It also provides a nice finished look by adding a subtle glossy sheen.
Be sure to apply 2-3 thin coats of sealer, allowing each coat to fully dry in between. The curing time will depend on the specific brand and type of sealer used.
Once sealed, your personalized clay art will be protected from chipping and fading for years to come. Proper sealing is key for preserving engraved names or designs on air dry clay.
Display the Clay
Once your name clay art is complete, you can display it in a variety of creative ways to show off your handiwork and the name you engraved. Here are some ideas for beautifully presenting your name clay art:
Mount on board or frame: Attach the clay to a sturdy board or frame it like artwork to hang on the wall. This gives the clay piece a polished, finished look. Use strong adhesives like E6000 that work on clay and porous materials. Place the board in a frame with a cardstock mat to accentuate the clay.
Add ribbon for hanging: Choose a pretty ribbon in a complementary color and attach it to the top back of the clay with a strong adhesive. Tie the ribbon in a knot or bow and hang your clay art like an ornament.
Rest on plate, tray or easel: For tabletop display, set the clay on a decorative plate, mirrored tray, or miniature easel. This allows the clay art to stand out and become a focal point wherever it’s displayed.
Clay Care Tips
Once your clay piece is complete, be sure to handle it with care so it lasts for years. Here are some tips for keeping your clay creation looking its best:
Store the finished clay piece in a cool, dry area away from direct sunlight. Sunlight and heat can cause the colors to fade over time. An ideal storage spot is in a closed cabinet or box.
Avoid placing the clay where it can get knocked over or damaged. Since air dry clay is fragile, rough handling or drops can lead to chips and cracks.
If your clay does get damaged, repair any chips carefully with a small amount of air dry clay. Gently fill in the damaged area and smooth it flush with the surrounding surface.
Consider spraying your clay with an acrylic sealant once it is fully cured. This adds a protective coating that will help keep the clay from absorbing moisture and oils from handling.
With proper care and storage, an air dry clay creation can last for many years as a cherished keepsake or decoration.
Fun Variations
Air dry clay provides a unique, textured medium for personalizing your names and special messages. Beyond basic writing or engraving, you can add creative flair and customization. Consider these fun ideas:
Add Textures
Mix in small items like beads, sequins, glitter, sand, or confetti to create one-of-a-kind texture and dimension in the clay. Press them gently into the surface before writing or carving into the clay.
Use Letter Stamps
For a playful look, press letter stamps into the clay to imprint names or words. You can find letter stamp kits with both upper and lowercase alphabet options.
Impress Objects
Make an impression by gently pressing small household objects into the clay. Seashells, leaves, flowers, and lace can leave behind a beautiful imprint. Get creative with the patterns and textures you can make.