How Hard Is It To Get Into Pottery?
Pottery is an ancient art form that involves shaping clay into functional or decorative objects, like bowls, vases, and figurines. As one of humankind’s oldest crafts, pottery has been found dating back over 20,000 years to prehistoric times. In recent years, pottery and ceramics have been experiencing a resurgence in popularity. The appreciation for handcrafted pottery has grown, with more people taking up pottery as a hobby, creative outlet, and even therapeutic practice. Pottery classes are filling up with newcomers eager to get their hands dirty on the wheel. With rising interest in pottery, many beginners wonder – how difficult is it to get started as an amateur potter? This article will explore the basic skills, required tools and workspace, startup costs, time commitment, technique development, safety considerations, and options for classes and communities. By the end, you’ll have a better understanding of how to begin your own journey into pottery.
Basic Skills Needed
Getting started in pottery requires some basic skills. Most importantly, you’ll need creativity and an artistic sense to envision and design pieces. Manual dexterity and hand-eye coordination are also key to properly manipulating the clay and creating smooth surfaces and clean lines. Patience and attention to detail are essential as well, as throwing pots on a wheel involves repeating motions over and over to center the clay and raise the walls evenly. According to the book “Creole Clay: Heritage Ceramics in the Contemporary Caribbean”, the skills needed for pottery production were inherited from Africa and preserved during the long years of slavery. This indicates the artform requires innate abilities that can be further developed with practice over time. Overall, having a creative instinct along with dexterous hands and focused patience provides a good foundation for learning pottery.
Equipment/Tools Required
Getting started in pottery requires some basic equipment and tools. The main pieces of equipment needed are a pottery wheel and a kiln. Here is an overview of the essential pottery equipment for beginners:
- Pottery Wheel – A pottery wheel allows you to throw and shape clay into various forms like bowls, vases, cups, and more. Pottery wheels come in electric or kick wheel models. Electric wheels are easier to use for beginners.
- Kiln – A kiln is needed to fire clay and ceramic pieces to permanently harden them. Kilns come in various sizes and as electric or gas models. Small tabletop kilns are suitable for home pottery beginners.
- Clay – Pottery clay is the medium used to shape pieces on the wheel. There are many types of firing clay you can choose from as a beginner. Low-fire clay works with home kilns.
- Sculpting Tools – Basic hand sculpting tools help form, carve, cut, and join clay. Metal loop tools, ribs, wire tools, wooden modeling tools, and clay cutting wire are commonly used.
- Glazes – Ceramic glazes are applied to bisque ware pieces before firing to add color, shine, and design. There are many beginner-friendly glazes to consider starting out.
You’ll also need basic studio supplies like a worktable, clay recycling system, bats, sponges, buckets, aprons, etc. Consider starting with affordable and smaller versions of equipment as a beginner. https://enviroklenz.com/what-do-i-need-for-a-pottery-studio-at-home/
Space Considerations
Pottery requires adequate working space for the wheel and storage. For wheel throwing, you’ll need enough room for the wheel itself, which is typically 20-30 inches wide, as well as workspace on either side to trim pots and a table for tools. Allow about 6 feet of clearance in front of the wheel so you can walk around it and assess your work from all sides. Underneath or next to the worktable, you’ll need storage for clay and tools. Shelving around the rest of the studio provides room for holding work in progress as it dries. The typical beginner studio requires at least 200 square feet of space (https://skutt.com/how-to-set-up-a-home-pottery-studio/).
Proper ventilation is crucial when operating a kiln, which can reach over 2300°F. Kilns should have 18 inches clearance on all sides from walls and combustibles. Install kilns in a well-ventilated area or dedicate a shed/outbuilding if firing indoors. Ventilation removes fumes from firing and provides airflow for cooling (https://www.homesteadpottery.com/articles-homestead-pottery/setting-up-a-pottery-studio/). Consider fans or HVAC adjustments to prevent overheating while firing.
Startup Costs
Getting started in pottery does require some initial investments. The three main costs are a pottery wheel, a kiln, and basic tools. Pottery wheels for beginners range from $300-$1000 (https://potterycrafters.com/is-pottery-an-expensive-hobby/). New electric kilns can cost between $500-$6500 depending on the size and features (https://wheelandclay.com/blog/costs-to-start-pottery/). Basic tools like trimming tools, cutting wires, ribs, and sponges will likely cost $50-$150 to start out.
There are also ongoing costs for supplies like clay, glazes, brushes, and accessories. These costs will depend on how frequently you make pieces, but expect to budget at least $50/month for clay and glaze supplies as a hobbyist. Some potters estimate spending $100-$300 per month on these consumable supplies as they advance their skills and produce more pieces.
Time Commitment
Taking up pottery requires a significant time commitment, especially when first starting out and developing your skills. It takes regular practice to build hand-eye coordination and muscle memory on the pottery wheel, as well as learning techniques for handbuilding and sculpting clay. Be prepared to spend hours in the studio perfecting your throwing technique.
There are also natural dry times built into the pottery process that add time between the creative steps. After shaping wet clay, it takes at least a few days for pieces to dry before they can be fired in a kiln. Bisque firing may take 6-12 hours or longer depending on the kiln size and number of pieces. After applying glazes, there is another 12-24 hour drying period before the glaze firing, which takes a similar length of time as the bisque firing. Transport time to and from the studio should also be factored in.
According to one source, it can easily take three and a half weeks minimum for a lump of clay to go from wet to finished pot (https://www.thesprucecrafts.com/how-long-does-pottery-take-3976331). For beginners, creating a simple pot on the wheel may take over an hour. With practice and efficiency, experienced potters may be able to throw several pots within an hour session.
Overall, be prepared to dedicate 10-20 hours per week on average when starting out in pottery. As your skills progress, you may be able to work more efficiently. But the drying, firing, and glazing processes inherently require patience and time commitment.
Developing Technique
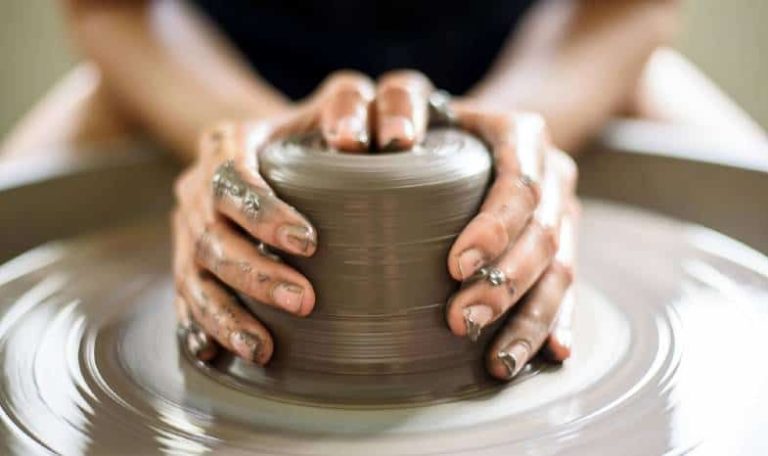
It’s important for beginners to focus on learning the fundamental techniques first when starting pottery. Three key techniques to master are centering, lifting, and trimming. Centering involves shaping a lump of clay into a symmetrical form by applying pressure while spinning on the pottery wheel. Lifting refers to using your hands, fingers, and tools to shape and raise the walls of the centered clay. Trimming involves using a metal trimming tool to refine the shape, size, and surface of pottery after it has been fired in a kiln. Taking the time to properly learn these basic techniques will provide a strong foundation for throwing more advanced pieces down the road.
Jumping into complex pottery projects right away can lead to frustration, so beginners should focus on simple forms like mugs, bowls, and vases. As technique improves over time with consistent practice, more intricate pieces can be attempted. But having patience and allowing skills to develop slowly is key. Mastering the fundamentals first will lead to better results and satisfaction in pottery-making.
Risks and Safety
Working with clay and ceramics does come with some safety risks that you should be aware of. Proper precautions need to be taken to avoid injury when working with clay, tools, kilns, and glazes.
It’s important to avoid overworking clay to prevent hand, wrist, or elbow injuries. Take regular breaks when wedging or throwing clay. Also be careful not to drop heavy bags of clay mix as this can lead to back strain or injury (Source).
Firing clay in a kiln can also pose risks if not done properly. Make sure to follow all manufacturer instructions for operating kilns and never leave a kiln unattended when firing. Locate kilns in a safe, open area if possible. Wear heat-resistant gloves when removing items from a hot kiln (Source).
Proper ventilation is also key when working with glazes, clays, and other ceramic materials to reduce dust inhalation. Wear a face mask or respirator when mixing dry materials. Clean tools and surfaces regularly to minimize exposure to clay dust or silica.
Overall, ceramics is very safe when basic studio safety practices are followed. Take steps to protect yourself and you can enjoy the art of pottery for years to come.
Finding Classes/Communities
One of the best ways to learn pottery as a beginner is by taking classes and connecting with pottery communities. This allows you to get hands-on instruction and feedback as you develop your skills. There are a few options for finding pottery classes and communities:
Local workshops or studio classes are a great option to learn in-person from experienced pottery instructors. Many local community colleges, art centers, and private pottery studios offer beginner group classes. This allows you to work alongside other students and have an instructor provide direct guidance as you learn techniques like centering clay, throwing pots on the wheel, handbuilding, glazing, and firing kilns. Classes range from single workshops to multi-week courses. Check listings in your area to find beginner-friendly pottery classes.
Online tutorials and pottery groups can also be valuable resources. YouTube channels like Beginner Pottery Lessons provide free video lessons explaining pottery fundamentals step-by-step. Active online pottery communities like r/Pottery on Reddit allow you to connect with other potters to ask questions, get feedback, and share your work. While not a substitute for in-person instruction, these online resources let you learn at your own pace and gain knowledge from potters around the world.
Conclusion
Getting started with pottery is very accessible for beginners with some determination and creativity. The basic skills needed include an artistic eye, manual dexterity, and patience. While specialized equipment like a pottery wheel and kiln are recommended for advanced practice, beginners can start with basic and inexpensive handbuilding tools. With practice over time, novice potters can steadily develop their technique and skills. Pottery engages both sides of the brain and provides a relaxing, rewarding creative outlet. To begin your own pottery journey, look for local classes where you can learn hands-on from experienced teachers. Connect with pottery communities online and in person to find inspiration, learn techniques, and share your creations. With some dedication and persistence, the possibilities are endless when it comes to making beautiful, functional ceramic art. Pottery is an enjoyable craft that provides a lifetime of learning and growth.


