How Is Clay Ceramics Made?
Clay ceramics refers to objects made from clay that has been shaped while soft and then hardened through heating in a kiln. Clay ceramics encompasses pottery, tableware, sculpture, and other decorative or functional items formed from clay-based materials. The process of creating clay ceramics involves several key steps: preparing and refining the clay, forming the desired shapes, drying the objects, firing them at high temperatures to harden, and often applying decorative glazes and finishing touches.
Shaping and firing clay into pottery and other objects is one of humankind’s oldest technologies, dating back over 25,000 years. Clay is abundant worldwide, versatile, and relatively easy to work with, making it an ideal material across countless cultures. Ceramics were central to many early civilizations and continue to be important today for both artistic and practical purposes. While methods and styles have evolved, the essence of transforming malleable clay into functional and beautiful art remains unchanged.
Modern ceramic artists, potters, and industrial manufacturers follow a similar process to ancient potters. Understanding the fundamental steps involved provides insight into an ancient craft that continues to fill an important niche in today’s world.
Types of Clay
There are three main types of clay used in ceramic production: earthenware, stoneware, and porcelain. Each type has different properties that make them suitable for various applications.
Earthenware is a porous, permeable clay that fires at lower temperatures, typically between 1500-2200°F. It comes in a variety of colors like red, brown, and terra cotta. Earthenware clays contain iron and other mineral impurities that enable low firing temperatures. However, they make the clay more fragile and absorbent unless glazed. Earthenware has been used for pottery and ceramics worldwide for thousands of years.
Stoneware is a dense, nonporous clay that becomes vitrified and watertight at higher firing temperatures around 2200-2400°F. The compact structure makes stoneware stronger and more durable than earthenware. It also has excellent thermal properties and resists thermal shock. Many stoneware clays contain volcanic ash or fireclay and come in gray, buff, and red colors. When fired, the clay can take on different hues depending on the temperature and atmosphere inside the kiln. Stoneware is commonly used for pottery, tiles, and decorative pieces.
Porcelain is the purest white firing clay made from the finest particle kaolin clay. It fires at very high temperatures up to 2640°F. Porcelain has very low porosity and permeability, making it strong, dense, and smooth in texture. It has excellent white color consistency and translucency when fired thin. The high glass content in porcelain allows forming sharp details and thin walls. Porcelain is commonly used for tableware, sculpture, electrical insulators, dental implants, and other technical ceramics.
Preparing the Clay
Once an appropriate clay is chosen for a project, the clay must be prepared before it can be shaped and sculpted. One of the most important steps is wedging the clay. Wedging involves repeatedly cutting the clay in half and slamming the two halves back together. This kneads the clay and ensures any air bubbles are removed. It also evenly distributes moisture and results in a uniform clay consistency.
Wedging is done on a wedging table or plaster slab. Start by cutting the clay in half, then slam the two sections together. Repeat this process of cutting and slamming about 10-20 times. Rotate the clay 90 degrees and repeat. Continue rotating and wedging until the clay has a smooth, elastic consistency free of cracks and air pockets. Test the clay’s readiness by slicing into it with a wire tool – it should have an even color throughout with no visible bubbles or dry spots.
Another preparation technique is throwing the clay. For this method, the clay is slammed or dropped repeatedly against a hard surface. The impact knocks out air bubbles and binds the clay particles together. Combining wedging and throwing yields clay that is perfectly plasticized and ready for the next stages of the ceramic process.
Shaping Methods
There are several techniques used to shape clay into ceramic art and functional pottery. The main methods are handbuilding and wheel throwing.
Handbuilding involves shaping clay by hand without the use of a pottery wheel. Some common handbuilding techniques include:
- Coil building – Rolling out and stacking long coils of clay on top of each other to build up vessel walls.
- Slab building – Rolling out flat slabs of clay and joining them together to form shapes.
- Pinch pots – Using fingers to pinch and shape solid balls of clay into pots or bowls.
Wheel throwing involves shaping clay on a rotating pottery wheel. The centrifugal force of the spinning wheel allows the clay to be pulled up into vertical forms. Wheel throwing takes practice to master but allows for uniform walled pottery.
Molds can also be used to form clay. A mold is made of plaster, wood, or flexible material that clay is pressed into to take on a specific shape. Molds allow for consistent reproduction of forms.
Ceramic artists may use a combination of handbuilding, wheel throwing, and molds to create their clay works.
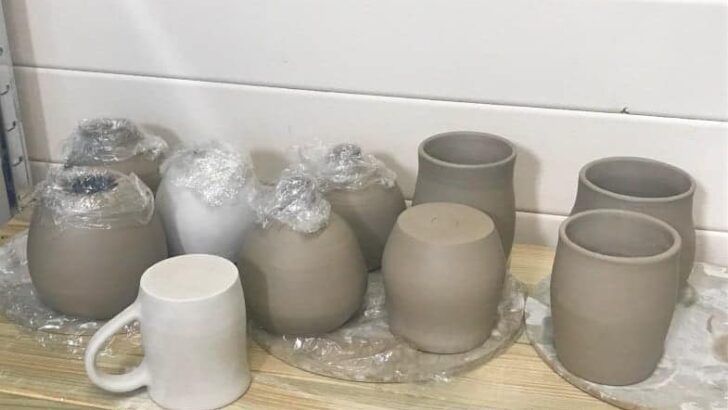
Drying the Clay
After the clay has been shaped into the desired form, it needs to be dried slowly and carefully before firing. Drying is one of the most delicate stages in ceramic production. If the clay dries too quickly, it can crack, warp, or even explode from internal stresses. To properly dry the clay:
– Allow clay sculptures and vessels to air dry naturally. Don’t use direct heat sources like blowdryers or ovens which speed up drying. The slower the clay dries, the less chance of cracks developing.
– Place pieces in a cool, ventilated space out of direct sunlight. Sunlight and heat make clay dry too rapidly.
– Set pieces on wire racks so air can circulate underneath. This allows moisture to evaporate evenly.
– Be patient. Thick pieces may take weeks to air dry fully. Rushing this stage risks cracks and defects.
– Use a dehumidifier to control humidity and pull moisture from the air. The ideal drying conditions are 50–70°F with 50–70% relative humidity.
– Rotate pieces periodically so no one section dries faster than other areas. Even drying is critical.
– Drape damp towels over drying pieces to slow moisture loss. Uncover sections slowly as they dry.
– Place a plastic bag over pieces if they are drying too fast. This retains moisture and slows the drying process.
With proper patience and environment control during the drying stage, ceramic pieces will be ready for bisque firing free of cracks and warping.
Bisque Firing
After the clay has been shaped and thoroughly dried, the next step is the bisque firing. This is the first firing process, which heats the clay pieces to a high temperature in order to harden and stabilize the physical form before applying glazes. The bisque firing typically occurs around 1000°C or 1832°F. Firing at this hot temperature sinters the clay particles together, causing the clay to become much harder and less porous. This transforms the fragile dried clay into a strong, durable ceramic material ready for glazing and decorating.
During bisque firing, chemical water and other mineral compounds are burned out of the clay. This prevents defects from forming later during glaze firing. In addition, bisque firing reduces the risk of breakage, warping, or cracking when applying glazes and during subsequent firings. Bisque ware has an absorbent, matte surface ideal for accepting glazes. Overall, bisque firing is a critical intermediary step that hardens the clay and prepares it for glazing and further embellishment before the final firing.
Applying Glazes
Glazes are an essential part of finishing ceramic pieces. They serve both decorative and functional purposes by adding color, shine, texture, and making the clay non-porous. Glazes are made from a mixture of minerals, clay, and other additives suspended in water. The main ingredients are silica, alumina, flux, and colorants.
Silica, in the form of finely ground quartz or flint, provides the glassy quality of the glaze. Alumina, from clay, stabilizes the glaze and prevents crazing. Flux lowers the melting point of the glaze so it can fuse to the clay body at typical kiln temperatures. Common fluxes are feldspar, borax, and calcium carbonate. Colorants like metal oxides add vibrant colors to the glaze. Other additives can opacify, strengthen, or alter the glaze’s properties.
There are several techniques for applying glaze to bisqueware clay:
– Dipping – The piece is fully submerged in a bucket or vat of glaze.
– Pouring – Glaze is poured directly onto the piece to fully coat it.
– Spraying – Glaze is sprayed on using a pressurized spray gun or aerosol can.
– Brushing – A brush is used to manually coat the piece with glaze.
The coating of glaze should be even, avoiding drips or thick patches. Pieces can be glaze fired after drying to fuse the glaze to the clay.
Glaze Firing
The second firing, known as the glaze firing, is done at a much higher temperature, usually around 1200°C. The purpose of this firing is to melt the glazes and bond them to the clay body to create the glassy coating.
During glaze firing, the kiln is heated up slowly, around 100°C per hour. The slow heating allows gases to escape from the clay and glaze gradually to avoid bubbling. Once the kiln reaches about 1000°C, the glazes will start to melt, bonding with the clay body beneath. The firing typically peaks at around 1200°C and is held there for a period of time, ranging from a few minutes to a few hours depending on the size and type of ware.
The high temperatures densify the glaze into a smooth, glassy coating. Different glazes melt and flow at different rates based on their chemical composition, resulting in a variety of visual effects. The glazes may bubble, wrinkle, crawl, or develop interesting crystals. The final appearance largely depends on the clay body, glaze recipe, and firing schedule.
After reaching the peak temperature, the kiln is slowly cooled to avoid thermal shock. Once it has cooled enough, around 100°C, the finished ceramic pieces can be removed.
Finishing
After firing, the finishing process begins to complete the ceramic piece. Some key aspects of finishing include:
Polishing
Polishing helps smooth any rough edges or imperfections. This can be done by hand with a cloth or sandpaper. Power tools like polishing wheels or tumblers may also be used to buff the surface and create a uniform sheen.
Decorating
Additional decorative touches can be added after firing as well. Ceramic paints and glazes work on already-fired pieces. Items like beads, sequins, or other materials may also be glued on. Relief carving and engraving can add texture and design elements.
Sealing
To protect the surface and enhance durability, a ceramic sealer may be applied as a final step. The sealer seals pores and prevents damage from moisture and general wear and tear.
Proper finishing transforms the raw ceramic into a complete work of art ready for display and use.
Notable Ceramic Artists
Ceramics have been used throughout history for both functional pottery and artistic expression. Some of the most well-known ceramic artists who have influenced and advanced the art form include:
Historical
Bernard Palissy (1510-1590) was a French potter who became famous for his vividly colored enameled earthenware. He is known for his lifelike figurative pieces and realistic depictions of animals, insects, and botanicals.
Josiah Wedgwood (1730–1795) was an English potter who industrialized ceramic manufacturing and modernized the craft. He perfected techniques like stoneware and jasperware, and his neoclassical designs were widely copied.
Shoji Hamada (1894-1978) was a Japanese potter who combined functional pottery with a simple, rustic aesthetic inspired by folk crafts. He helped establish the mingei (“folk art”) movement in Japan.
Modern
Peter Voulkos (1924-2002) was an American artist who pushed the boundaries of ceramic art, rejecting fonctionalism and pioneering abstract expressionist sculpture.
Ruth Duckworth (1919-2009) was a German-American sculptor known for her innovative modernist ceramic works exploring themes of fertility and the feminine presence.
Arlene Shechet (born 1951) is an American ceramic artist acclaimed for her complex, dynamic sculptural forms drawing on historical porcelain. She often incorporates other materials like wood, metal, and plaster.