How Long To Leave Clay On A Hump Mold?
What is a Hump Mold?
A hump mold, also known as a slump mold, is a type of mold used in pottery and ceramics to shape clay pieces. It consists of a plaster or bisqueware base with a concave depression. The mold gets its name from the curved “hump” shape of the base.
To use a hump mold, a ball of clay is centered and flattened on a pottery wheel. The clay is then lifted and draped over the mold, allowing gravity to pull the soft clay down into the mold’s cavity. The contours and shape of the mold are thus imprinted into the clay.
Hump molds allow potters to create uniform pieces with flowing, organic shapes. They are especially useful for making bowl and platter forms. The concave depression results in bowls with soft, rounded curves rather than hard angles.
Compared to other mold types, hump molds have some advantages:
- Allow flexible shaping of clay, unlike rigid molds
- Easy to use on the pottery wheel unlike slip casting molds
- Create smooth, symmetrical, uniform pieces
- Softer molded contours compared to drape molds
Potential disadvantages include:
- Limited range of shapes compared to custom molds
- Plaster can absorb moisture from clay
- Not good for complex shapes with high level of detail
Preparing the Clay
Before placing clay on a hump mold, it’s crucial to properly prepare the clay through wedging and conditioning to achieve optimal results. Wedging involves cutting, squeezing, and reforming the clay repeatedly to remove air bubbles and evenly distribute moisture. This helps produce a smooth, lump-free clay that withstands the forces of throwing without cracking or breaking apart.
Start wedging by cutting the clay into several pieces, then reforming them together using the palms of your hands. Apply even, firm pressure as you compress and push the clay in a circular motion. Fold or cut and stack the clay, then repeat the kneading process until the clay feels uniform in moisture and plasticity. Avoid over-wedging, which can make the clay too stiff. The clay should feel smooth, flexible, and ready for centering once wedging is complete.
Conditioning clay involves letting it rest inside plastic wraps or bags to equalize moisture after wedging. Allow at least 24 hours for conditioning to improve the clay’s workability before using a hump mold. Well-wedged, conditioned clay will center smoothly on the mold and achieve clean lifts as you shape your pottery piece.
Centering the Clay
Properly centering the clay on a hump mold is a crucial step for ensuring even thickness and avoiding flaws in the final piece. Here are some techniques for centering clay on a hump mold:
Applying Even Pressure: When initially placing the clay on the mold, use your hands to gently press it down with even pressure across the surface. Avoid pushing too hard in any one area, which can cause uneven spots. Spread your fingers wide and use your palms to gently flatten the clay.
Rocking: Once the clay is in place, rock the mold forward and back while keeping your hands pressed lightly on the clay. This allows the clay to naturally center itself and form to the contours of the mold surface. Rock gently and avoid any harsh motions that could deform the clay.
Using a Rib: Use a rounded rib tool to gently coax the clay outward from the center. Apply even pressure with the rib while slowly working from the middle outward. The rib helps spread the clay smoothly without stretching or tearing it.
Checking Thickness: Periodically check the thickness by gently pressing a finger on the edges and corners. Adjust any thicker areas by gently pressing clay from that spot toward thinner regions. Work slowly and make minor adjustments for an even thickness.
Take your time when centering the clay. Rushing can cause flaws and uneven spots. Patience and gently technique leads to properly centered clay ready for shaping.
Shaping the Clay
Once the clay has been centered on the hump mold, it’s time to begin shaping it into the desired form. Start by pulling up the walls to the intended height, using your hands and fingers to gently stretch the clay upwards. Be careful not to make the walls too thin or they may collapse. Aim for roughly 1⁄4 to 1⁄2 inch thickness on average.
Next, begin shaping the overall form using various rib tools. Rib tools allow you to compress and smooth the clay walls from both the inside and outside to refine the shape. Use a rounded rib on the inside to define curves and smooth seams. A serrated rib on the outside can shape details like lines and edges. Take your time using various sizes of ribs all over the piece to form the desired contours.
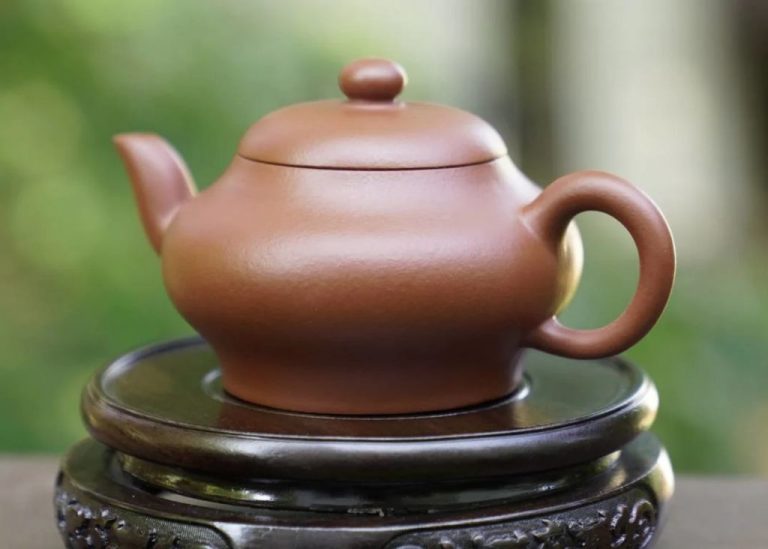
As you work, regularly check proportions and symmetry by observing the piece from all sides. With focused rib work and patience, you can shape the centered clay into elegant forms from vases to teapots and more. Allow the clay’s plasticity to guide you – avoid overworking any one area, and let the shaping progress gradually.
Drying Time
The length of drying time depends on several factors, primarily the thickness and type of clay used. For thicker clay walls and forms, drying time can range from a few hours to overnight. For thinner pieces, drying time may only be 30-60 minutes.
Here are some guidelines for drying time before removing clay from a hump mold:
- Thin clay pieces, walls under 1/4 inch – 30-60 minutes
- Thicker clay walls, 1/4 to 1/2 inch – 60-90 minutes
- Sculptural forms, 1/2 to 1 inch thick – 2-4 hours
- Very thick clay forms, over 1 inch – 4-8 hours or overnight
The type of clay also affects drying time. Porcelain clay tends to dry faster, while stoneware clay dries more slowly. Letting clay dry too long runs the risk of it cracking while removing it from the mold.
To test if the clay is ready, you can touch the surface. If it feels cool and leather hard, it should be ready to remove. If it still feels wet or cold, give it more time. Gently flexing the edges can also test if it releases cleanly from the mold.
Temperature, humidity, air circulation, thickness variations, and clay type all play a role in drying time. Get to know how your particular clay dries under your studio conditions. When in doubt, allow extra drying time to be safe.
Removing from the Mold
When working with hump molds, it’s crucial to know the right techniques for safely removing your clay pieces without deformation. Here are some tips for proper removal:
First, make sure your clay has dried adequately on the mold before attempting to remove it. Insufficient drying can cause the piece to slump or warp. Clay should have a leather-hard consistency, where it is dry to the touch but still slightly cool and moist inside. This stage is usually reached after 12-24 hours of drying time.
Next, carefully begin releasing the edges of the clay from the mold surface. Use a metal ribbon tool to slowly lift and detach the clay from the mold, working your way around the entire piece. Take care not to drag or scrape the clay, as this can cause tearing or scratches.
Once the edges are freed, place one hand underneath the piece to support it as you gently turn the mold over. Continually support the clay with both hands as you lower the mold off of it. Move slowly and cautiously to prevent cracking or breaking off any fine details.
For pieces with undercuts or intricate sculpting, you may need to press the clay gently away from the mold rather than peel it directly up and off. Compressed air can also help fully release pieces from detailed molds.
Set the freed clay piece on a flat surface to fully dry and harden before bisque firing. Inspect for any small bits of clay that may have stuck to the mold and gently clean the mold surface after each use.
Troubleshooting Issues
When working with hump molds, you may encounter some common issues that can be easily fixed with a few simple tricks.
Stuck or Affixed Clay
If your clay is sticking to the mold and not releasing properly, there are a couple things you can try:
- Make sure the mold surface is completely clean and free of debris before applying the clay.
- Apply a very thin layer of clay slip or cooking spray to the mold as a release agent.
- Allow the clay to dry further before attempting to remove it.
- Gently wiggle and rock the clay to break the suction seal.
- Slide a thin wire tool between the clay and mold to sever any stuck points.
Collapsing Walls
If your clay piece is slumping or losing its shape:
- The clay may have insufficient structure – reinforce it by adding thicker walls or soft armature inside.
- The piece was removed before fully hardened – allow more drying time.
- There may be too much moisture left in the clay – allow longer drying or introduce heat.
- The clay may have reached its dry limit – consider a stronger clay body or solid armature.
Tips and Tricks
Using a hump mold well takes some practice, but following these pro tips can help you get clean results right away:
-
Always center your clay extremely well before shaping it in the mold. Any lopsidedness will be exaggerated in the final piece.
-
Avoid overworking the clay when shaping it, as this can cause cracking or tearing when removing it from the mold.
-
Lightly dust the mold with talc powder before each use to prevent sticking.
-
Start with thicker clay and give it extra time to stiffen up before removing it.
-
Loosen the edges gently with a ribbon tool when taking the clay off the mold.
-
Let the molded piece sit and firm up for a few hours before handling to prevent deforming it.
-
Keep the mold surface clean and free of residue to get smooth results every time.
Following basic best practices like these will help you master hump molding and achieve expert-level results.
Caring for the Mold
Molds play an important role in creating precisely shaped pottery pieces, so it’s crucial to properly care for and maintain molds. With regular cleaning, careful storage, and occasional maintenance checks, your hump mold can serve you for many years of pottery making.
Cleaning the Mold
After each use of your hump mold, be sure to thoroughly clean it. Remove any dried clay or residue from the mold’s surface using your fingers, a dull knife, or stiff brush. Avoid metal tools to scrape the mold, as they could scratch and damage the mold’s finish. To remove stubborn clay remnants, soak the mold in warm, soapy water for 10-15 minutes. Rinse and dry the mold completely before storing.
Storing the Mold
Store hump molds in a cool, dry place away from moisture and direct sunlight, which could cause warping. Lay the mold on a flat surface or upright on edge. Avoid stacking molds directly on top of each other, which may lead to chips and cracks over time. If possible, keep the mold wrapped in plastic when not in use to prevent dust buildup.
Maintenance Checks
Periodically inspect your hump mold for signs of wear and tear. Check for any cracks, fading, rough patches, or lost mold details. If the mold becomes damaged or deformed, it may need to be resurfaced or reworked by a mold professional. With routine cleaning and gentle handling, a quality hump mold should provide many years of throwing beautiful pottery.
Alternative Mold Types
Hump molds are a popular choice for sculpting pottery, but they aren’t the only option. Here’s an overview of some alternative mold types and how they compare to hump molds:
Slab Rolls
Slab rolls compress clay into a flat slab that can then be cut into desired shapes. Pros: Easy to achieve consistent thickness and flatten clay quickly. Cons: Limited in the forms you can create compared to a hump mold.
Plaster Bats
Plaster bats provide a flat working surface, similar to a canvas for painting. Pros: Allows free sculpting of clay. Cons: No outer structure to support vertical forms.
Solid Sculpting Forms
Pre-shaped plaster forms mold the clay into a specific form. Pros: Guarantees perfectly uniform pieces. Cons: Very limited in terms of creativity and custom shapes.
Overall, hump molds strike a nice balance between consistency and creative freedom. They provide support to shape vertical forms, while still allowing flexibility in sculpting custom asymmetrical or organic shapes.