How To Make A Cool Hand Turkey?
A hand turkey is a popular Thanksgiving craft where children trace their hand on paper and turn it into the shape of a turkey. This fun craft activity has become a beloved tradition for many families and classrooms around Thanksgiving time. Though the exact origins are unknown, hand turkey crafts are thought to have emerged as an art activity for children in North America sometime in the mid-1900s.
Hand turkeys likely developed from the broader tradition of using stencils and outlines of hands to create art, which dates back centuries to ancient cave paintings. In modern times, hand outlines and colorful handprints are an engaging way for young kids to express creativity. When combined with the theme of Thanksgiving, tracing around a child’s hand can cleverly result in the shape of a turkey through the simple addition of decorated “feathers” made by each finger.
Hand turkeys have been featured in Google Doodles and become popular classroom crafts around Thanksgiving season as a way to celebrate, decorating bulletin boards and walls with students’ turkey masterpieces.
Gather Materials
To make a hand turkey craft, you’ll need a few basic supplies:
- Construction paper in various colors like brown, yellow, orange, red – this will be used for the turkey’s body and feathers. Look for 12×18 inch sheets for full handprints. [Source: https://www.amazon.com/Handprint-Turkey-Thanksgiving-School-Activity/dp/B005DS7BY2]
- Googly eyes to add personality and fun to your turkey. Make sure they are big enough to stick onto the handprint. [Source: https://www.amazon.com/Handprint-Turkey-Thanksgiving-School-Activity/dp/B005DS7BY2]
- Glue like Elmer’s Glue or a glue stick to attach the feathers and eyes.
- Scissors for cutting out the handprint shape and feathers.
- Markers, crayons or colored pencils for adding details like feet, beak, and wattle.
Gather these supplies before starting the hand turkey craft. Having everything ready will make the process smoother.
Trace Your Child’s Hand
Have your child spread out their fingers and lay their hand flat on a large piece of paper or poster board. You want their fingers spread wide to make a good looking turkey hand. Place a blank piece of paper under their hand so the writing instrument doesn’t mark up the table.
Starting on one side of the wrist, trace your child’s hand using a black crayon or pencil until you reach the other side of the wrist. Make sure to trace the outline of each finger. Apply enough pressure so the outline shows up clearly, but not too hard.
Have your child lift their hand up to reveal the tracing. Their handprint outline will become the turkey’s body.
Source: https://www.instructables.com/Make-a-Hand-Turkey/
Cut Out the Handprint
Once you have traced your child’s hand on paper, the next step is to carefully cut out the handprint. Use scissors to follow along the traced lines and cut out the hand shape. Be sure to cut just inside the lines so the entire handprint is intact. Go slowly and watch your fingers to avoid accidentally cutting the handprint. For younger children, have an adult handle the scissors to cut out the handprint.
Some tips for neatly cutting out the handprint:
- Use sharp scissors for clean cuts
- Go slowly and focus on accuracy
- Cut just inside the traced lines
- An adult should handle scissors for young children
- Watch fingers near the blades
Once the handprint is cut out cleanly, it’s ready to be transformed into a turkey for Thanksgiving decorations or cards. The cut out handprint will serve as the turkey’s body. Next we’ll add fun creative details like feathers, eyes, and feet to give it personality.
Add Features
To add character to your hand turkey, you can glue googly eyes onto the palm to make the eyes. Use hot glue and carefully attach a pair of googly eyes where you want the turkey’s eyes to be. Make sure to let the glue dry fully before moving on. You can have some fun with the eyes by using different sizes or colors for a silly look.
After adding the googly eyes, use markers to draw a beak and wattle onto your turkey hand. You can outline the thumb area and color it in yellow and orange to make a cartoon beak. Then add a wattle by drawing a curved red line under the beak area. Get creative with the beak shape and wattle size! Encourage kids to give their turkey hand a unique personality through the features they add.
Create the Feathers
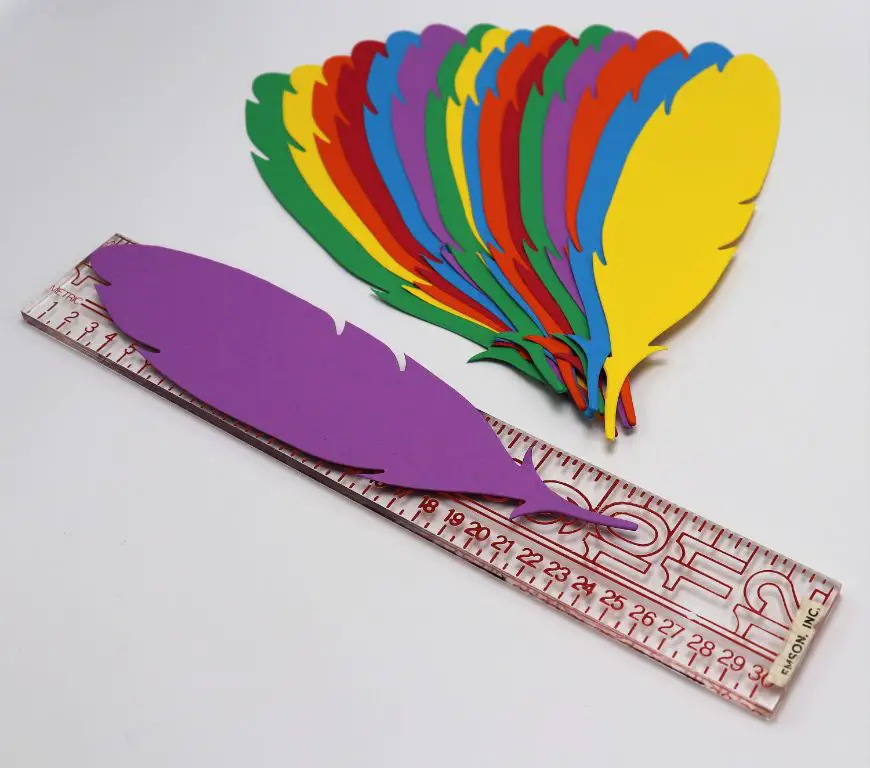
Once you have the handprint cut out, it’s time to make the feathers to attach to the fingers. For this part, you’ll need construction paper in fall colors like red, orange, yellow, brown, etc. Cut out feather shapes from the construction paper in a variety of sizes and colors – both small and large feathers work well.
Feel free to get creative with the feather shapes. You can cut traditional feather shapes, or get funky and cut circles, zig zags, triangles or any fun shape you can imagine. The feathers don’t have to perfectly resemble real feathers. Let kids take the lead on cutting out creative feathers.
“Having feathers in lots of colors and shapes makes the hand turkey even more fun,” says crafting expert Katie Smith. “Don’t be afraid to mix and match feather sizes and shapes for a turkey with real personality.” (Source)
Attach the Feathers
One of the most fun parts of making a hand turkey is attaching the feathers. The feathers really bring the turkey to life! To attach the feathers:
Gather your colored construction paper feathers. You’ll want to have a variety of colors and sizes. Lay them out so they are ready to be attached.
Apply a glue stick or other adhesive to the back of each feather. Then, starting with the thumb, glue the feathers onto the fingers of the handprint, spreading them out. Make sure to glue the feathers onto both sides of each finger.
Try alternating colors and sizes as you go. Layer the feathers slightly as you move out along each finger to create a full feathery effect. Let the glue dry completely before moving onto the next steps.
Refer to this helpful video tutorial from YouTube on attaching the feathers: How to Attach Feathers to a Hand Turkey
Add Details
Adding details like gluing on feet and drawing with markers helps bring your hand turkey to life. Use cardboard, construction paper, or felt to cut out and glue on feet to make your turkey stand up. Get creative and add feet made to look like brown boots or black sneakers. Use permanent markers to add details like eyes, a beak, wattle, and colors for the feathers (source). Consider using glitter glue or puffy paint to add fun textures and sparkle. The opportunities for embellishing are endless, so encourage kids to be inventive with colors, patterns, accessories, and textures to make their turkey unique.
Display the Hand Turkey
Once your hand turkey is complete, it’s time to proudly display it! Here are some ideas for showing off your child’s adorable handmade turkey:
Hang it up on the wall or fridge – This is the easiest way to display your hand turkey. Use magnets to stick it on the fridge so it’s nicely showcased for Thanksgiving dinner. Or use strong tape to adhere it to a wall, door, or other surface. Place it somewhere that’s visible so everyone can admire your child’s handiwork.
Create a Turkey Placemat – Glue the hand turkey onto a colorful piece of construction paper or cardstock to create a personalized Thanksgiving placemat. Let your child decorate around their turkey with crayons, markers, stickers, glitter glue, or other craft supplies. Laminate the placemat if desired for extra durability.
Make a Centerpiece – Glue or tape hand turkeys made by each family member onto a fall-colored wreath base. Display it on your Thanksgiving table as a showstopping centerpiece! Or put them in a vase with faux leaves or flowers for another creative table decoration.
Use as Thanksgiving Cards – Mount your child’s hand turkey onto cardstock or construction paper to make adorable homemade Thanksgiving cards. Write a message inside and send to friends and family to spread Thanksgiving cheer!
Let the hand turkey’s silly personality shine through in how you showcase it. Get creative with fun backdrops and accessories. Displaying your child’s handmade creation will let them feel proud and add a personal touch to your Thanksgiving decor.
Encourage Creativity
Letting kids express their creativity is one of the best parts of making hand turkeys. Encourage them to get imaginative with colors, textures, and features. Instead of just using construction paper, try using different materials like fabric, aluminum foil, felt, or tissue paper for the feathers and wings. Get creative with the eyes too – googly eyes, pom poms, and stickers can make silly and fun facial features. Add in some glitter, sequins, and pipe cleaners to give your turkey even more personality. Let kids customize their turkeys using their favorite colors, patterns, and decorations. The sillier and more creative the better! See more hand turkey craft ideas on The Finest Best Hand Turkeys on the Interwebs.

