How To Make Vinayagar In Clay Step By Step?
Vinayagar, also known as Ganesha, is one of the most beloved Hindu deities. He is worshipped as the remover of obstacles and the patron of arts and sciences.
Clay vinayagar idols are very popular, especially during Vinayagar Chaturthi festival. Making vinayagar idols at home is a fun creative process that allows you to show devotion and connect with the deity.
This article will provide a step-by-step guide to making your own clay vinayagar. We’ll go over gathering materials, preparing the clay, sculpting the head and body, adding details, drying, baking, painting, and varnishing the idol. By the end, you’ll have your own clay vinayagar that you can use for worship or decorative purposes.
Gathering Materials
There are a few key materials you’ll need to make your Ganesha clay sculpture. The most important is the type of clay you choose to work with.
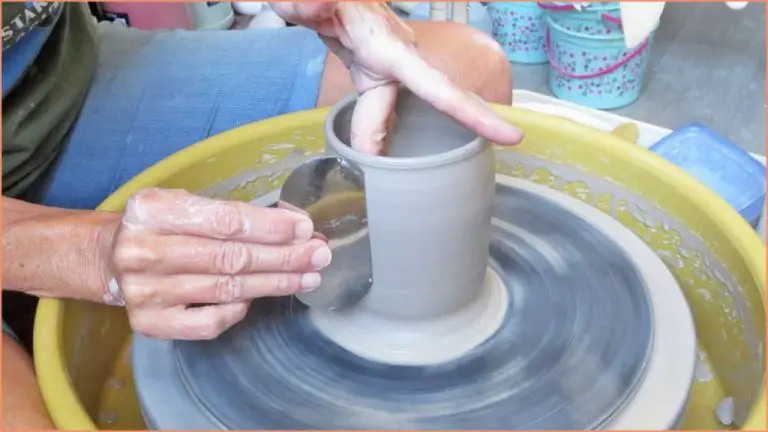
For sculpting an idol like Ganesha, an air-drying clay is best. These clays start out soft and malleable, allowing you to shape them easily. Then they harden naturally as the moisture in the clay evaporates over 1-3 days.
Polymer clay and pottery clay are two good options. Polymer clays like Sculpey are smooth, easy to condition, and available in white which works well for Ganesha. Pottery clays provide more texture and need more preparation, but create a sturdier finished product.
In addition to clay, you’ll need some basic sculpting tools like:
- Clay sculpting knife – for cutting, smoothing, and shaping
- Clay shapers – to refine details
- Rolling pin – to roll out slabs of clay
- Wooden sculpting sticks – for poking holes and textures
You’ll also need acrylic paints for decorating, varnish or glaze to seal the sculpture, and a oven or dehydrator for curing the finished idol if using an air-drying clay.
Preparing the Clay
Before you begin sculpting, it’s important to properly prepare your clay. This involves kneading, wedging, and getting the right moisture content.
Kneading is working and pressing the clay to make it soft and pliable. Do this on a clean, flat surface. Push down on the clay, folding it over itself again and again. Knead it for 5-10 minutes until it is smooth, flexible, and free of air bubbles.
Wedging is a technique to further mix the clay and remove air pockets. Cut the kneaded clay in half. Press one half into a cylinder. Take the other half and press it into a thick pancake. Put the pancake on top of the cylinder and press them together. Then cut the combined clay in half again, rotate it 90 degrees, and repeat the process. Do this several times.
Check the moisture content by squeezing the clay in your hands. It should be pliable but not sticky. If it’s too wet, let it air dry slightly. If it’s too dry, mix in a small amount of water and knead it in thoroughly. The clay should be smooth, elastic, and moldable without cracking. Once your clay is prepared, it will be ready for sculpting your vinayagar idol.
Shaping the Head
The head is the most important part of sculpting a Ganesha idol. Here are some basic guidelines for shaping the head:
Start by rolling a large ball of clay for the head. The size will depend on how big you want the overall idol to be. Smooth the surface of the ball with your fingers.
Use your thumbs to push in eye sockets, shaping them as desired. Wedge small balls of clay and attach them for the eyeballs. Smooth over the edges to blend them into the head.
For the ears, roll two small flattened teardrop shapes and attach them on either side of the head. Use a shaping tool to define the inner folds and curves of the ear.
Roll a tapered cone shape for the trunk and attach it to the center of the face. Use a rounded tool to indent a nostril opening at the end.
The head shape can be rounded, more squarish, or elongated depending on your preference. Use a wooden modeling tool to refine the contours and angles of the face.
Add other details like eyebrows, mouth, and facial expression as desired. Smooth all joints and seams to blend the features into a cohesive head.
Sculpting the Body
The body is where you can get creative in sculpting the posture and details of the idol. Here are some techniques for working with the clay to sculpt the limbs, ornaments, clothing, and overall posture:
Smoothing and Blending Clay
Use your fingers and small clay sculpting tools to gently smooth the clay and blend pieces together. Avoid overworking any one area, as that can deform the shape. The warmth of your hands helps soften and smooth edges.
Sculpting Arms
Roll small sausage shapes for the arms and pinch one end to attach the hands. Use simple shapes for the palms and fingers. Bend the arms into position.
Sculpting Legs
Form the legs from tapered cylinder shapes with rounded feet. Bend into a seated position and use tools to refine details like toes.
Adding Ornaments
Use thin snakes of clay to add details like necklaces, armbands, waistbands and ornaments on the clothing. Flatten and smooth with tools to refine shapes.
Posing
Consider the overall posture and position of the limbs. Sitting with legs crossed or in lotus pose is common. Arms may be outstretched, resting on the knees or held up in symbolic gestures. Adjust as needed.
Adding Details
Once the basic shape and form of the idol is complete, it’s time to add the finer details that will bring it to life. This stage requires more precision and dexterity to sculpt intricate shapes and designs into the clay.
For the face, use a loop clay sculpting tool to define the eyes, nose, mouth and ears. Add expression to the face by indenting slight smiles or frowns around the mouth. Use a clay shaper to refine details around the eyes and bridge of the nose.
For the body, add ornaments, jewelry and clothes by imprinting designs into the clay. A clay stamp can press patterns into a sash or necklace. Use different sized balls of clay to create beaded chains or necklaces around the neck. Add a clay crown or headpiece atop the head.
To sculpt the multiple arms, roll out snake-like coils of clay and attach them to the shoulders, shaping them into elegant curving arms. Use line clay tools to etch fingers into the hands. For intricate details on the hands, use a small paintbrush dipped in slip to paint on finer lines.
For the base, imprint designs that resemble a stone or metal pedestal. Add clay feet in a crossed leg posture. Refine the edges and engravings using a clay scraping tool. Work slowly and let the clay dry slightly before etching in finer details to avoid distortions.
Drying and Baking
Allowing your clay sculpture to dry properly before baking is a crucial step. As the clay dries, moisture evaporates from the surface and the interior. Drying too quickly can cause cracking or warping. Here are some tips for proper drying:
- Let the sculpture air dry for 24-48 hours before baking. Thicker areas may require longer.
- Drying time depends on factors like temperature, humidity, and thickness of the clay.
- Avoid placing the sculpture in direct sunlight or near heating vents to prevent uneven drying.
- Gently turn the sculpture periodically so all sides dry evenly.
Once fully dried, you can bake the clay in a conventional or toaster oven. Follow these guidelines for baking:
- Refer to your clay brand’s instructions for recommended baking temperatures and times.
- Bake at the lowest temperature for the longest time to prevent cracking.
- Common baking temperatures range from 225°F to 275°F for 15 minutes to over an hour.
- Check on the sculpture periodically to prevent over-baking.
- Allow the sculpture to cool completely before handling.
Proper drying and baking will ensure your clay vinayagar idol keeps its shape and structural integrity for years to come.
Painting
After the clay Ganesha idol is completely dried and baked, it’s time to add color with paint. When choosing paints, be sure to select ones specifically designed for use on baked clay, ceramic or porcelain. Standard acrylic craft paints or spray paint may not adhere well or endure on clay surfaces. Look for acrylic paint sold for ceramics or specialized modeling paints made for clay applications.
To apply the paint, you’ll want to work in thin layers and allow each coat to dry fully before adding another. Thicker paint can obscure details in the sculpture or cause drips. If using a brush, choose a soft bristled one and avoid overloading it with paint, gently dabbing and brushing to slowly build color. Sponge tipped applicators can also be used to dab on paint lightly. An alternative technique is to dilute the paint with a bit of water and apply it as a wash, letting the thinned paint seep into the clay. This creates a natural, subtle coloring.
Paint the figure from bottom to top and background colors first, followed by main colors and then final details. Take your time, allowing sufficient drying between coats to achieve the desired color saturation. Once all painting is completed, give the idol 24 hours for the paint to fully cure before applying any protective varnish.
Varnishing
Varnishing your clay sculpture is a very important finishing step. A varnish serves multiple purposes – it protects the sculpture from moisture, helps prevent chipping and cracking, and gives the sculpture’s painted surface a glossy, finished look.
There are several types of varnishes that work well for sealing and protecting clay sculptures:
- Polyurethane. This is a common varnish for clay and one of the most durable options. It dries to a hard, protective coat and has a high-gloss finish.
- Matte varnish. As the name implies, this has a non-glossy, matte finish. It still protects well from moisture and scratches.
- Resin. Epoxy and other resin varnishes are also very tough and durable. Resins give a crystal clear, glass-like coating.
When choosing a varnish, make sure it is specifically formulated for clay, stone, or other porous materials. The varnish will soak into the tiny pores of the clay and properly seal the painted surface. Apply multiple thin coats to build up protection, allowing each coat to dry fully before adding the next.
With a good varnish, your clay sculpture will have a beautiful finish that retains its luster for many years to come.
Displaying the Idol
After putting in all the effort to create a beautiful clay vinayagar idol, you’ll want to display it properly to showcase your hard work. Here are some tips for displaying your clay vinayagar:
Location
Choose a prominent location in your home to display the idol, such as a mantle, shelf, or tabletop. Place it in an area where it will catch people’s eye when they enter the room.
Lighting
Proper lighting can really make the idol pop. Place it near a window or light source to illuminate the sculpture. You can also use spotlights or directional lighting to create dramatic effects.
Elevation
Display the idol on a pedestal or riser to elevate it. This will make it more visible and prominent in the room. The height of the pedestal is a matter of personal preference.
Background
Consider the backdrop for the idol. A plain wall works well, or you may want to place it against a decorative tapestry or drapery. The colors should complement or contrast nicely with the painted idol.
Accessories
You may want to incorporate small decorative items into the display, like flowers, lights, or decorative fabric. Just take care not to clutter the area or detract attention from the idol itself.
With the right location, lighting, and display accents, your homemade clay vinayagar idol will really impress all who see it. Have fun showing off your creation!


