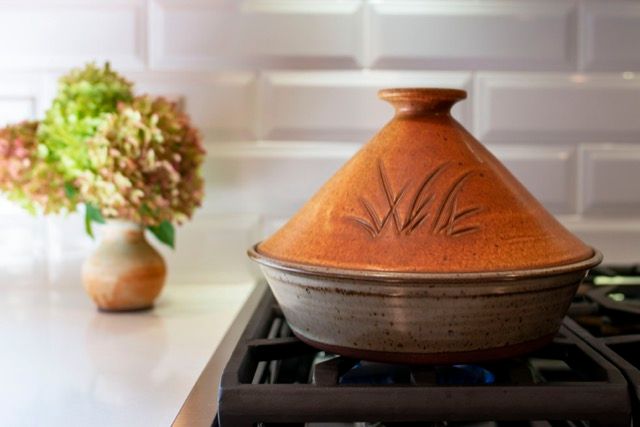
Is It Hard To Make Clay Pots?
Pottery making is an ancient craft that has evolved over thousands of years across many cultures. The process of creating functional and decorative clay pots takes patience, skill, and creativity. While modern tools and techniques make pottery more accessible, it remains a hands-on artform requiring practice and dedication.
At its core, making pottery involves forming clay into a desired shape, drying it thoroughly, decorating or glazing it, and firing it in a high temperature kiln. This transforms the soft, malleable clay into a hard, finished ceramic piece. Although the basics are straightforward, perfecting the craft takes time as each step of the process requires care and technique.
Pottery making can be done professionally, as a hobby, or as an artistic endeavor. Many find working with clay to be a calming, therapeutic experience that exercises creativity. The satisfaction of designing and completing a functional or decorative clay object is a special joy. With some determination, anyone can develop pottery making skills and produce pieces to use or display with pride.
Clay Preparation
Before starting any clay project, the clay must be properly prepared. Choosing the right type of clay and properly wedging and kneading it are critical first steps.
Types of Clay
There are several major types of clay used in pottery:
- Earthenware – Lower firing temperature clay that is porous and absorbs water. Common for beginners.
- Stoneware – Denser clay that becomes watertight at higher firing temperatures. Provides more durability.
- Porcelain – Very fine clay that fires at the highest temperatures. Can be delicate but has a glass-like finish when glazed.
The type of clay chosen will impact the workability, firing requirements, and final strength and appearance of finished pieces.
Kneading and Wedging Clay
Before using clay, it must be kneaded and wedged thoroughly. Kneading involves pressing, squeezing, and slapping the clay to form it into a uniform mass. Wedging involves cutting the clay into chunks and reforming it into a log shape repeatedly.
Proper kneading and wedging removes air pockets, evenly distributes moisture, and aligns the clay particles. This prevents cracks and explosions during drying and firing. It also makes the clay easier to center and shape on the pottery wheel or by handbuilding.
Wheel Throwing
Wheel throwing is one of the main techniques for shaping clay by hand. It involves centering a lump of clay on a rotating pottery wheel and using your hands to shape it into a vessel by pulling up the walls. Mastering the wheel throwing process takes a lot of practice, but allows a high degree of control and consistency in shaping clay.
The first step in wheel throwing is wedging or kneading the clay to remove air bubbles and achieve an even consistency. The clay is then formed into a ball or cone shape and secured onto the wheel head, which is then set in motion. As the wheel rotates, the potter uses water and pressure to center the clay into a cylinder in the middle of the wheel.
Once centered, the potter uses the thumbs to push down into the middle of the clay, creating an indentation and opening up the form. The fingers then pull gently upwards along the walls, gradually raising them into an even cylinder or bowl shape. The height and width can be precisely controlled by applying pressure on the inside and outside walls with the hands. The potter can also modify the form by collapsing, indenting or thinning the clay walls as desired.
After a vessel is formed to satisfaction on the wheel, excess clay is trimmed off the base with a wire tool before the piece is set aside to dry and firm up, ready for firing and glazing. Though challenging at first, wheel throwing allows potters to create uniform, symmetrical forms and vessels much faster than handbuilding. With practice, clay artists can master the centering, opening and pulling techniques to shape elegant pots in minutes.
Handbuilding
Handbuilding is a common technique for making clay pots without a pottery wheel. There are three main handbuilding methods:
Pinch Pots
Pinch pots are made by pinching and shaping a ball of clay with your fingers and thumbs. Start with a lump of clay and press your thumb into the center to form a hole. Then pinch the clay evenly between your fingers and thumb, rotating as you go to shape the pot. Pinch pots are simple but versatile – you can make bowls, cups, vases and more.
Coil Building
Coil building involves rolling out “snakes” or coils of clay and stacking them on top of each other. Roll clay into long strands, then lay one coil on top of another, smoothing and blending the joints. Coil building allows you to make larger and more stable pots than with pinch pots alone. You can build up uniform walls and refine shapes by gently bending coils as you build.
Slab Construction
Slab construction uses flat “slabs” of rolled clay to form the structure of a pot. Roll out slabs of even thickness using guides like rulers or yardsticks. Cut shapes and assemble into box shapes by overlapping seams and blending. Add coils and slabs to refine shapes. Slab construction is great for making rectangular pots and containers.
Drying Clay Slowly
After clay pieces are formed, they must be thoroughly dried before firing to avoid cracking. Drying should be done slowly to allow moisture to evaporate evenly throughout the clay body. Rushing the drying process can lead to moisture getting trapped inside, which will turn to steam and expand during firing, causing cracks or even explosions.
Air drying clay works well for small pieces. Larger or thicker clay items may need additional help drying by placing them in a warm (not hot) oven or dehydrator to draw moisture out from the center. Avoid drying clay in direct sunlight or near heating vents as this can dry the surface too rapidly. Take your time, allowing days or weeks for proper air drying if needed.
Once clay is dried to a leather hard state with no cool or damp areas left, the pieces are ready for the first bisque firing. Bisque firing further dries and hardens the clay before applying glazes and doing a final glaze firing. Rushing to glaze wet clay can cause glaze cracking or peeling issues after firing. Proper drying is a key step for success.
Glazing
Glazing is an essential step in creating clay pots. Glazes are made from mixtures of minerals that melt and form a glassy coating on the pottery at high temperatures inside the kiln. They serve both decorative and functional purposes.
Glaze ingredients usually include silica, fluxes, and stabilizers. Common silica sources are minerals like feldspar, quartz, or clay. Fluxes help lower the melting temperature and promote glass formation. These include compounds with sodium, potassium, calcium, magnesium, lead, lithium and boron. Stabilizers such as alumina and zirconium are added for improved application properties.
Glaze recipes must be carefully tested and calibrated to ensure the desired results. Factors like firing temperature, clay body, kiln atmosphere, and application thickness can all affect the final glazed surface. Testing is done by applying sample glaze mixes to test tiles and firing them under controlled conditions.
Glazes are applied using methods like dipping, pouring, brushing, or spraying. Proper studio procedures are important to avoid contamination between glazes. The thickness and evenness of the glaze coating will impact the results. Too thin and it may crawl or be hard to achieve full coverage. Too thick and it may bubble or peel off.
During firing, the glaze melts and chemically interacts with the clay body beneath it. The kiln is slowly cooled to prevent cracking. The firing schedule must match the clay and glaze to fully mature both components. Glazes require specific temperature ranges and firing times to properly melt, flow, and fuse with the clay surface.
Kiln Firing
Firing clay in a kiln is essential for hardening and finishing ceramic pieces. Proper kiln firing will permanently vitrify the clay and make it impervious to water. There are several steps involved in the kiln firing process:
Loading the Kiln
Loading the kiln properly ensures even heat distribution and prevents the pieces from touching each other. Place pieces at least 1 inch apart and leave open space between shelves. Load similar sized pieces together. Place larger pieces on the bottom shelves near the elements. Load glazed pieces on higher shelves. Use kiln furniture like stilts and posts to support pieces.
Firing Schedule
The firing schedule refers to the time and temperatures the kiln will go through during the firing process. A typical schedule starts at room temperature, slowly ramps up to a top temperature between 1800-2300°F, holds for 10-20 minutes, then slowly cools back down. The ramp up and cool down periods allow the clay to gradually adjust to the temperature changes to prevent cracking and glaze defects.
Types of Kilns
– Electric kilns use heating elements and are highly programmable for custom firing schedules. Good for smaller scale use.
– Gas kilns burn natural gas or propane for heat. Provide more options for larger scale production and certain effects like raku firing.
– Wood-fired kilns use wood as fuel to give pottery a unique smoky appearance and flame effects. Require constant stoking during firing.
Troubleshooting
Making clay pots without any cracks or breakages requires care and foresight. Here are some tips for troubleshooting common issues:
Preventing Cracks and Breakage
Clay shrinks as it dries. If uneven shrinkage occurs, it can result in cracks. To prevent this:
- Avoid making walls and bases too thick or thin. Stick to 1/4″ thickness for handbuilt pieces.
- For wheel throwing, maintain consistent wall thickness throughout the piece.
- Dry clay slowly and evenly. Drastic temperature changes can shock the clay.
- Avoid applying excess water or compressing attached parts too tightly.
- When joining parts, ensure a good seal with slip.
- Use kiln wash on shelves to prevent pieces sticking.
Also check clay pieces carefully before firing. Repair cracks with slip. Handle fired ware gently to prevent breakage.
Achieving Desired Shape
Getting clean shapes takes practice. Some strategies include:
- Use rib tools on wheel pieces for smoothing walls and fine tuning shapes.
- Avoid overworking the clay which can lead to slumping.
- For handbuilding, cut templates from cardboard and use them to guide shapes.
- Shore up forms with wads of newspaper or other fillers while working.
- Refine forms once clay has firmed up slightly after initial shaping.
Focus on quality craftsmanship for best results. With experience, you’ll improve your skills at envisioning and executing your desired forms.
Decorating
Once the clay pot has been fired in the kiln, it is ready for decorating. There are many creative ways to decorate clay pots and make them unique.
Painting
Acrylic and oil-based paints work well on bisqueware clay pots. Paint can be used to create designs, patterns, images, or to fully cover the pot in a solid color. Painted clay pots make great gifts when decorated with the recipient’s name or a meaningful design.
Stamping
Clay stamping tools imprint designs and patterns into the surface of the clay. Stamping can be done before firing when the clay is soft, or after firing on the hardened bisqueware surface. Popular stamp designs include geometric patterns, animals, flowers, and custom motifs.
Incising
Incising involves using sharp tools to carve lines and designs directly into the clay surface. This can be done before or after firing. Incising creates a beautiful contrast between the etched design and smooth clay background. Intricate patterns can be carved this way.
Adding Handles, Spouts, Feet
Functional elements like handles, spouts, and feet can be added after the pot is fired. These parts are made separately, then attached using ceramic glue or slip. Handles provide easier gripping and lifting. Spouts facilitate pouring liquids from pitchers and teapots. Feet raise bowls and vases off the table for decorative effect.
Conclusion
Pottery making requires patience, good fine motor skills, and creativity but it certainly is not as difficult as it may seem. With some practice and persistence, anyone can learn how to successfully make their own clay pots and sculptures. The biggest challenge is simply getting started and gaining experience with the basic techniques.
Some of the key skills needed for making pottery include:
- Ability to center and shape clay on a pottery wheel
- Understanding how to blend and wedge clay
- Knowledge of handbuilding techniques like pinch pots, coils, and slabs
- Patience during the drying and firing process
- Creativity and problem-solving
- Willingness to learn from mistakes
While it takes time to master, making your own pottery can be an incredibly rewarding hobby or even career. With practice, anyone can unlock their creativity through this fun craft. Pottery making is an enjoyable and relaxing hands-on activity that people of all ages can learn if they put in the effort.