Is There A Way To Make Clay At Home?
Clay is a malleable material made from minerals, water, and organic materials that can be molded into various shapes and then hardened to retain that form. Clay has been used by humans for millennia to make pottery, figurines, tiles, and other objects. Some of the main benefits of making your own clay at home include:
- Creativity and Fun – Making your own clay allows you to unleash your creativity. The process itself can be a fun family activity.
- Customization – You can create clay in your favorite colors and scents. Adding color pigments and essential oils allows you to customize the clay.
- Affordability – Making your own clay costs a fraction of buying pre-made clay from the store. All you need is some basic ingredients you likely already have at home.
- Educational – Making clay is a great science and art project for kids. They can learn about chemistry while getting creative.
- Sustainable – Using ingredients you have on hand reduces waste and avoids purchasing clay that’s been mass-produced and shipped.
With just a few basic ingredients and materials, you can make high quality air-dry or bake-dry clay right in your own kitchen. The process is simple enough for beginners but still fun for experienced artists. Read on to learn how!
Gather Your Materials
To make homemade clay, you’ll need just a few simple ingredients and tools. Here’s what you’ll need to gather:
- Flour: All-purpose flour acts as a binder to help the clay hold its shape. You’ll need 2 cups.
- Salt: Table salt also helps bind the clay. Use 1 cup.
- Water: Start with 1 cup of water. You may need a bit more if the mixture is too dry.
- Food Coloring (optional): For colored clay, use liquid food coloring.
- Fragrance Oil (optional): For scented clay, use a few drops of oil like peppermint or lemon.
- Spoon: Use a large spoon for mixing the ingredients.
- Measuring cups: You’ll need both dry and wet measuring cups.
- Microwave-safe bowl: Choose a large bowl to mix everything in.
- Plastic wrap or resealable bags: To store the finished clay.
Having the right ingredients and tools will make the clay-making process easy and successful.
Make the Clay Base
To make the clay base, you’ll need to combine the ingredients and knead them into a smooth, pliable clay. Here are the steps:
1. In a large bowl, mix together the flour, salt, water, and oil. The measurements will depend on how much clay you want to make, but a good starting ratio is 2 cups flour, 1/2 cup salt, 1 cup water, 1 tablespoon oil.
2. Stir the ingredients together until they are fully combined into a shaggy, sticky dough.
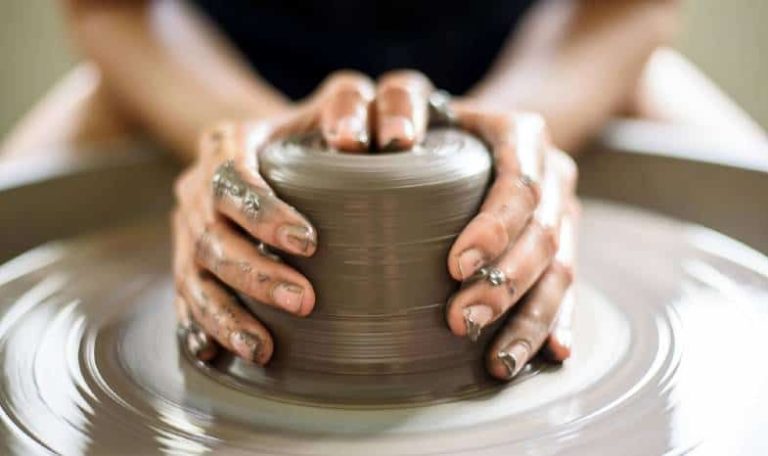
3. Lightly flour a clean surface and turn the dough out onto it. Start kneading the dough, pushing and folding it against the surface. Knead for 5-10 minutes.
4. As you knead, the dough will become smoother, less sticky, and more pliable. If it remains sticky, sprinkle on a little more flour while kneading.
5. Once the dough is smooth, soft, and no longer sticky, the clay base is ready. At this point you can leave it as is or add color and scent (see next step).
With some elbow grease, the simple ingredients are transformed into a soft clay that’s perfect for crafting homemade play dough sculptures, jewelry, and more.
Coloring and Scenting
Adding colorants and scents to homemade clay can make it more visually appealing and provide sensory interest. Here are some options for coloring and scenting clay:
Liquid food coloring or liquid watercolors work great for coloring clay. Start with just a drop or two and knead it into the clay to distribute the color evenly. Add more drops for a deeper shade. Glycerin-based food color tends to blend the best.
Powdered drink mix like Kool-Aid or powdered tempera paint also color clay nicely. Use a toothpick to scoop just a small amount and knead it in. Powders allow you to achieve pastel or soft hues.
For scent, a few drops of essential oils like lavender, lemon, peppermint or vanilla extract can be kneaded in. The scent will remain detectable even after baking. Avoid using fresh or dried flowers, herbs or spices as these may cause mold.
When coloring and scenting clay, add ingredients sparingly a little at a time. Overdoing it can make the clay too moist and sticky. Remember to knead well after each addition to fully incorporate ingredients. By experimenting with color and scent combinations, you can create custom clay perfect for your projects.
Storing the Clay
Properly storing homemade clay is important for preserving its texture and workability. Here are some tips for keeping your clay in optimal condition:
Store unused clay in an airtight container or plastic bag. This prevents the clay from drying out and becoming brittle. Squeeze out any excess air before sealing to minimize air exposure.
Keep the clay cool, between 60-70°F. Avoid hot areas like on top of the refrigerator. The warmth can cause the clay to slowly dry out over time. The refrigerator is ideal, but letting the clay return to room temperature before use.
To keep soft clay workable for months, store it in an airtight container with a damp paper towel. The paper towel provides moisture to prevent drying without making the clay wet. Replace the towel if it dries out.
For long term storage of over 1 year, consider freezing the clay. Shape it into a log, wrap tightly in plastic wrap, and freeze. When ready to use, thaw in the refrigerator overnight before opening. This prevents condensation from forming on the clay.
If clay does start to dry out and crack, it can be revived by kneading in a little water. Dry, hard clay is difficult to soften, so proper storage from the start prevents this. With the right care, homemade clay can stay usable for many projects to come.
Clay Projects
Homemade clay opens up a world of creative possibilities. Here are some fun clay projects to try:
jewelry – Make beads, pendants, earrings and more. Let the clay air dry or bake it in the oven for durable jewelry pieces. Add paints, glaze or glitter for extra pizazz.
magnets – Make shapes, letters or designs and glue magnets onto the back. Great for decorating fridges, lockers and more.
bowls and vases – Use cookie cutters or molds to shape clay into functional yet artsy dishes.
game pieces – Craft chess pieces, checkers, chutes and ladders pieces. Get creative with the designs.
miniatures – Build tiny models of animals, people, cars, furniture and other items. Display them together in a mini village.
seasonal decor – Make holiday ornaments, menorahs, nativity figures and more. Personalize for a handmade touch.
Let your imagination run wild! Homemade clay is an open canvas for creativity and fun.
Troubleshooting
Homemade clay can sometimes develop issues like cracking or stickiness as you work with it. Here are some solutions for common problems:
Cracking Clay
If your clay starts to crack as it dries, there are a few things you can try:
-
Add a small amount of water and knead it in to moisten the clay.
-
Store the clay in an airtight container or plastic bag to prevent it from drying out.
-
Consider adding a bit more oil during the clay making process to increase flexibility.
Sticky Clay
Clay can become sticky for a couple reasons:
-
Too much oil – try adding a bit more flour or cornstarch.
-
High humidity – let the clay dry more before working with it.
Kneading in a small amount of flour or cornstarch should help absorb excess moisture that’s causing stickiness.
Safety Tips
When making homemade clay, it’s important to keep safety in mind, especially when children are involved. Here are some key tips:
Supervise Children
Young children should always have adult supervision when working with homemade clay. Make sure kids wash hands before and after handling the clay.
Avoid Contamination
Don’t let the clay come in contact with food surfaces or utensils. Store clay in an airtight container away from food. Avoid using ingredients for clay that may also be used for cooking.
Watch for Allergies
Be aware of any allergies. Clay may contain ingredients like wheat flour or food coloring/scents. Consult with parents if making clay for a group.
Making Clay Without Cooking
If you want to skip the cooking step entirely, there is a quick no-bake clay recipe you can try. This type of clay air-dries and does not require baking.
To make no-bake clay, you will need:
- 1 cup cornstarch
- 1 cup cold water
- 2 tablespoons vegetable oil
- Food coloring (optional)
In a medium bowl, mix together the cornstarch and cold water until smooth. Stir in the vegetable oil and a few drops of food coloring if desired. Knead the clay for a few minutes until it reaches a smooth, doughy consistency.
This no-bake clay will air dry in 24-48 hours. Keep the unused clay stored in an airtight container. Use this simple clay for fun craft projects without having to bake it.
Conclusion
Making your own clay at home can be a fun and creative project for both kids and adults. Homemade clay offers many benefits over store-bought varieties:
- Cost Savings – Homemade clay is much less expensive than buying pre-made clay.
- Customization – You can create any color clay you want by adding food coloring, natural powders, or other colorants.
- Scented – Mix in a few drops of essential oils like lavender or lemon to give your clay a lovely aroma.
- Safe Ingredients – With homemade clay you control exactly what goes into it, using simple pantry ingredients.
- Learning Experience – Making your own clay lets kids experiment and learn through hands-on creating.
The possibilities are endless when working with homemade clay. Let your imagination run wild to make fun sculptures, jewelry, ornaments, bowls, beads, and more. Approach it with a creative spirit and don’t be afraid to try new things. The whole process of making and creating with your own clay can be incredibly rewarding.