Sculpting With Precision: Advanced Clay Techniques
Sculpting with precision refers to creating intricate clay sculptures using advanced techniques that allow for detailed and complex forms. Unlike basic sculpting which uses simple hand-building methods, precision sculpting relies on specialized tools, controlled processes, and an in-depth understanding of working with clay.
This advanced approach opens up new possibilities for ambitious ceramic artists. With precision techniques, sculptors can create realistic figures, capture fine textures, join complex multi-part pieces, and achieve clean polished finishes. Mastering these methods requires patience, planning, and practice but allows for clay artistry at an elevated level.
In this guide, we will explore the tools, materials, and step-by-step techniques needed to start sculpting clay with precision. Key topics include: selecting the right clay, using armatures and textures, hollowing and joining forms, specialty modeling tools, and tips for flawless finishing and firing. With the methods outlined here, ceramic sculptors can hone their skills and take their clay art to the next level.
Tools
Some essential tools for advanced clay sculpting include wire tools, ribbon tools, loop tools, sculpting sticks, and clay shapers. Wire tools like loop tools allow you to refine curves and details in clay and are especially useful for sculpting figures (Essential Clay Sculpting Tools For Beginners and Their Uses). Ribbon tools have thin, flexible metal blades that can create fine lines and textures. Sculpting sticks made of wood or metal can also be used to carve lines and patterns. Clay shapers have rounded silicone tips that can blend and smooth clay without damaging the surface.
Having a variety of specialized clay tools allows advanced sculptors to achieve more intricate and refined details in their creations. The right tools matched to your sculpting needs and personal style can help unlock your full creative potential when working with clay.
Clay Types
There are several types of clay used for sculpting, each with their own properties and best uses. Here we’ll focus on the main types – polymer, earthenware, stoneware, and porcelain.
Polymer clay is made from polymers, resins, and color pigments. It is an oil-based clay that air-dries and does not shrink or crack. Polymer clay is lightweight, flexible when conditioned, and easy to sculpt detail. It’s great for sculpting small, intricate pieces as well as jewelry. Popular brands include Sculpey and Fimo. (https://www.sculpey.com/blogs/blog/a-beginners-guide-to-sculpting-in-clay)
Earthenware clay contains lower levels of minerals and fluxes than stoneware or porcelain. It fires at lower temperatures, is quite porous after firing, and can be easily scratched. Earthenware has a coarse texture that lends itself well to handbuilding and wheel throwing techniques. Its red-orange natural coloring makes it commonly used for terra cotta pottery.
Stoneware clay contains higher mineral and flux content than earthenware, allowing it to be fired at higher temperatures for greater strength. It is less porous than earthenware after firing. The higher firing temperatures result in a finer texture and lighter colors like grey, buff, or white. Stoneware is commonly used for functional pottery and sculptural pieces.
Porcelain clay has the highest kaolin content of any clay, firing to a glass-like white finish. It’s the strongest clay body but also the most difficult to work with, as its high shrinkage rate requires careful drying and firing. Porcelain is smooth, fine, and translucent. It’s ideal for detailed sculptures, figurines, tiles, and high-end dinnerware.
Armatures
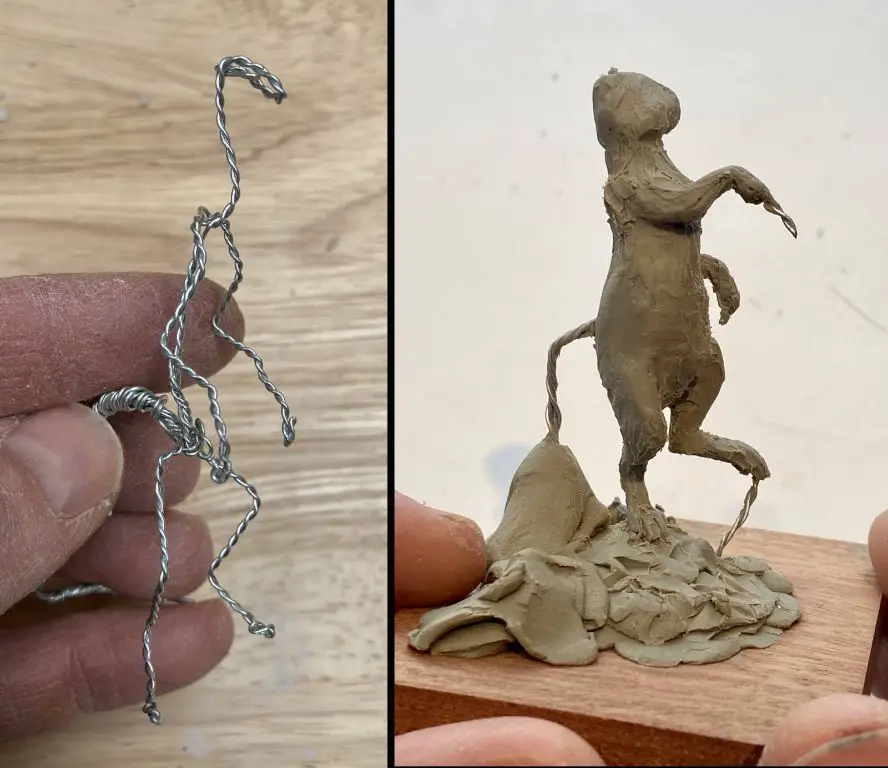
An armature is an essential framework that provides support and structure for the clay sculpture. The purpose of an armature is to hold the weight of the clay and serve as an internal skeleton to sculpt around. Having a sturdy armature allows the sculptor to create complex shapes and overhangs that would otherwise collapse under their own weight.
Armatures are commonly made from wire, wood, or metal. The most flexible and adjustable option is metal armature wire, such as aluminum or steel wire. These can be bent, shaped, and adjusted as needed during the sculpting process. Heavier gauge wire is best for larger sculptures that require more support. Wood and metal armatures, made from rods or strips, provide rigid internal structures for solid clay forms. These take more planning but allow sculpting of more ambitious postures and shapes.
Best practices for armature building include making sure wires are tightly wrapped and connections are secure. Anchoring the armature to a sturdy base helps provide stability. Clay should be applied gradually and symmetrically to avoid uneven weight distribution. Planning the armature design ahead allows the sculptor to anticipate problem areas and provide extra support where needed. No matter the material, a well-built armature enables the clay sculpture to reach its full creative potential.
Source: https://www.instructables.com/Make-an-Armature-for-Sculpting/
Textures
Adding texture to clay sculptures can bring surfaces to life and create more visual interest. There are many techniques sculptors use to achieve different textural effects.
Impressing
Impressing involves pressing small objects into the clay surface to leave an imprint. Items like lace, burlap, leaves, nuts, seeds, twigs, ropes, and fabric can create intriguing patterns. The clay should be leather hard for the best impressions. Press gently and evenly into the surface, then carefully peel away the object.
Incising
Incising is using sharp tools to scratch lines and marks into the clay. Texture liners, loop tools, fettling knives, wooden skewers, dull needle tools, and toothpicks all work well. Incising lines can range from fine hairlines to deep grooves. Curving, crossing, or hatching lines result in different designs.
Scraffito
In scraffito, a top layer of colored slip or engobe is applied to leather hard clay. Once dry, lines are carved through the layer to reveal the clay color underneath. Fine metal ribs or clay loop tools work well. Crisscrossing lines create grid patterns. Consider imagery like plants or animals.
Sgraffito
Sgraffito also involves applying layers, traditionally a white engobe over dark clay. Leather hard surfaces are then etched or scratched through the layers to create contrasting lines. Sgraffito originated as a decorative pottery technique. It offers great potential for intricate surface carving on sculptures.
Mishima
Mishima involves inlaying thin lines of colored clay into the main clay surface. Roll out contrasting clay very thin and cut into strips. Press the strips into the leather hard base clay. Use a flat knife to trim away excess. Intricate line work and patterns can be built up. Alternate line colors for dramatic results.
Nerikomi
Nerikomi entails carefully layering and blending colored clays to achieve patterns when cut. The clay can be rolled out, cut into pieces, reassembled, then sliced to reveal the designs. Complex images can be made by meticulously planning the clay layers and cuts. Once leather hard, slices can be joined onto sculpture surfaces.
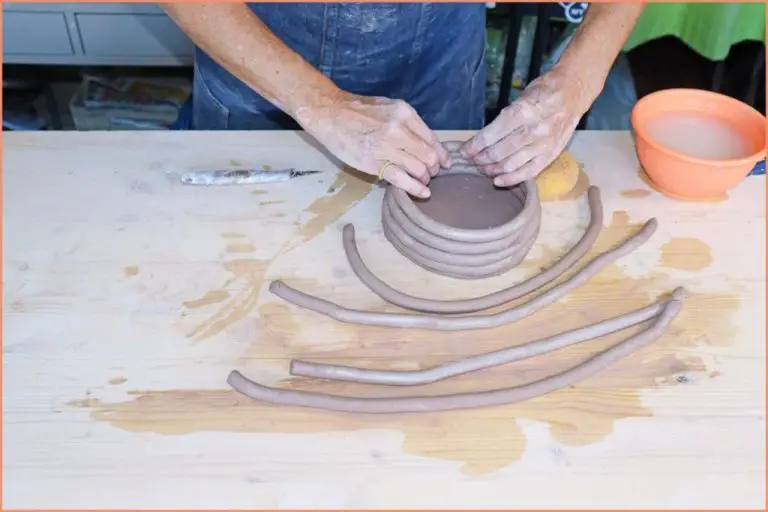
Joining
When creating complex sculptures, you will likely need to join separate pieces of clay together. The most common method for joining clay is called slip and score. This involves “scoring” or scratching the surfaces to be joined, applying water or “slip” (a thin mixture of clay and water), then pressing the pieces together.
To properly join clay:
- Use a knife, fettling knife, or other tool to scratch crossing lines on the surfaces to be joined. This roughs up the surface and gives the slip something to adhere to.
- Apply water or slip generously to both scored surfaces using a brush, sponge, or your finger.
- Press the surfaces together firmly. Twist slightly to lock pieces in place.
- Smooth over seam and any excess slip gently with your finger, tool, or sponge.
Let assembled pieces sit for 15-30 minutes before handling so bond is established. For additional strength, add clay slip along interior seam joints with a slip trailer, clay syringe, or by painting slip on by hand.
With good joining technique, seams should disappear and pieces will hold together as one solid form through drying, firing, and beyond. Take time scoring and slipping thoroughly, and let bonds set up properly.
Hollowing Forms
Hollowing out clay forms before firing is an important technique for sculptors. Creating hollow forms rather than leaving sculptures solid has several benefits. Hollow pieces require less clay, are lighter weight, are less prone to cracking and exploding in the kiln, and allow for more complex and intricate shapes by reducing thickness in some areas.
To properly hollow a sculpture, specific tools like loop tools, ribbon tools, and various specialized scrapers are used. These allow the sculptor to carve out the inside of a form evenly and leave an approximately even thickness of the clay walls. Most experts recommend leaving at least 1/4 inch thickness on all sides.
The process involves carefully cutting an opening into the form, then reaching inside with loop and ribbon tools bent into curves to scrape away excess clay bit by bit. The sculptor must maintain an even pressure and smooth motion to avoid puncturing the clay. It is key to frequently check progress and wall thickness by feel. Once the desired hollowness is achieved, the opening can be patched and smoothed over.
With practice and the right tools, hollowing forms allows much more freedom and experimentation in sculpture. Pieces can incorporate negative spaces, openings, and thin shells while still maintaining structural integrity for firing. Mastering the hollowing process opens up many new possibilities in clay sculpture. (Source)
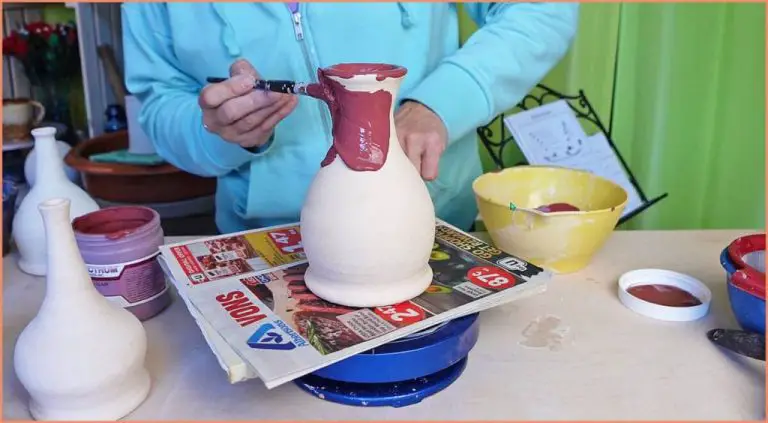
Finishing
Once the clay sculpture has been allowed to fully dry after hollowing forms and joining any sections, the next step is finishing to refine the surface. Sanding is a key technique for finishing clay sculptures to smooth out any uneven textures or imperfections. Start with a coarse sandpaper like 80-grit to quickly remove larger irregularities, then gradually step down to finer grits like 220-grit to achieve a smooth finish.
Other surface treatments can also be used depending on the desired look. A clay modeling tool like the Dioche Clay Craft Tool Kit (source) is great for detailing, carving, and burnishing the surface. Acrylic paints or glazes can be applied for color and effects. Using fine steel wool can also refine the texture. The finishing process truly brings out the fine details and transforms the raw sculpted clay into a refined work of art.
Firing
Firing is a critical step in finishing ceramic sculptures. There are several common firing techniques used for clay sculptures:
Bisque Firing
Bisque firing refers to the first firing of greenware or unfired clay objects. This initial firing converts the clay into a permanent ceramic material by driving out the chemically combined water and organic materials. Bisque firing is done at a relatively low temperature, usually between 1600-2100°F. This prepares the clay for glazing and subsequent higher temperature firings.1
Glaze Firing
Glaze firing is done after bisque firing and applying glazes to the sculpture. Glazes melt during this firing and create a glassy coating on the clay surface. Typical glaze firing temperatures range from 2100-2350°F. The glaze chemically bonds to the clay body during this process.2
Raku Firing
Raku is a specialized firing technique often used for sculptures. The pieces are bisque fired first, then glazed and loaded into a raku kiln at around 1850°F. The sculptures are removed while red hot and placed into containers with combustible materials that create effects on the glaze surfaces.
Pit Firing
Pit firing involves firing sculptures in a shallow pit dug into the ground and fueled by wood. This primitive firing technique reaches lower temperatures than kiln firing, typically under 2000°F. Pit firing produces organic, natural surfaces on the clay.
Kilns
Kilns are essential for firing clay sculptures at controlled high temperatures. Both electric and gas kilns are commonly used. The size and design of the kiln must accommodate the scale of sculptures being fired.
Conclusion
Clay sculpting is a rewarding art form that allows artists to bring their visions to life in 3D. Mastering advanced techniques opens up new possibilities for intricate and detailed sculptures. This guide has covered essential tools, clay types, armatures, textures, joining methods, hollowing forms, finishing techniques, and firing. With practice and dedication, sculptors can create stunning works of art.
In summary, choose the right clay for your goals, whether modeling, pottery, or porcelain. Build armatures to support weight and create dynamic poses. Use various tools to carve delicate textures. Join pieces securely with slip and score or wire armatures. Consider hollowing large forms to prevent cracking and save on clay. Refine sculptures with sanding, burnishing, or patinas. Finally, bisque fire clay at the optimal temperature to enhance durability.
For further learning, consult How to Sculpt the Human Figure in Clay, Advanced Clay Sculpture IMPROVISATION, and Clay Sculpture Techniques and Tips. With dedication to the craft, artists can unlock their full creative potential in clay sculpture.