What Are The Four Basic Tools Used In Tile Installation?
Tile Cutter

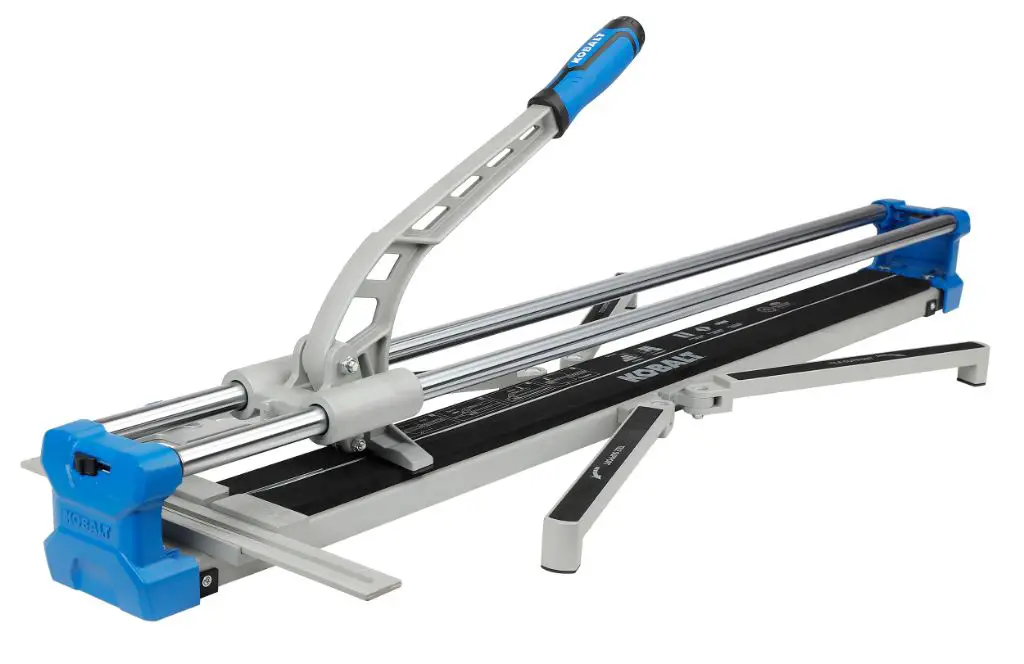
The main purpose of a tile cutter is to accurately cut tiles to the correct size and shape needed to complete a tile installation project. There are a few different types of tile cutters that professionals and DIYers use:
Manual tile cutters, also known as score and snap cutters, are hand operated tools that use a wheeled carbide cutter to score the surface of the tile, allowing it to then be snapped along the scored line by applying pressure. They do not require electricity and are portable, making them the most common type for basic home use (1).
Electric tile cutters have a diamond blade that cuts through tile quickly and smoothly with a motor providing power. This makes precise cuts easier and they can cut harder materials like porcelain or stone. They require an electrical outlet and are less portable. Wet saws are a type of electric tile cutter designed to keep water flowing over the blade to minimize dust and cool the blade (2).
To properly use any tile cutter safely, eye protection and gloves should be worn. The tile should be measured and marked where the cut is needed. It should be secured in place on the cutter, then scored firmly and evenly by the cutter. The tile is snapped upward along the scored line. Cuts should be made steadily and the blade should be replaced when worn down. With electric wet saws, safe handling of water and electricity is crucial.
(1) https://www.zjlingfei.com/The-different-types-of-tile-cutters-and-their-advantages-and-disadvantages-id42238347.html
(2) https://www.architecturelab.net/best-tile-cutting-tools/
Trowel
The trowel is one of the most important tools for tile installation. Its main purpose is to evenly spread the thinset adhesive on the substrate before setting the tiles. Using the proper sized trowel helps ensure full coverage of the adhesive underneath the tiles, which leads to a strong bond and prevents the tiles from loosening over time.
There are a few main types of trowels used for tile setting:
- Notched trowels – These have notches that create ridges in the adhesive to help with adhesion and allow air pockets to form. Notches come in different sizes like 1/4″, 1/8″, etc. Smaller tiles require smaller notched trowels.
- Square notch trowels – The notches are square instead of U-shaped, which provide thicker adhesive ridges.
- Rounded trowels – Used for spreading mortar beds, these have a flat bottom with rounded edges.
To use a trowel properly, hold it at a 45 degree angle to the substrate and spread the adhesive evenly over the surface using firm pressure. Spread in straight lines rather than circles. The adhesive should be spread thinly enough that the trowel ridges remain well-defined.
According to this article, choosing the right sized trowel for the tile is essential for proper coverage and adhesion. The general rule of thumb is to use a trowel with notches equal to half the length of the tiles. Using too large of a trowel can lead to thinset that is spread too thin and prone to failure down the line.
Grout Float
A grout float is a tool used for applying and spreading grout evenly between tiles during the grouting process. The purpose of a grout float is to press the grout firmly into the joints and get full coverage without removing too much grout from the tile faces.
There are a few common types of grout floats:
- Rubber floats – Made of gum rubber, these provide some flexibility and are the most popular type. They can contour corners well. Example: Rubi Pro Rubber Grout Float
- Sponge floats – Made of an open-cell sponge material, these are more porous. They tend to absorb water from the grout which can help with consistency.
- Plastic/resin floats – Made of rigid plastic or resin, these provide a smooth hard surface but can be prone to scratches.
Proper technique is key when using a grout float:
- Hold the float at a 45 degree angle and use a scrubbing motion to press grout firmly into joints.
- Wipe diagonally across joints to avoid dragging grout out of the joints.
- Make continuous passes to smooth the grout uniformly.
- Clean the float periodically so grout doesn’t build up on the surface.
- Take care around edges and corners.
Using the proper grout float technique will help ensure even, consistent joints.
Spacers
Tile spacers are small plastic or rubber crosses that are placed between tiles as they are being set to provide consistent spacing between them. Proper spacing between tiles is crucial for a high quality installation. According to Rubi, spacers allow you to keep tiles evenly spaced, enabling grout lines of equal width. Wider grout lines are more prone to cracking. Spacers also help keep tiles level with each other.
There are a few types of spacers:
- Plastic spacers – These small plastic crosses come in sizes ranging from 1/16″ to 1/2″ for different size grout lines. They are removed once the tiles have set.
- Rubber spacers – Rubber spacers are reusable options that can be left in the grout lines.
- Tile wedges – Wedges and clips create a wedge-shaped spacer. They allow for adjustments and keep tiles level with each other.
To use spacers:Ardex recommends placing 4 spacers around each tile corner as you lay them. The spacers should gently press against the tile edges. Once the floor has set, remove plastic spacers before grouting. Wedges and clips can be left in place. Maintaining proper spacing is key for straight grout lines and preventing cracks.
Safety Equipment
Proper safety equipment is vital for protecting tile setters during installation. According to the Occupational Safety and Health Administration (OSHA), tile setting involves numerous hazards that can be mitigated with the right protective gear (OSHA – Tile). Some essential safety equipment includes:
Hard hats – These protect tile setters from bumping their heads on scaffolding, ladders, pipes, or other objects when working at height. Hard hats also guard against falling objects and debris.
Gloves – Gloves shield hands from cuts, scrapes and irritation when handling tile materials. Thick leather gloves provide the best protection.
Knee pads – Knee pads cushion knees when tile setters kneel on hard surfaces during installation. They prevent knee injuries and reduce strain.
Respiratory masks – Masks filter out dangerous silica dust generated from cutting tile materials. Inhaling silica dust can cause lung disease, so masks are critical (Controlling Silica Dust in Construction).
In addition to basic gear, OSHA may require fall protection, eye shields, and other equipment depending on the specific tile setting job. Following OSHA guidelines ensures tile setter safety.
Mixing Tools
A mixer is an important tool for properly mixing thinset mortar and grout to the right consistency before application. Using a mixer allows you to efficiently mix large batches of material and achieve an even, lump-free consistency.
There are two main types of mixers commonly used:
-
Drill mixers – These attachments fit onto a standard power drill. A paddle attachment mixes the thinset or grout in a bucket as you run the drill. Drill mixers are affordable, portable options good for small jobs. However, they can lead to inconsistent mixing if not used properly and don’t work as well for large batches (source).
-
Mortar mixers – These wheeled units have a rotating drum that efficiently mixes mortar or grout consistently. They are ideal for larger jobs where you need to mix multiple bags efficiently. However, they are less portable and more expensive than drill attachments (source).
When mixing thinset, it’s important not to overwater the mix, as too much water weakens the bond strength. With grout, precise water amounts are needed to achieve a smooth, workable consistency. Using a quality mixer allows you to achieve optimal results.
Leveling Systems
A leveling system is a crucial tool for ensuring tiles are properly leveled during installation. According to this instructional video, the purpose of using levels is to achieve a flat, even surface and prevent lippage (height differences between tiles).
There are a few common types of levels used in tile installation:
- Laser levels – These project laser guides across floors and walls to mark level points. They allow hands-free level marking.
- Standard bubble levels – The basic rectangular levels used to check if surfaces are horizontally or vertically level.
To check for level throughout the installation, start by marking level points with the laser or standard levels in multiple spots on the floor or wall. As tile is laid, place a straight edge like a long level or board across the surface, with the ends on the level marks.
The straight edge will clearly show any high or low spots as gaps underneath. The tile surface needs to be adjusted until the straight edge rests flat at every check point. This technique ensures level is maintained across the entire installation area.
Bucket/Pan
Buckets or pans serve multiple purposes during tile installation. Primarily, they are used for mixing thinset mortar, grout, and other materials. Tilers will mix up batches of thinset in a bucket using a paddle mixer before applying it to the substrate. Pans with higher sides are useful for holding more material and preventing spills while mixing. Buckets also provide a convenient container for transporting mixed thinset or grout around the workspace.
In addition to mixing, buckets and pans are helpful for holding tools during the tiling process. Tilers can carry their trowels, spacers, grout floats, and other small hand tools in a bucket as they work to keep them organized and within reach. Setting tools in a bucket keeps them up off the floor and lessens the chance of losing a tool or having to bend down frequently to retrieve one.
Lastly, buckets or pans serve as a kneeler when installing tile on the floor. Tilers will flip a bucket upside down to create a clean, dry place to kneel while working. Kneeling on a bucket is more comfortable and protective than kneeling directly on a hard floor surface. The slight elevation also helps take strain off the back when leaning forward to apply tile.
Sponge
The most commonly used sponge for tile installation is the cellulose sponge. These sponges are made from natural materials like wood pulp or vegetable fibers, making them highly absorbent and ideal for smoothing and cleaning grout lines once the grout has been applied.
It’s important to use the proper technique when sponging freshly grouted tiles. The grout should be allowed to sit for 10-20 minutes after application before sponging to prevent removing too much grout from the joints. Gently wipe the sponge diagonally across the tiles to smooth the grout lines and remove excess grout. Rinse the sponge frequently in clean water to prevent spreading dirt and grout haze. Work in small sections so you don’t allow the grout to dry on the tile surface before sponging. With the right sponging technique, you can achieve clean, uniform grout lines. (Source)
Grout Sealer
Sealing grout after installation is an important step to protect the grout and extend its life. Grout sealer creates a protective barrier that makes the grout more water-resistant and stain-resistant.
There are two main types of grout sealers (Sir Grout, 2022):
- Penetrating sealers soak into the grout pores and don’t leave a coating on top.
- Coating sealers sit on top of the grout and create a protective layer.
It’s recommended to seal grout as soon as possible after installation, usually within 3 days (Tile Club, 2022). Allow new grout to cure fully first. Use a high quality sealer and apply according to the product instructions. Apply evenly across grout lines using a sealer applicator, paintbrush or sponge. Allow sealer to soak in and dry completely before using shower.
Reapply grout sealer every 1-2 years in showers and high traffic areas. This will ensure continuous protection over time (Maria Louise Design, 2020). Using a quality grout sealer helps maintain the look and integrity of the grout.


