What Are The Steps Involved In Making Pots?
Pottery and ceramic art has an ancient history, with artifacts dating back over 20,000 years. The earliest known pottery was discovered in China and dates to around 18,000 BC. Since prehistoric times, clay has been one of the most important materials used by humans to create both functional wares and artistic pieces.
The basic process of pottery making has remained largely unchanged over the centuries, though advancements in materials, tools, and techniques have allowed for great innovation. The general steps involved in handmade pottery are preparing the clay, forming the pottery, drying and trimming it to refine the shape, decorating the piece with glazes and slips, and finally firing the pottery in a kiln to harden and set the clay and finishes.
There are many different types of pottery defined by its look, finish, firing method, and clay composition. Some major categories include earthenware, stoneware, porcelain, and terra cotta. The type of clay body and glazing techniques used determine the strength, porosity, appearance and usage for the final pottery piece.
Gathering Materials
When making pottery, you first need to gather the necessary materials. The main ingredient is of course clay. There are several types of clays that can be used for pottery, each with their own properties.
Some common types of clay used in pottery include:
- Earthenware – Fired at lower temperatures. Porous and brittle. Good for handbuilding.
- Stoneware – Denser and fired at higher temperatures. Low porosity makes it water-tight.
- Porcelain – Very fine clay fired at highest temps. Smooth, white, and translucent.
- Terracotta – An orange or red earthenware due to high iron content.
Consider the type of pottery you want to make when choosing the appropriate clay. The clay body is essential for giving form to your pottery.
In addition to clay, you will need glazes and slips. Glazes are glass-like coatings applied on top of pots before firing. Slips are also ceramic coatings but made of clay-based mixtures. Glazes and slips add color, textures, and effects to the finished pottery. You can purchase premixed glazes and slips or mix your own recipes.
Finally, assembling the proper pottery tools is key. Essential tools include:
- Potter’s wheel – For throwing and shaping pots
- Kiln – For firing the pottery at high temperatures
- Trimming tools – Blades, loop tools, ribs, etc. for refinement
- Brushes – For slip and glaze application
- Cutting wires – For cutting and trimming clay
Once you have gathered the necessary clay, glazes/slips, and tools, you can begin the pottery making process.
Preparing the Clay
Once you have your clay gathered, the next step is to prepare it for forming your pottery. Clay preparation is a crucial stage that helps remove air bubbles and makes the clay uniform. There are a few key techniques for preparing clay:
Wedging
Wedging is the process of cutting the clay in half and then slamming it back together. This helps blend the clay and remove air pockets. To wedge, firmly press a lump of clay down on a wedging table or canvas. Use a wire tool to slice through the center, divide the clay in two, then push the halves back together. Repeat this cutting and slamming process until the clay feels smooth and free of air bubbles.
Kneading
Kneading is similar to wedging but done completely by hand, without cutting the clay. Take a lump of clay and press down firmly with the palm of your hand. Stretch the clay out flat then fold it over itself. Press down and continue stretching and folding the clay until it’s smooth and uniform. Kneading squeezes out air bubbles and blends any grog or additives evenly throughout the clay.
Removing Air Pockets
In addition to wedging and kneading, you can remove remaining air pockets by pounding the clay. Take a soft rubber mallet or hammer and gently tap the clay to release trapped air bubbles. Pay extra attention to folded or joined areas where air bubbles tend to hide. Tap until you no longer see any air pockets come to the surface.
Forming the Clay
There are two main methods for forming clay into pottery – handbuilding techniques and wheel throwing. Handbuilding involves shaping the clay by hand into simple forms like coils, slabs, and pinch pots. This method allows for asymmetric and organic shapes. Some common handbuilding techniques include:
- Coil building – rolling out and stacking coils of clay on top of each other
- Slab building – cutting out and joining together slabs of clay
- Pinch pots – pinching clay into a basic pot form
- Modeling – sculpting freehand shapes
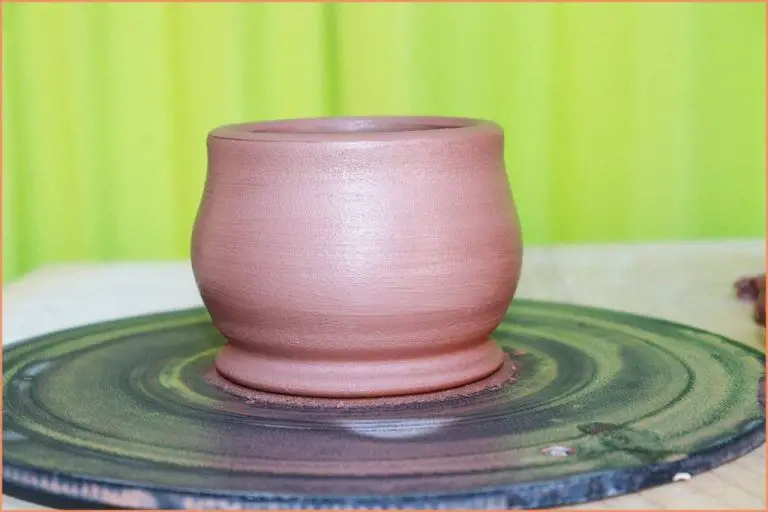
Wheel throwing involves using a pottery wheel to shape clay into symmetrical rounded forms. As the wheel spins, the potter uses their hands to manipulate the clay into various shapes like cylinders, bowls, and vases. This method allows for uniform walled pottery with refined shapes and surfaces. Mastering the wheel takes coordination and practice to center the clay and control the spinning form.
Deciding between handbuilding vs wheel throwing depends on factors like the desired shape, the potter’s skill level, available equipment, and artistic preference. Many potters will combine both methods in one piece. The flexibility of clay allows for immense creativity in the forming process to make functional and artistic objects.
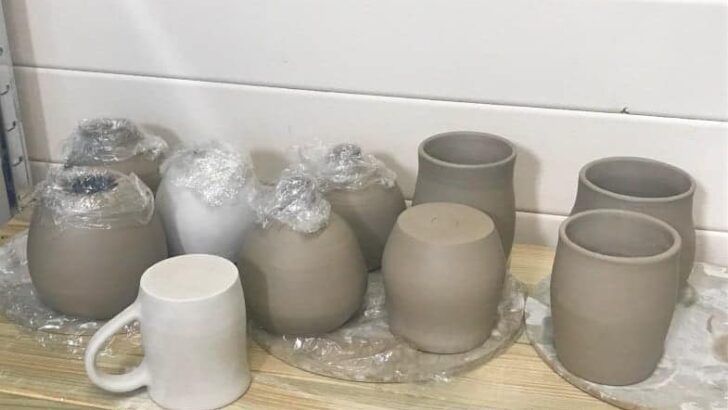
There are two important steps at this stage: allowing clay to dry and trimming excess clay off the dried piece.
Drying and Trimming
Once a pot has been formed, the next critical step is letting it dry. If the clay dries too quickly, it can crack or warp. Slow, even drying is ideal. For large or very thick pieces, drying can take over a week. There are a few ways to control the drying process:
- Let pieces air dry slowly in a dry, ventilated space out of direct sunlight.
- For faster drying, use a dehydrator or oven on low heat.
- For very large pieces, cover with plastic to slow moisture loss.
As clay dries, it shrinks slightly. Once leather hard, the piece can be trimmed to refine edges and remove excess clay using special metal loop tools or a knife. Trimming creates an even thickness and uniform shape. Careful trimming at this stage allows the final fired piece to have crisp, clean lines and symmetry.
Applying Glazes and Slips
Glazes and slips add color, texture, and effects to finished pottery. There are many types of glazes to choose from depending on the look you want to achieve. Popular glaze types include:
- Glossy glazes that result in a shiny surface
- Matte glazes that have a non-reflective, silky finish
- Crystalline glazes with visible crystal formations
- Crawling glazes that create uneven “cracked” effects
Glazes can be mixed to create custom colors and textures as well. Slips are made from clay, water, and pigment and are used underneath glazes to alter the final color and appearance.
To apply glazes, the bisque ware must be smooth, clean, and dry. Glazes can be applied with a brush, sponge, or by dipping the bisque ware directly into the glaze. It’s important to apply glaze evenly and avoid drips. Allow the piece to dry completely before firing.
Slips are usually applied with a brush prior to glazing. They should be applied smoothly and thinly. Like glazes, slips must be fully dry before firing the final piece.
Firing the Pottery
Firing the pottery is one of the most important steps in creating finished ceramics. Pottery must be fired in a kiln to harden the clay through sintering, which fuses the clay particles together to become strong and non-porous. There are several types of kilns used to fire pottery.
Electric and gas kilns are the most common types used by potters today. Electric kilns use heating elements to generate the high temperatures needed to fire clay, while gas kilns use natural gas or propane as fuel for the fire. Another traditional type is the wood-fired kiln, which imparts a unique look and quality to the finished pottery.
Firing typically takes place in two stages. The first firing, called a bisque firing, heats the pottery to around 1800°F to harden and prepare it for glazing. Bisqueware is unglazed and porous. The second firing, or glaze firing, brings the pottery to over 2000°F to melt the glazes and create a glassy surface. The higher temperature permanently affixes the glazes to the clay body. Proper heat ramps, temperatures, and kiln atmosphere are critical for success in firing pottery.
Polishing and Finishing
The finishing steps help complete and refine the final pottery piece. After firing, pots may have small rough patches or need some final shaping adjustments. Sanding and polishing helps smooth any rough areas and gives the pot a uniform surface.
Start by sanding the pottery gently with progressively finer grit sandpaper, such as starting with 120 grit and working up to 600 grit. Rub the sandpaper in small circular motions evenly across the surface to smooth it out. Use a damp sponge to wipe away any debris between sanding sessions.
You can also polish using a buffing wheel charged with a polishing compound. Apply polish and buff the pottery on the wheel to create a uniform sheen. Use a soft cloth to buff any hard to reach areas by hand.
Adding decorations and embellishments can further enhance the pottery. Options include painting designs with acrylics or glazes, adding texture with slipped trailings, attaching decorative elements like beads or stones, etching patterns chemically or with tools, and more. The options are endless for creative and artistic touches.
Take care not to over-decorate or make embellishments too complicated on simple, functional pieces. But decorative accents can elevate art pottery into something unique and special.
Storing and Caring
Properly caring for finished pottery pieces is important for preserving your hard work. Here are some tips for storing and caring for your pottery:
- Allow adequate drying time – Let pieces air dry thoroughly before handling or storing, as moisture can cause cracks. For complex pieces, slow drying in a controlled environment is best.
- Protect pieces from scratches – Cover the base with felt before placing on a shelf. Handle with care to avoid chips and scratches.
- Avoid extreme temperature changes – Prevent damage from thermal shock by keeping pottery away from extreme heat or cold. Don’t wash in hot water.
- Use food-safe finishes – For functional pieces like mugs, bowls, etc., use food-safe glazes and finishes. Avoid lead glazes.
- Clean with care – Use a soft sponge and mild detergent for cleaning. Avoid abrasives or soaking finished pieces.
- Store properly – Keep pieces in a climate-controlled area away from direct sunlight. Use cabinets, shelves, boxes to protect from dust.
With proper care and storage, your finished pottery can last for many years to come.
Conclusion
Making pottery by hand requires patience, skill, and creativity. We’ve covered the key steps involved, starting with gathering clay, tools, and workspace, to kneading the clay, forming vessels or sculptures, drying and trimming, applying decorative glazes and slips, and finally firing the finished pieces. While the basic process stays the same, each artist brings their own flair and techniques to the craft.
Potters can customize their pieces by using various types of clay for desired looks and feels, sculpting unique shapes by hand or with molds, creating their own glaze mixtures, decorating with textures and embellishments, and more. The firing process also allows for variations, from high-fire stoneware and porcelain to pit-firing earthenware. There are many opportunities for potters to make each piece their own. With practice and experimentation, you can develop skills and find creative satisfaction in crafting pottery.
Making pottery connects us to ancient traditions carried on today. With some clay, creativity, and dedication, you can start crafting your own meaningful pots and contribute to this timeless human artform.


