What Are The Steps To Making A Clay Pot?
Pottery making is an ancient and beloved craft that allows you to create unique ceramic pieces from clay. The basic process involves gathering clay and tools, shaping the clay into a pot, decorating it, and firing it in a kiln. With some creativity and patience, you can make your own beautiful pots from start to finish.
This guide will walk through the key steps for handbuilding and decorating a basic clay pot. We’ll cover everything from choosing the right clay and tools, to refining the shape, decorating techniques, and properly drying and firing your creation. Follow along to pick up this rewarding hobby and make your own pottery.
Gather Materials
The first step in making a clay pot is gathering the necessary materials. The key items you will need include:
Clay
Clay is the fundamental material required for making pottery. There are many different types of clay that can be used, including earthenware, stoneware, and porcelain. Choose a clay body that is appropriate for your project and skill level. For beginners, a stoneware or stoneware-porcelain blend is a good choice as it is versatile and easy to work with.
Wheel or Mold
You will need either a pottery wheel or mold to shape your clay into a pot. A wheel allows you to throw pots by hand, giving you greater flexibility and control over the final shape. Forbeginners, using a mold can be easier as it gives you a form to work with. Plaster molds shaped like vases, bowls, and cups are readily available.
Decorating Tools
Decorating tools like brushes, sponges, stamps, and carving tools allow you to embellish your finished pot. Gather any tools you will need for the type of decoration you want to achieve, such as colored slips, glazes, or clay for hand-building decorative elements.
Prepare the Clay
An important early step when making pottery is properly preparing the clay. This involves wedging or kneading the clay to achieve an even consistency throughout. Wedging involves cutting the clay into slices, stacking them, and then pushing them together. This process mixes the clay thoroughly and removes any air pockets. Air trapped in the clay can expand during firing and cause cracks or explosions.
After wedging, form the clay into a ball shape. Use your palms to roll the clay on a flat surface, applying even pressure. This further works the clay and removes any remaining air bubbles. Check for air bubbles by slicing into the clay with wire. Remove any bubbles you find by pinching or piercing them, then reform the ball. Repeat the kneading, rolling, and inspection process until the clay is smooth, elastic, and free of air pockets. Well prepared clay is vital for constructing pots that hold their shape during handling and firing without defects.
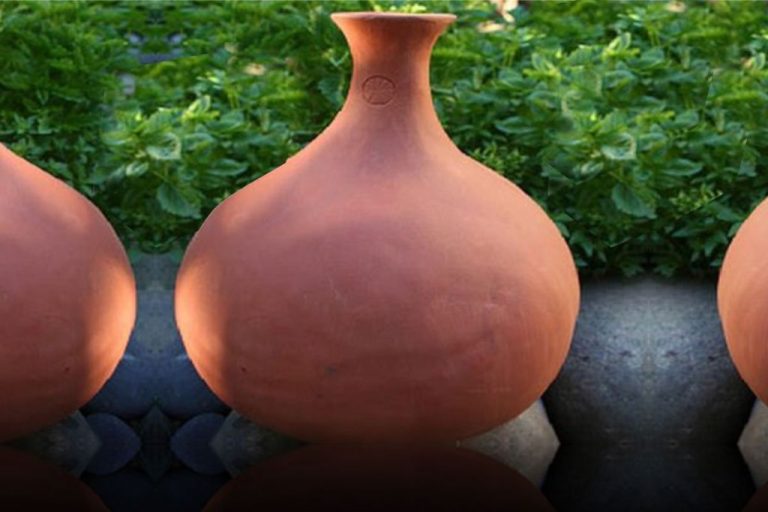
Shape the Clay
The key methods for shaping clay into a pot are using a wheel, molds, or your hands.
Using a Wheel
A pottery wheel allows you to shape centered, symmetrical, and uniform pots. To use a wheel:
- Center your clay on the wheel and shape it into a ball.
- Kickstart the wheel and wet your hands to prevent sticking.
- Open up the ball into a hollow using your thumbs.
- Push out the walls evenly while the wheel spins.
- Lift and shape the clay into the desired pot form.
- Refine thinner pot walls using rib tools.
Using Molds
Shaping pots into specific forms like bowls, vases, or cups can be achieved using plaster molds.
- Press soft clay into the mold to transfer the shape.
- Smooth seams and refine details by hand.
- Carefully remove the hardened shaped clay from the mold.
Using Hands
For handbuilt and sculptural pots, shaping the clay directly with your hands provides the most flexibility and control.
- Roll out clay slabs and coil pieces together by hand.
- Sculpt details and textures into the clay.
- Blend seams and refine forms with your fingers.
Refine the Shape
Once you’ve shaped your basic pot, it’s time to refine the shape to get the final look you want. This involves smoothing the surfaces and sharpening the edges.
To smooth the surfaces, you can use a few different tools. A basic wood or rubber rib works well for gently smoothing away imperfections. You can also use metal scrapers, sponges, or even just your fingers to gently compress the clay. Work in a circular motion and take your time to avoid damaging the shape. Focus on problem areas with rough textures or uneven surfaces to get a uniform smoothness.
For sharpening the edges, you’ll need some type of modeling tool. Wood and metal ribs work well, as do loop tools and curved kemper tools. Run the tools along the edges, applying gentle pressure inward and compressing the clay to create clean, defined edges. Be careful not to damage the overall shape. You can also use your fingers and moistened sponges to soften and round sharp edges.
The goal is to refine the overall shape and form to your liking. Work slowly and gently during this process. Let the clay firm up a bit more as you work to avoid distorting the shape. Keep a bowl of water nearby to moisten tools and your fingers as needed. Take your time and don’t rush this important shaping step.
Decorate
Once the basic shape of the pot has been formed, it’s time to decorate it before the drying and firing stages. Decorating the pot allows you to add visual interest, texture, color, and make each piece unique. There are several common techniques for decorating clay pots:
Incising
Incising involves using sharp tools to cut into the surface of the leather-hard clay. This can create lines, patterns, or designs that become visible decoration. Incising is done before firing the pot.
Adding Appliques
Appliques are decorative clay pieces that are applied onto the surface of the pot. These can be shapes like circles, stars, animals, etc. that are separately sculpted and attached. Appliques add three-dimensional decoration and interest.
Painting
Once the pot has been bisque fired, it can be painted with special pottery glazes and paints. These paints chemically interact with the glaze during firing to produce color. Painting allows for colorful designs like flowers, animals, landscapes, and geometric patterns.
Glazing
Glazes provide a glossy coating over the clay that is then fired to harden it into glass. Glazes come in many colors and effects like metallic, matte, or speckled. They can be painted on or dipped to cover the entire piece.
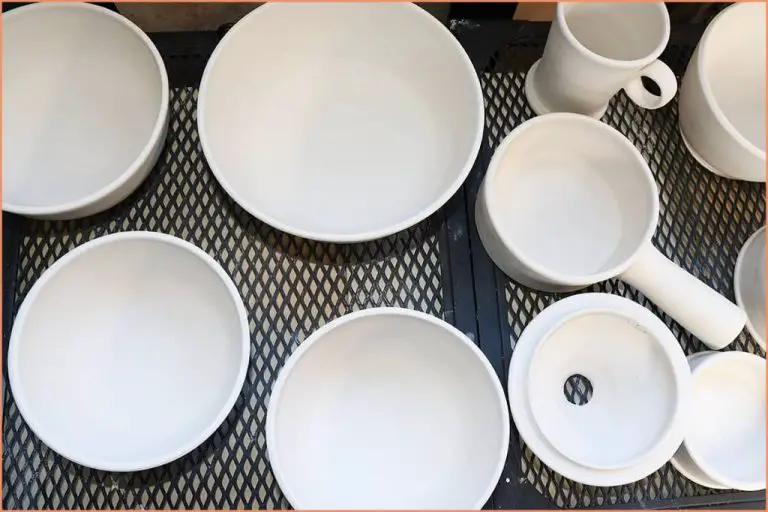
Dry the Pot
After the basic shape of the clay pot has been formed, the next step is to dry the pot before firing. There are two main methods for drying clay: air drying and using a dryer.
Air Drying
Air drying is the most traditional method for drying clay pottery. Here are the steps for air drying:
- Let the shaped clay sit at room temperature for several hours until the surface is hardened.
- Flip the pot over so both sides can dry evenly. Rotate the pot periodically.
- Let the pot air dry for at least 24-48 hours to fully dry.
- Check for cracks and repair with slip.
- Ensure the clay is completely dry before firing.
Using a Dryer
A drying room, dehydrator, or commercial drying kiln can also be used to dry clay pottery. Here are some tips:
- Let clay dry at room temperature up to the leather-hard stage.
- Follow the manufacturer’s instructions for drying time and temperature.
- Avoid drying too quickly, which can cause cracking.
- Turn or rotate pieces during drying for evenness.
- Test center of clay to ensure completely dry before firing.
First Firing
Once the shaped clay has dried completely, it is ready for the first firing, also known as bisque firing. This initial firing process hardens the clay body. Bisque firing is done at lower temperatures, usually between cone 08 and cone 04 (1650-1860°F/900-1020°C). The temperatures and length of firing time depend on factors like the type of clay body, thickness of the pieces, and size of the kiln.
It’s important that the pottery is slowly preheated and then cooled inside the kiln to prevent cracking and breakage from sudden temperature changes. Ramps or holds during the firing allow moisture to fully evaporate. Once it reaches the peak temperature, the pottery must be held at that heat for an adequate length of time for sintering to occur. Sintering fuses the clay particles together, making the clay body strong and nonporous.
After bisque firing, the pottery will be ready for decorating and glazing before the final firing. Bisque firing provides an absorbent surface for glazes to adhere to. The initial bisque firing is a critical step that enables the clay to withstand the higher temperatures of the final glaze firing process.
Glazing
One of the most exciting parts of making pottery is choosing and applying glazes. Glazes are mixtures of minerals and compounds that produce a glassy coating on the pottery when fired to a high temperature. The glaze melts and fuses to the clay body, making the pottery non-porous, durable, and bringing out vibrant colors.
There are many options when it comes to selecting glazes. You can purchase pre-made glazes at art supply stores which come ready to apply. These glazes provide predictable results. Some common glaze types are glossy, satin, matte, crystalline, and rich color glazes like reds, blues and greens. You can also explore mixing your own custom glazes from raw materials, though this requires expertise in glaze chemistry.
When applying glazes, use a soft brush to coat the bisqueware. Apply glazes evenly in thin layers, allowing drying time between coats. Too thick of an application can cause glaze defects like cracking or crawling. Use wax resist techniques to reserve bare clay areas. Multiple glazes can be layered or blended for unique effects. After glazing, the final firing will melt and permanently fuse the glazes to the clay body.
Final Firing
The final firing, also known as the glaze firing, is the last step in finishing your clay pot. After the pot has been bisque fired and glazed, it is ready for its final firing. This firing will melt the glaze and bond it to the clay body to create a glassy coating.
For the final firing, the kiln temperature needs to reach between 2,200°F and 2,300°F (1,204°C and 1,260°C). The exact temperature depends on the type of clay and glaze used. Firing to these high temperatures will fully mature the glaze and pottery. Make sure to follow the temperature guidelines provided by the clay and glaze manufacturers.
It is critical to slowly increase the kiln temperature during final firing. Rapid temperature changes can cause defects like cracking or glaze pinholing. Aim to raise the temperature at a rate of 200°F to 300°F (93°C to 149°C) per hour. After the maximum temperature is reached, allow sufficient time for the ware to soak at that heat. The soak time helps the glaze and clay fully fuse.
After reaching the peak temperature, the kiln should then be slowly cooled. Allow at least 8 hours for the kiln to cool down to room temperature before opening. Slow cooling prevents thermal shock and enables the glaze and clay to stabilize properly. Be patient – while it takes time, proper final firing is essential to finishing a durable, high-quality pot.