What Can I Use As A Trim Removal Tool?
Trim refers to the excess plastic, paper, foil, or other material that gets generated as waste during manufacturing processes. Trim is a byproduct from cutting, stamping, slitting, or other operations. Properly removing trim is an important part of streamlining production and reducing waste.
If trim builds up on machinery or conveyor belts, it can cause equipment jams and slow down production. Removing trim quickly and efficiently as it is produced helps keep the production line moving smoothly. Proper trim removal also supports sustainability efforts by diverting waste material away from landfills. Companies can recycle trim, resell it, or find other ways to recover value.
Plastic Trim Tools
Plastic trim removal tools are an essential addition to any mechanic’s toolbox. These tools are specifically designed to pry interior and exterior trim pieces from vehicles without causing damage like scratches or cracks. They come in a variety of shapes like flat pry bars, curved picks, and plastic wedges to get into tight spaces.
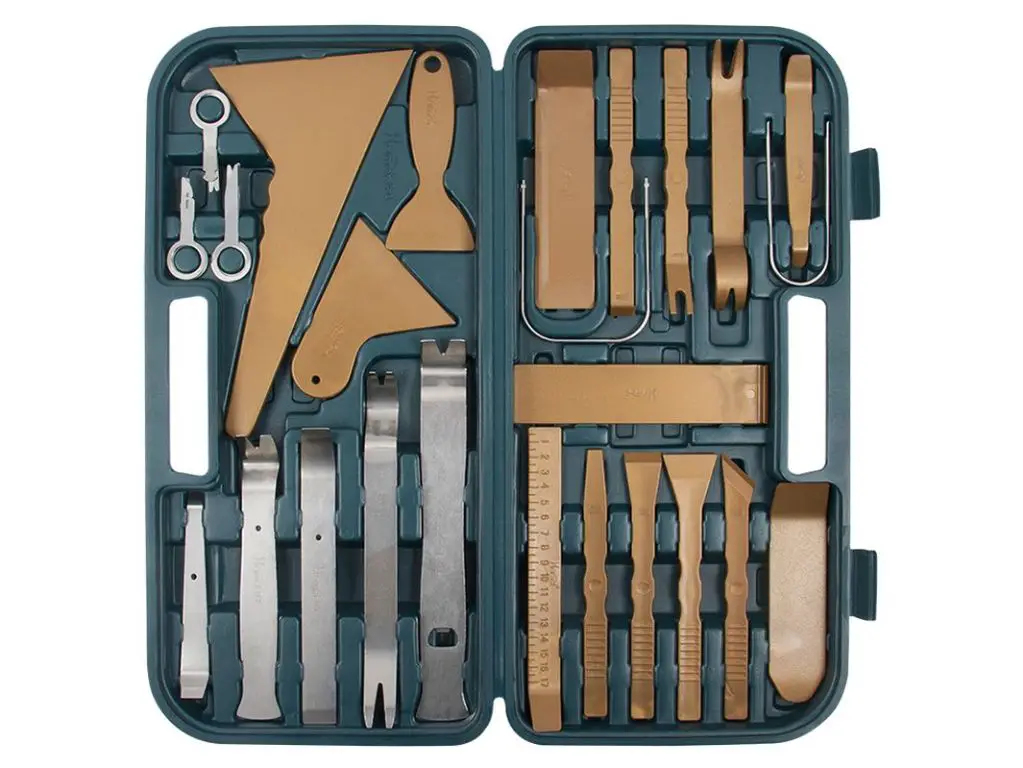
Popular options include sets with multiple plastic pry tools of different sizes and angles to tackle any trim removal job such as this 42 piece set on Amazon. The flexibility of the plastic prevents marring the trim’s surface while still providing enough rigidity to pop clips, fasteners, and panels loose. Plastic tools may be the safest for automotive interiors and delicate jobs.
Specialty plastic trim tools also exist such as door panel clip removal tools that quickly pop the clips loose from the door frame. There are also plastic pry bars with protected tips to prevent scratching glass when removing window trim. Always use the correct tool for the intended job.
Metal Trim Tools
Metal tools are another great option for removing trim. While plastic tools work well for lighter duty jobs, metal tools provide more rigidity and strength for stubborn trim pieces.
Metal pry bars and scrapers are commonly used by professionals and DIYers for auto trim removal. They allow you to apply more force compared to plastic tools without bending or breaking. Popular options include flat, curved, hooked, and angled designs to fit into tight spaces. Brands such as Dent Craft Tools offer high quality metal trim tools made for automotive work.
When shopping for metal trim tools, opt for ones made from durable but malleable metals like stainless steel. This prevents the tools from being overly rigid and scratching surfaces. It’s also helpful to choose a set with multiple shapes and sizes for different applications.
While extremely useful, metal tools do require caution as they can easily damage trim and paint if used incorrectly. Take your time and don’t force anything. Apply steady pressure and stop if you meet too much resistance. With the right techniques, metal pry bars and scrapers make quick work of stubborn trim pieces.
Dental Tools
Dental picks and hooks are another effective option for detailed trim removal and can be purchased affordably at most drug stores (Metal Trim Pry Tool). Dental picks have a very thin, rigid metal tip that allows you to get into tight spaces and crevices. The fine tip gives you precision control to lift trim pieces away from surfaces without gouging or scratching. Dental hooks have a 90 degree bend on the end which is useful for pulling nails and grabbing onto trim to dislodge it. The thinness of dental picks and hooks enables meticulous work in detailed areas that thicker tools may be too clumsy for. When removing delicate molding or working around intricate corners, dental tools are often the perfect choice. Their versatility also makes them useful for tasks like removing old caulk or grout. Just be sure to use a gentle touch so as not to damage the materials you’re working on.
Razor Blades
Razor blades can be an effective tool for trim removal, but they must be used with caution. This video demonstrates how to properly use a single edge razor blade to cut caulk and separate trim from the wall. When using razor blades, apply very light pressure and slide the blade slowly along the caulk line rather than digging in. Take care not to gouge into the drywall or scratch the paint on the trim. Dull blades are more likely to cause damage. Replace blades frequently for best control.
As noted in this guide, cut parallel to the wall surface when slicing caulk beads to minimize damage. Razor blades allow precision cutting, but move carefully. Rushing increases the risk of slipping and cutting too deeply. Work slowly and methodically. Razor blades provide a cheap and simple option for DIY trim removal if used properly, but they do require a delicate touch.
Putty Knives
Putty knives, also known as scraper knives, are versatile hand tools commonly used for removing trim and moldings. They come in a variety of sizes, shapes, and stiffness levels to suit different applications. Stiffer putty knives work well for scraping and prying, while more flexible ones conform better for smoothing putties and compounds. Many professional painters keep a selection of putty knives in different widths in their toolbox.
When removing trim, start by selecting a putty knife about 2-3 inches wide. Hold the putty knife at a low angle against the trim piece and carefully slide the blade underneath to break the trim free from the surface. Take care not to gouge into the underlying surface. Once underneath, twist or pry gently to work the trim piece loose. Continue working your way down the trim, inserting the putty knife and lifting up slightly. The goal is to dislodge the trim without damaging the surrounding area.
For stuck-on trim, heat from a hair dryer or heat gun can help soften any caulk or adhesive first, making the trim easier to remove. Wider putty knives give increased leverage for prying, but require more space to insert the blade. Narrower putty knives allow accessing tighter spots. Choose chrome or stainless steel blades for durability and corrosion resistance. Many find plastic putty knives too flexible for effective trim removal.
Heat Guns
Heat guns provide an effective way to soften the adhesive used to attach trim pieces in order to remove them more easily. A heat gun applies concentrated heat that warms and softens the adhesive, allowing you to gently pry off the trim without damaging the surface underneath.
To use a heat gun for trim removal, start by selecting a heat gun that allows temperature control, as too much heat can scorch or burn the underlying surface. Hold the heat gun an inch or so away from the trim and move it slowly back and forth until the adhesive begins to soften. This may take 30 seconds or longer. Apply gentle pressure with a plastic trim tool to test if the trim is ready to remove. Repeat heating and testing until the trim can be pried off cleanly.
Take care not to overheat the surface, which can cause damage. Work in small sections and allow the area to cool before heating again. Heat guns work well on most standard trim adhesives, but test first on an inconspicuous area to ensure it doesn’t damage the finish.
Sources:
https://abutterflyhouse.com/strip-paint-heat-gun/
Chemical Softening
One method to help loosen stuck-on trim is to use chemical softening agents. These chemicals work by dissolving or softening the adhesive behind the trim, making it easier to pry off. Some popular options include:
Chemical Guys Trim Clean – This is a specialty product designed for removing wax, sealant and polish buildup from trim pieces. It contains solvents that help dissolve embedded residues (https://www.amazon.com/Chemical-Guys-TVD11516-Remover-Rubber/dp/B078J3RVN4).
Citrus-based solvents – Products with d-limonene work as natural solvents to soften adhesives and make trim removal easier. Look for citrus-based paint strippers or degreasers.
Acetone – This common solvent found in nail polish remover can be used sparingly on uncured adhesives. It will cause the adhesive to ball up for easier removal.
When using chemicals, it’s important to follow all safety precautions like working in a well-ventilated area and wearing gloves. Spot test on an inconspicuous area first. Allow the chemical to soak in for a period before attempting to pry off the trim.
Best Practices
When removing trim, it’s important to follow some best practices to ensure the trim and walls remain undamaged. Here are some tips:
Be gentle and go slow. Don’t try to pry off trim in one forceful go, as this can cause cracks and chips. Carefully work a trim removal tool behind the trim to slice through caulk and loosen the trim.[1]
Protect walls and trim. Place a piece of cardboard or cloth behind the trim as you work to prevent scuffing and dents.[2]
Watch out for nails. Expect nails and use pliers or pry bar to remove them as you detach trim pieces.[3]
Work top to bottom. Detach upper trim pieces before lower ones to avoid damaging lower trim.[1]
Slice paint seal. Use a utility knife to sever the paint seal attaching trim to walls before prying.[1]
Go slow on ornate trim. Intricate trim with curves and detailing needs extra care and patience during removal.
By taking it slow and using the right tools, trim can be detached and preserved for reuse or replacement.
Conclusion
There are several effective options when it comes to trim removal tools. Plastic trim tools are inexpensive and easy to find, providing safe prying ability without scratching. Metal tools like trim clips and pry bars give more strength for stubborn trim pieces. Dental tools offer precise scraping ability thanks to their hooked shape. Razor blades can slice through caulk and adhesive, but require careful handling. Putty knives have a thin, flexible blade to get behind trim for clean removal. Heat guns soften up glue and plastic for easier prying. Chemical softening sprays help weaken adhesives. Each method has its benefits depending on the specific trim material and desired result.
When selecting a trim removal tool, consider the trim’s material, whether it uses adhesive or plastic welds, and how difficult it will be to remove. Use care not to damage the underlying surface during prying. Work slowly and gently to protect both yourself and the vehicle. With the right tools and techniques, you can successfully remove trim pieces for replacements or upgrades.