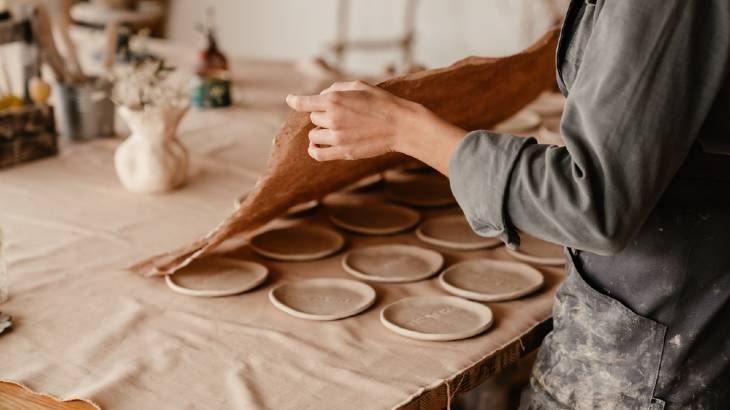
What Can You Use Instead Of A Kiln For Pottery?
This article explores various alternatives for hardening and firing clay without the use of a traditional electric or gas kiln. Kilns provide the high temperatures needed to permanently set clay in its finished state, but they can be expensive, energy-intensive, and not readily available. For hobbyists, students, or artists who want to work with clay but lack kiln access, several effective options exist for firing clay at home using simple materials and techniques. This article will provide an overview of oven, pit, raku, microwave, sun, and other accessible firing methods that can achieve similar results as kiln firing. By understanding these kiln-free techniques, anyone can experience the creativity and satisfaction of firing their own pottery and clay sculptures.
Oven Firing
Firing clay in a conventional household oven is a popular alternative to using a kiln. There are some key advantages and disadvantages to be aware of when using this method:
Pros:
- Ovens are readily available in most homes
- Allows small-scale firing of pottery pieces
- Lower equipment cost compared to purchasing a kiln
Cons:
- Temperature control is more difficult in an oven
- Size limitations based on oven dimensions
- Longer firing times needed than in a kiln
- Uneven heating can lead to cracking or exploding
Ideal temperatures for oven firing tend to be between 200-300°F. Go with a lower temperature for bisque firing and a higher one for glaze firing. The typical range is 200°F for bisque and 275-300°F for glaze.
Some tips for success:
- Use a thermometer to monitor the temperature
- Allow plenty of time for a slow ramp up and cool down
- Use an oven-safe container or firing tray
- Avoid pieces that are too thick or large
- Prop pieces off the oven floor for even heating
With care and proper preparation, an oven can produce nicely fired pottery. Just be ready for a slower process than kiln firing.
Pit Firing
Pit firing is a primitive ceramic firing technique that involves digging a pit in the ground to contain the fire (Anderson, 2022). This method allows the flames, smoke, and reduction atmosphere to interact with the pottery in unique ways.
When pit firing, it’s important to dig a hole at least 2 feet deep and 3-4 feet wide. Ensure the pit has insulated walls made from a heat resistant material like hard bricks or soft insulating bricks. Line the bottom with sand. Place pottery directly on the sand layer or on ceramic stilts to allow flames access. Use hardwood pieces or scrap soft wood as fuel. Stack the wood over and around the pottery (Jane White Ceramics, n.d.).
Pit firing creates atmospheric effects on the clay through exposing pottery to smoke, flame, ash deposits, and reduction cooling. Pieces develop natural colors, markings, and textures from the way the smoke penetrates the porous clay. The method results in one-of-a-kind finishes and earthy colors ranging from brown, black, and orange hues. Each piece will be unique depending on its exact positioning and exposure to certain elements of the pit firing environment (DIY Natural, 2020).
Raku Firing
Raku firing is a technique used to fire pottery without a kiln. Instead, the pottery is quickly heated to around 1800-1850°F according to this article. Once it reaches the desired temperature, the pottery is removed from the fire and allowed to cool. This rapid heating and cooling process creates unique crackled glaze effects.
For raku firing, you’ll need the following materials:
- A raku kiln, which can be as simple as a metal garbage can
- Propane torch or gas burner
- Tongs and heat-resistant gloves
- A ventilated area for firing
Raku firing works best on low-fire clay bodies and raku glazes. The quick heating and cooling creates unpredictable results in the glazes. Raku firing can create beautiful crackle effects and metallic sheens on the surface of pottery.
Microwave Firing
Microwaves can be used to fire small pieces of pottery or bisqueware when a traditional kiln is unavailable. This method uses the heat generated by microwave energy to fully or partially fuse ceramic materials.
When firing in a microwave, pieces should be under 3 inches in diameter and thickness. Larger or thicker pieces may result in uneven heating and cracking. Choose low-fire clays and glazes rated for cone 06 or lower.
Fill a microwave-safe container with an inch of sand or vermiculite. Bury pieces one at a time in the medium during firing. Start with 2-3 minutes on high power and check for doneness. Pieces are finished when they are fully fused but not melted. Add 30 seconds to a minute at a time until the desired effect is achieved.
Use care when handling recently microwaved pieces, as they will be extremely hot immediately after firing. Allow them to fully cool before applying any glazes or removing them from the sand/vermiculite. Do not put any metals or combustible materials in the microwave during firing.
Microwave firing can be risky due to the potential for thermal shock cracking or explosions from trapped moisture in the clay. Take appropriate safety precautions and only microwave small, dry bisqued pieces.
Sun Firing
Sun firing is a traditional technique that uses the heat from the sun to harden pottery. It requires a hot, arid climate with plenty of direct sunlight throughout the day. According to Ceramic Arts Network, sun firing involves placing “greenware,” unfired pottery, out in the direct sun for several days to fully dry and harden it before it can be handled or used.
This eco-friendly firing method doesn’t require any fuel source besides the sun. It’s often used in places like Africa, the American Southwest, and the Middle East. However, it can only be done during certain times of year when daylight hours are long and temperatures are very hot. The clay body also needs to be formulated for sun firing and low temperature firing in general, using coarser grogs and minerals.
While it takes patience and ideal weather conditions, sun firing is an energy-efficient way to harden pottery without an electrical or gas kiln. It literally allows the sun’s rays to bake the clay. According to Energy5, this renewable energy source can offer artists “cost savings, eco-consciousness, energy independence, and reliability.”
Burnout Method
The burnout method is a technique for firing pottery without a kiln by burying it in sawdust or other combustible materials. According to Digitalfire, clay often contains carbon and organic compounds that must burn out during firing. The burnout technique eliminates the chance of carbon burning out during glaze firing and causing blisters.
To fire with the burnout method, pieces should be bone dry before burying to avoid exploding from steam pressure. Bury pottery in a container filled with sawdust, paper, or other combustible materials. Ensure pieces are fully surrounded and insulated. Light the sawdust on fire and let it burn out completely. The long, slow burn reaches temperatures up to 1000°F, enough to fully fire and vitrify clay.
A key benefit of burnout firing is achieving an even distribution of heat around complex shapes. While the process takes patience and experimentation to perfect, it can fire pottery without the high costs of a kiln. With care, the burnout method fires clay thoroughly for functional ware or sculpture.
Electric Kiln Alternatives
One of the most common homemade electric kiln designs involves converting a large container like a flower pot or metal trash can into a kiln by adding electric heating elements. According to this Instructables tutorial, you can make a basic electric kiln by cutting down an outdoor electrical cord to 6 feet, stripping the wires, and connecting them to ceramic heating elements placed inside a large covered flower pot. The key is ensuring proper insulation around the heating elements and pot for safety. A metal trash can lined with ceramic fiber blanket or firebrick can also work. The benefit of a homemade electric kiln is having an affordable, customizable firing chamber. Just be sure to take proper safety precautions.
Gas Kiln Alternatives
For small pieces and projects that don’t require high temperatures, propane torches or paper kilns with controlled burning can provide an alternative gas firing method without a proper kiln. According to community.ceramicartsdaily.org, propane torches reach temperatures up to 2,000°F which allows for glaze firing and possibly low temperature bisque firing on small pieces.
Additionally, a Reddit user cautions that clay must be heated evenly and slowly with a torch to avoid cracking, so only very small items may be suitable. With care and patience though, small pendants, beads, and components can be torch fired successfully.
For slightly larger or higher temperature firings, controlled paper kilns allow reaching temperatures up to 2,200°F in some cases. By using thick stacks of newspaper, successful firings can be achieved on select low-fire clays and glazes. With testing and monitoring, paper kilns present a viable option for hobbyists who don’t have standard gas kilns.
Conclusion
When it comes to alternatives for firing pottery without a kiln, each method has its own pros and cons that should be considered. Oven firing can work for small pieces but has size limitations and less control over results. Pit firing involves more time and effort but can create beautiful effects on the clay. Raku firing lets you quickly achieve unique finishes but requires specialty equipment and materials. Microwave and sun firing are the most accessible options but offer the least predictable outcomes. Electric and gas kiln alternatives give you more precision but require buying equipment that mimics a real kiln.
For most potters, the best alternatives will be pit firing, raku firing, or an electric kiln substitute like a kiln sitter. Pit firing allows impressive results without specialized tools. Raku firing creates distinctive pottery not achievable through other methods. Electric alternatives provide the control of a real kiln for those willing to invest in the equipment. Beginners may want to start with oven or microwave firing due to their simplicity.
Whichever method you choose, test it out on sample pieces first. Firing clay requires patience and experimentation to learn the right techniques. Focus on the process and artistic expression over perfect results. Part of the beauty of pottery is that each piece is unique. With some care and practice, you can successfully fire beautiful pottery without ever needing access to a traditional kiln.