What Do I Need To Start Air Dry Clay?
What is Air Dry Clay?
Air dry clay, also sometimes called “cold porcelain” clay, is a modeling material that air dries to a hard, durable finish at room temperature. It does not require baking in a kiln or oven like traditional clays. Air dry clay is an affordable, accessible, and versatile sculpting medium great for crafters and artists of all skill levels.
There are a few main types of air dry clays:
– Cellulose-based: Made from cellulose fiber. Lightweight and easy to work with.
– Polymer-based: Made from PVC, resin, glue, and other additives. Very durable and flexible when dry.
– Paper clay: Made from paper pulp. Environmentally friendly and lightweight.
Some key benefits of working with air dry clay include:
– Does not require firing, saves time and money
– Lighter weight than ceramic clays, easier to work with
– Low mess, just requires water to activate
– Dries hard and smooth, often paintable
– Very versatile for sculpting, modeling, craft projects
Supplies Needed
To start sculpting with air dry clay, you’ll need a few basic supplies:
Clay
The most important supply is obviously the clay itself. There are a few main types of air dry clay readily available:
- Polymer clay – This pliable clay dries hard and smooth when cured. Great for detailed sculptures.
- Paper clay – Made from cellulose fiber. Lightweight and easy to sand and shape when dry.
- Cold porcelain – Non-toxic and dries durable and chip resistant. Best for smooth sculptures.
Pick a type of clay that suits your project. Buy an adequate amount as you’ll want plenty to work with (at least 1-2 pounds).
Sculpting Tools
You’ll want some basic sculpting tools on hand like:
- Clay sculpting knives – For cutting, shaping, and detailing clay.
- Loop tools – To smooth clay and add textures.
- Clay shapers & silicone tipped tools – For smoothing seams and blending.
- Plastic or wooden modeling tools – For imprinting patterns and textures.
Work Surface
Cover your work table or surface with wax paper, canvas, or a smooth ceramic tile to keep it protected from the clay.
Clay Storage Containers
Store unused clay in airtight containers or heavy duty plastic bags to keep it soft and workable between sessions.
Use small containers with lids for holding water while sculpting.
Clay Options
When selecting an air dry clay, you’ll want to consider the brand, color options, and properties that suit your particular project. Some top brands to consider include:
- Crayola Air Dry Clay – This popular kids’ clay comes in white and terracotta colors. It’s lightweight, non-toxic, and dries hard in 1-2 days.
- Activ-Clay – Offered in white and natural tan, this clay is smooth, ultra lightweight, and dries overnight.
- Creative Paperclay – Available in white, terra cotta, and gray, this clay contains cellulose fiber for lightweight strength. It air dries in 24 hours.
Color options range from natural terra cotta clays to bright primary colors. Neutral white and gray clays work well for painting. Metallic clays contain shimmery particles for a glittery effect.
Important clay properties to note are drying time, strength, weight, and texture. Some clays shrink slightly as they dry. The packaging or product details will specify the clay’s characteristics to help match it with your project needs.
Sculpting Tools
Air dry clay allows for lots of creativity when it comes to sculpting tools. While there are many specialized modeling tools you can buy, you can also improvise effective tools from common household items.
Some basic tools that are handy for sculpting include:
- Sculpting sticks – These are rounded, blunt sticks used for smoothing, shaping, blending, and texturing the clay. Wooden skewers, popsicle sticks, and chopsticks all work well.
- Clay rollers – Rollers allow you to flatten and thin the clay. Try using a rolling pin, brayer, or acrylic rod.
- Clay cutters – For cutting shapes and textures, use cookie cutters, stencils, or improvised tools like bottle caps.
Around the house, all sorts of everyday objects can become sculpting tools. Bottle caps, straws, combs, toothpicks, sponges, forks – get creative with items you already have!
For a more complete starter set, look for a kit with basic sculpting sticks, a roller, clay cutting tools, and texture plates or molds. This will provide plenty of options for shaping, smoothing, imprinting, and embellishing your clay sculptures.
Work Surfaces
When working with air dry clay, it’s important to protect your work surface. Air dry clay can stain and damage surfaces if proper precautions aren’t taken.
Recommended work surface materials include:
- Plastic tablecloths or shower curtains
- Wax paper
- Newspaper
- Disposable aluminum baking sheets
Tips for protecting your work area:
- Cover your entire work surface with an old tablecloth or plastic shower curtain. This will protect your table or desktop.
- Place wax paper, aluminum foil or a sheet of cardboard directly under your clay work. This will prevent any clay from seeping through and staining the covered work surface.
- Keep a damp paper towel or sponge nearby to quickly clean up any clay residue.
- Avoid working on expensive wood furniture or antique surfaces that could be permanently damaged.
Clay Storage
Properly storing unused air dry clay is important for keeping it workable for future projects. Here are some tips for clay storage:
Store unused clay in a sealed plastic bag or airtight plastic container. This prevents the clay from drying out.
For long term storage, wrap the clay tightly in plastic wrap before sealing in a bag or container. This creates an extra barrier against air exposure.
If the clay dries out, add a few drops of water and knead it to restore softness and pliability. Don’t add too much water or the clay may become sticky.
Store clay away from direct heat or sunlight, as this can cause drying and cracking. A cupboard or shelf works well.
Consider dividing bulk clay into smaller portions before storage. This minimizes air exposure when portions are removed for projects.
Avoid freezing clay for storage as this can affect its consistency and workability.
With proper storage methods, most air dry clays can be kept for 6 months or longer before drying out.
Clay Safety
Air dry clay is generally safe to work with, but there are some precautions to take for optimum health and safety:
Avoid Skin Irritation
The dust from air dry clay can be drying and irritating to the skin. Wear gloves when handling clay to prevent dryness. Wash hands thoroughly after working with clay. For sensitive skin, apply a moisturizing lotion after cleaning up.
Proper Clay Cleanup
Work in a well-ventilated area and wear a dust mask to avoid inhaling clay dust particles. Avoid blowing excess clay dust around by sweeping dust and clay scraps with a wet paper towel or sponge. Wipe down all work surfaces with a damp sponge once finished.
Ventilation Tips
Open windows and use a fan to circulate air. If working extensively with clay, use a respirator mask and work outside if possible. Store clay in an airtight container. Keep clay work areas separate from living spaces.
Mixing Clay
Mixing or conditioning clay before starting a sculpture is an important step. Fresh clay directly from the package will be stiff and difficult to work with. Properly conditioning clay makes it smooth, flexible and easier to shape.
To condition new clay, start by cutting or tearing the clay into pieces and kneading it with your hands. Work the clay until it becomes soft and pliable. Adding water a few drops at a time can help soften and condition the clay further. However, be careful not to add too much water or the clay can become sticky.
As you work on sculptures and have excess or damaged clay, save these bits to recycle and mix back into fresh clay later. Old clay can be rehydrated and conditioned again with fresh clay. Mix thoroughly to achieve an even consistency across the clay. Recycling clay helps reduce waste and saves money on art supplies.
Sculpting Techniques
There are several techniques that can be used when sculpting with air dry clay to help create unique and detailed works of art:
Rolling
Rolling the clay out flat using a rolling pin is an essential first step for many air dry clay projects. This allows you to achieve an even thickness before cutting shapes or applying texture.
Cutting
Once the clay is rolled out, you can use cookie cutters, knives, or clay tools to cut out shapes. Cutting out clean edges helps give a smooth, professional look to sculptures.
Sculpting Methods
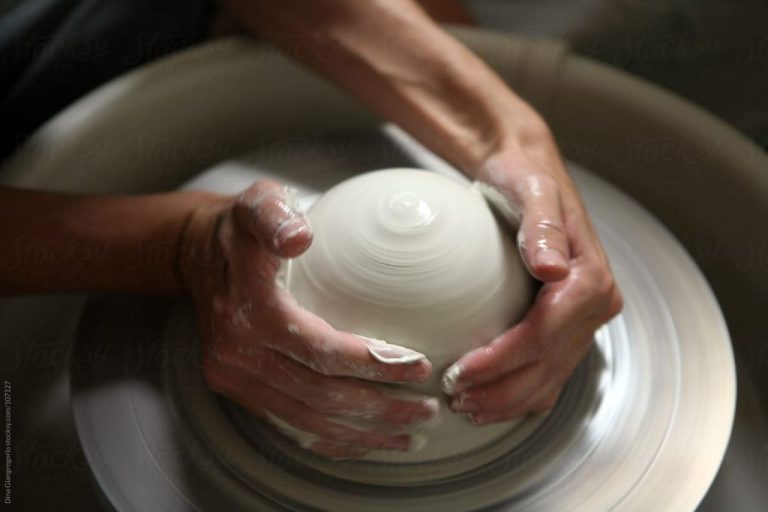
Air dry clay can be sculpted by hand to create free-form shapes. Pinching, pulling, smoothing, and carving the clay are common techniques. Rubber sculpting tools help refine details and textures.
Joining Pieces
For multi-part sculpts, clay pieces can be joined together using water or slip. Scratching surfaces and using pressure helpsfused pieces adhere firmly.
Smoothing
Fingers, clay shapers, rubber tools, and water can be used to blend and smooth seams and sculpted areas. Smooth, refined textures give a polished look.
Drying and Finishing
After sculpting your air dry clay creation, you’ll need to allow adequate drying time before moving on to finishing techniques. Air dry clay dries through evaporation, so drying times can vary based on factors like temperature, humidity, clay thickness, and ventilation.
On average, air dry clays require 24-48 hours to fully dry. Thicker pieces may require longer. Ensure clay is dry all the way through before sanding or handling roughly, as wet clay can crack. Gently warming clay with a hairdryer can speed drying if needed.
Once fully dry, air dry clay creations can be sanded to smooth rough edges and refine shapes. Start with a coarse grit sandpaper like 120-150 grit and work up to finer 220+ grit for a smooth finish. Sand gently to avoid tearing softened clay.
Sealing is recommended to protect dried clay and prepare the surface for painting. Acrylic varnish or glaze provides a protective coat and light sheen. Allow sealer to fully dry before painting.
Air dry clay takes acrylic craft paints very well. Thin coats of paint work best to prevent brush strokes or uneven coverage. Allow each coat to dry fully before adding another. Finish with a protective acrylic sealant spray once paint is fully dry.

